Hinweis: Du bearbeitest eine grundständige Anleitung. Alle Änderungen, die du vornimmst, betreffen alle 9 Anleitungen, die diese beinhalten.
Schritt 1 übersetzen
Schritt 1

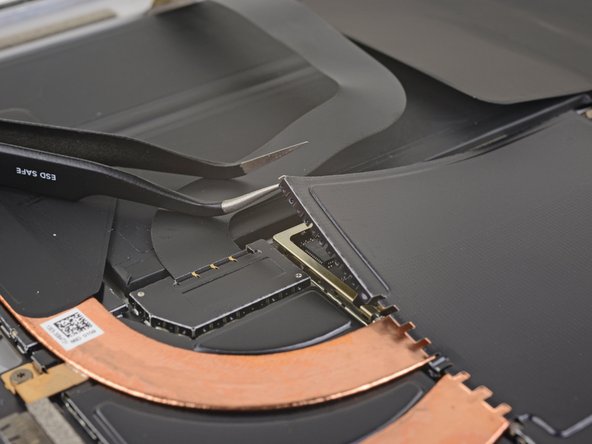


Remove the heat sink shield
-
Insert one point of a pair of pointed tweezers into a gap in the corner of the EMI shield covering the heat sink.
-
Use the tweezers to pry the EMI shield away from the motherboard as much as you can without bending it. Do not remove it yet.
Deine Beiträge sind lizenziert unter der Open-Source Creative Commons Lizenz.