Hinweis: Du bearbeitest eine grundständige Anleitung. Alle Änderungen, die du vornimmst, betreffen alle 9 Anleitungen, die diese beinhalten.
Schritt 1 übersetzen
Schritt 1

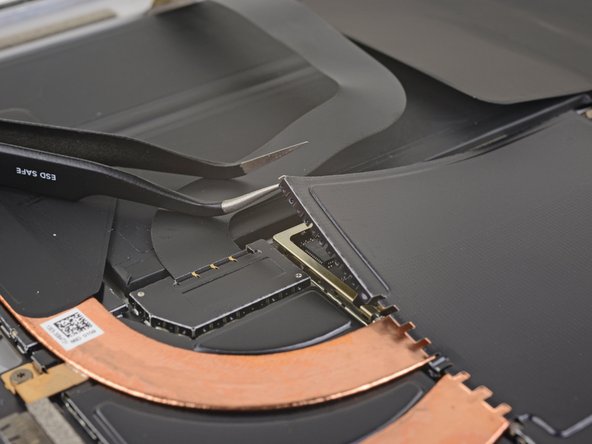


Remove the heat sink shield
-
Insert one point of a pair of pointed tweezers into a gap in the corner of the EMI shield covering the heat sink.
-
Use the tweezers to pry the EMI shield away from the motherboard as much as you can without bending it. Do not remove it yet.
| [title] Remove the heat sink shield | |
| - | [* black] Insert one point of a pair of pointed tweezers into a gap in the corner of the EMI shield covering the heat sink. |
| + | [* black] Insert one point of a pair of [product|IF145-020-2|pointed tweezers] into a gap in the corner of the EMI shield covering the heat sink. |
| [* black] Use the tweezers to pry the EMI shield away from the motherboard as much as you can without bending it. Do not remove it yet. | |
| [* icon_caution] Try not to deform the shield too much—you will need to reinstall it during reassembly. | |
| [* icon_caution] Take care not to puncture the battery with the tweezers while working on this shield. |
Deine Beiträge sind lizenziert unter der Open-Source Creative Commons Lizenz.