Zum Hauptinhalt wechseln

Halterung des USB-C-Anschlusses entfernen

Hinweis: Du bearbeitest gerade eine grundständige Anleitung, die Teil der Anleitung ist, die du eben angeschaut hast. Alle Änderungen, die du vornimmst, betreffen alle 10 Anleitungen, die diese grundständige Anleitung beinhalten.

Englisch
Deutsch

Schritt 5 übersetzen

Schritt 5
USB-C Port Bracket Removal, Reassembly information: Schritt 0, Bild 1 von 3 USB-C Port Bracket Removal, Reassembly information: Schritt 0, Bild 2 von 3 USB-C Port Bracket Removal, Reassembly information: Schritt 0, Bild 3 von 3
Reassembly information
  • During reassembly, follow this step to replace the plastic shim that runs across the bottom of the midframe and loudspeaker. If you don't have a replacement, press the old one back into place.

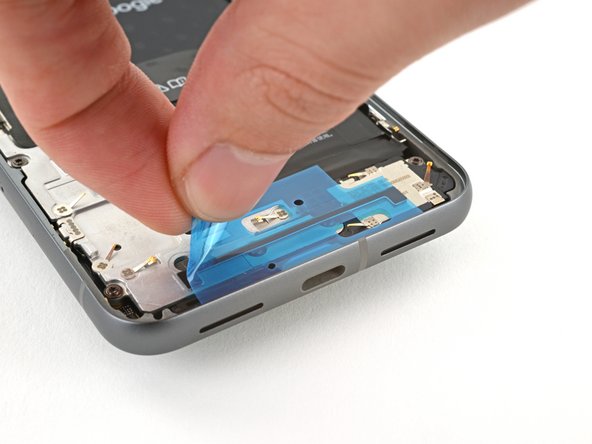
  • Remove the clear liner from the shim.

  • Use the markings on the midframe to align the left side of the shim and press it into place.

  • Use the flat end of a spudger to firmly press down along the whole shim to secure it.

  • Remove the blue liner.

Ersetze beim Zusammenbau das Kunststoffplättchen, das über die Unterseite des Mittelrahmens und des Lautsprechers verläuft. Wenn du keinen Ersatz hast, dann drücke das alte wieder an seinem Platz fest.

Entferne die durchsichtige Schutzfolie vom Plättchen.

Orientiere dich an den Markierungen auf dem Mittelrahmen, um die linke Seite des Plättchens auszurichten und festzudrücken.

Drücke das Plättchen komplett mit dem flachen Ende des Spudgers fest an.

Entferne die blaue Schutzfolie.

Deine Beiträge sind lizenziert unter der Open-Source Creative Commons Lizenz.