Zum Hauptinhalt wechseln

Remplacer le boitier extérieur d’un Gateway SA1

Englisch
Französisch
Schritt 6
Gateway SA1 Outer Casing Replacement: Schritt 0, Bild 1 von 3 Gateway SA1 Outer Casing Replacement: Schritt 0, Bild 2 von 3 Gateway SA1 Outer Casing Replacement: Schritt 0, Bild 3 von 3
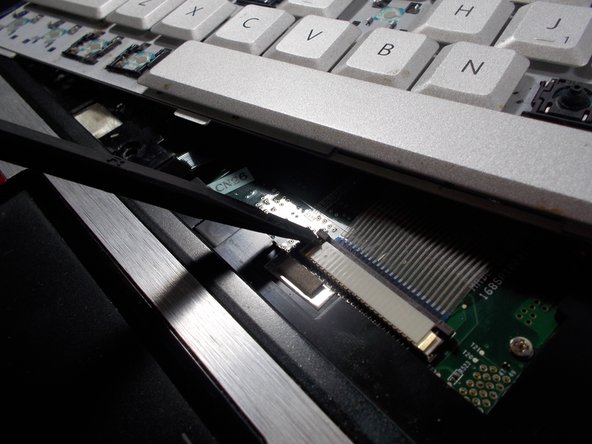
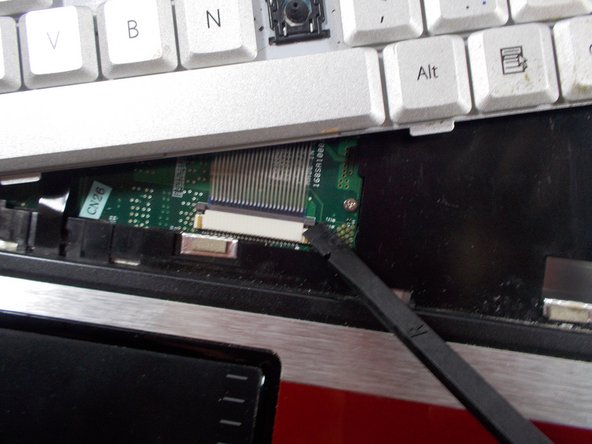
  • Carefully lift the keyboard off from the laptop. It is still attached as shown.

  • Using the spudger, detach the connector by pushing two tabs away from the white connector and then gently pulling the connector away.

  • The brown colored component with the tabs does not come out with the connector.

Soulevez doucement le clavier de l’ordinateur portable. Il est encore attaché comme montré.

À l’aide du spudger, détachez le câble en éloignant du connecteur blanc les deux extrémités du clapet, puis en tirant doucement sur le câble.

Le clapet de couleur marron ne se retire pas du connecteur.

Deine Beiträge sind lizenziert unter der Open-Source Creative Commons Lizenz.