Zum Hauptinhalt wechseln

iPad Air Wi-Fi LCDの交換

Hinweis: Du bearbeitest eine grundständige Anleitung. Alle Änderungen, die du vornimmst, betreffen alle 28 Anleitungen, die diese beinhalten.

Englisch
Japanisch
Schritt 6
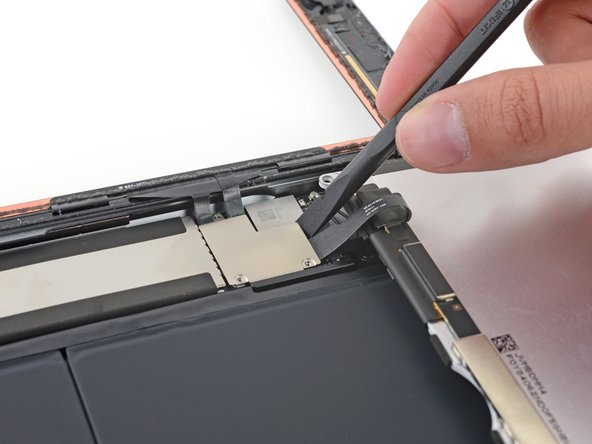
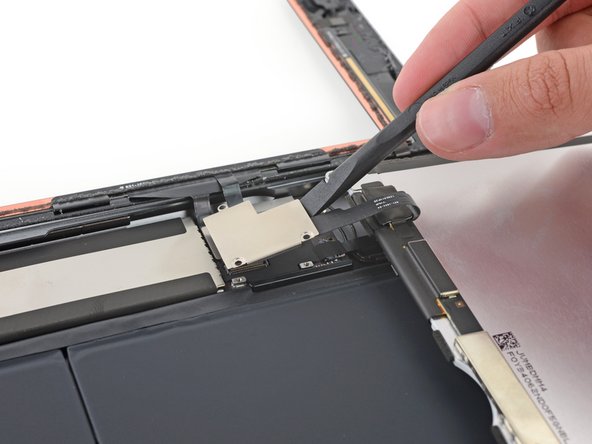
iPad Air Wi-Fi LCD Replacement: Schritt 0, Bild 1 von 2 iPad Air Wi-Fi LCD Replacement: Schritt 0, Bild 2 von 2
  • Use the flat end of a spudger to gently pry the display cable bracket straight up from the logic board.

  • The display cable connector is adhered to the underside of the bracket, so don’t push the spudger too far under the bracket, or you may damage the connector.

スパッジャーの平面側先端を使って、ディスプレイケーブルのブラケットをロジックボードからまっすぐ引き上げます。

ディスプレイケーブルコネクターはブラケットの底面に接着されています。ブラケット下の奥までスパッジャーを押し込まないでください。コネクターにダメージを与えてしまうことになります。

Deine Beiträge sind lizenziert unter der Open-Source Creative Commons Lizenz.