Hinweis: Du bearbeitest eine grundständige Anleitung. Alle Änderungen, die du vornimmst, betreffen auch die Anleitung, die diese beinhaltet.
Schritt 3 übersetzen
Schritt 3


-
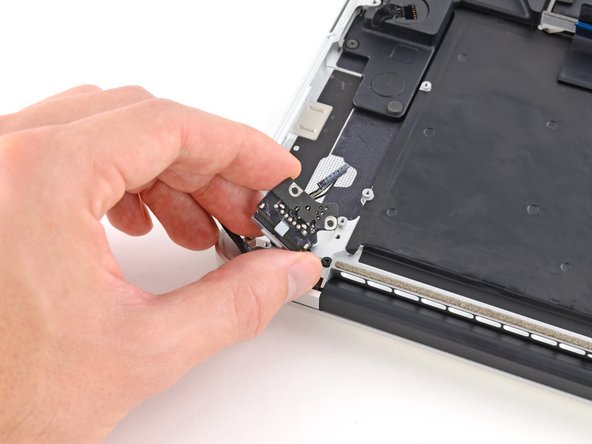
Remove the two 4.0 mm T5 Torx screws securing the MagSafe DC-In board to the upper case.
-
Slide the MagSafe DC-In board towards the right to free it from its recess within the upper case.
-
Lift and remove the MagSafe DC-In board out of the upper case assembly.
| [* red] Remove the two 4.0 mm T5 Torx screws securing the MagSafe DC-In board to the upper case. | |
| + | [* icon_note] Depending on your model, the DC-In board may not be secured to the upper case. |
| [* black] Slide the MagSafe DC-In board towards the right to free it from its recess within the upper case. | |
| [* black] Lift and remove the MagSafe DC-In board out of the upper case assembly. |
Deine Beiträge sind lizenziert unter der Open-Source Creative Commons Lizenz.