Zum Hauptinhalt wechseln

Samsung Galaxy Note 10.1 LCD Replacement

Englisch
Spanisch
Schritt 5
Samsung Galaxy Note 10.1 LCD Replacement, Removing the Components Around the Motherboard: Schritt 0, Bild 1 von 3 Samsung Galaxy Note 10.1 LCD Replacement, Removing the Components Around the Motherboard: Schritt 0, Bild 2 von 3 Samsung Galaxy Note 10.1 LCD Replacement, Removing the Components Around the Motherboard: Schritt 0, Bild 3 von 3
Removing the Components Around the Motherboard
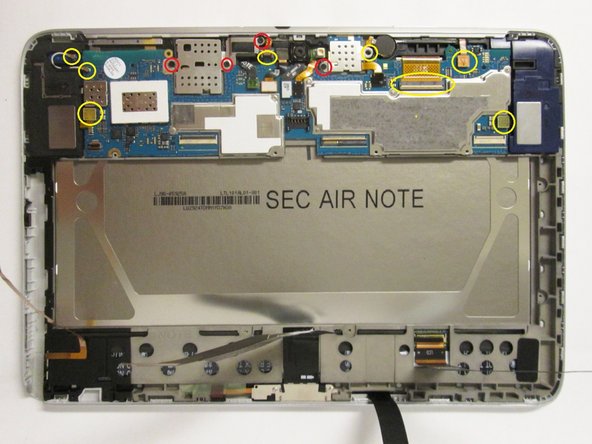
  • From the first photo:

  • Remove all the components marked by yellow circles

  • Unscrew all the 3 mm and 2 mm screws marked by the red circles with the #00 Philips screwdriver.

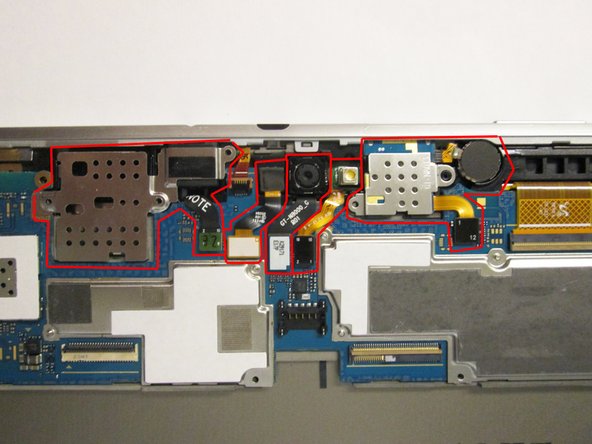
  • From the second photo:

  • Starting with the motherboard connectors, remove all the components marked in red.

  • Please place all components removed after this point in a static-free area or in anti-static bags.

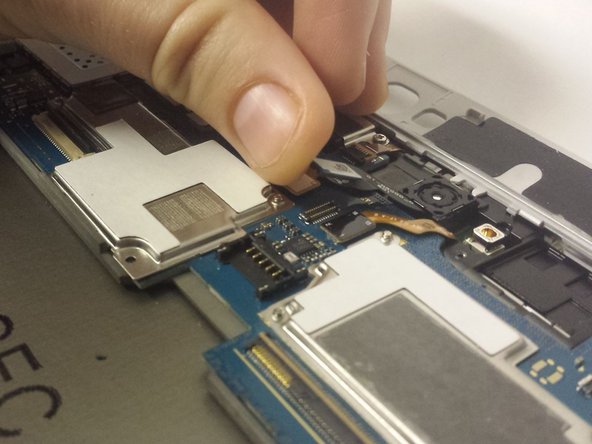
  • Please note that you can only remove the ribbon attached to the headphone jack and the metal covering it on the far left. Do not attempt to remove the whole piece at this time.

Hier Übersetzung einfügen

Hier Übersetzung einfügen

Hier Übersetzung einfügen

Hier Übersetzung einfügen

Hier Übersetzung einfügen

Hier Übersetzung einfügen

Hier Übersetzung einfügen

Deine Beiträge sind lizenziert unter der Open-Source Creative Commons Lizenz.