Zum Hauptinhalt wechseln

HTC One Akku Austausch

Englisch
Deutsch

Schritt 1 übersetzen

Schritt 1
HTC One Battery Replacement, Battery: Schritt 0, Bild 1 von 1
Battery
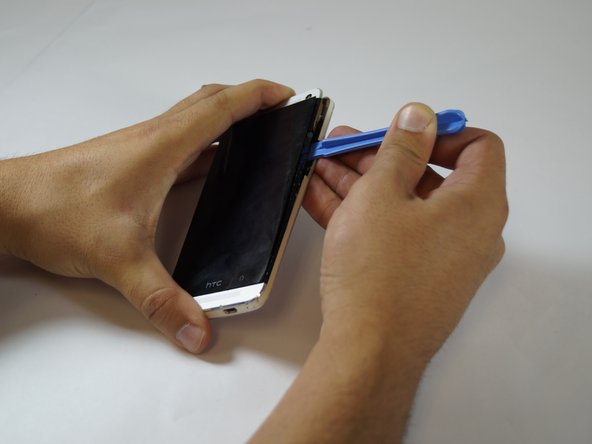
  • In this step you'll lift the screen. Be VERY gentle else you will break it. Insert the plastic opening tool in between the black plastic bezel and the glass screen edge along the sides and the top, gently loosening the adhesive. The screen will remain attached at the bottom edge, as if on a hinge.

  • You may need to use a hair dryer or hot air gun to loosen the adhesive holding the device together. Be careful not to heat the device too much however as you could cause damage!

In diesem Schritt wirst du die Glasscheibe anheben. Sei SEHR vorsichtig damit sie nicht bricht. Setze einen Plastiköffner zwischen den schwarzen Rahmen und den Rand der Glasscheibe entlang und löse allmählich den Kleber. Die Scheibe soll am unteren Rand noch befestigt sein so wie an einem Scharnier.

Möglicherweise benötigst du Wärme um den Kleber aufzuweichen. Erhitze das Gerät nicht zu sehr, das kann Schäden verursachen.

Deine Beiträge sind lizenziert unter der Open-Source Creative Commons Lizenz.