Schritt 2 übersetzen
Schritt 2


-
Use a plastic opening tool to lift the small hinge holding the circled gold ribbon in place, then gently slide the ribbon out of the socket.
-
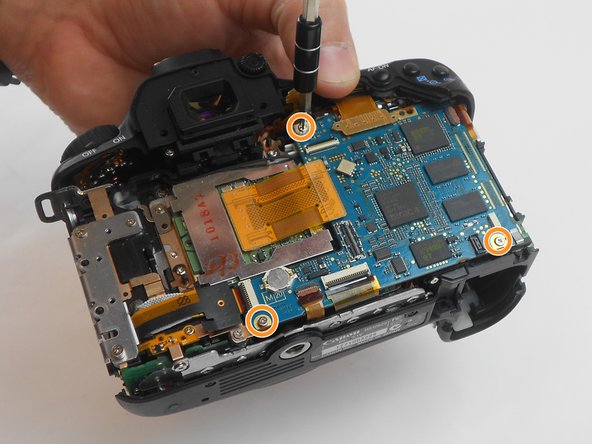
Next unscrew the three 4.3 mm Phillips #PH00 screws holding the motherboard down using the PH00 screwdriver.
| [* red] Use a plastic opening tool to lift the small hinge holding the circled gold ribbon in place, then gently slide the ribbon out of the socket. | |
| [* icon_caution] Use cation, and pull the ribbon straight out. If damaged the camera may not work the same after reassembly. | |
| - | [* |
| + | [* orange] Next unscrew the three 4.3 mm Phillips #PH00 screws holding the motherboard down using the PH00 screwdriver. |
Deine Beiträge sind lizenziert unter der Open-Source Creative Commons Lizenz.