Zum Hauptinhalt wechseln

iPhone SE の分解

Hinweis: Du bearbeitest eine grundständige Anleitung. Alle Änderungen, die du vornimmst, betreffen auch die Anleitung, die diese beinhaltet.

Englisch
Japanisch
Schritt 3
iPhone SE Teardown: Schritt 0, Bild 1 von 3 iPhone SE Teardown: Schritt 0, Bild 2 von 3 iPhone SE Teardown: Schritt 0, Bild 3 von 3
  • Now for the step we don't like. Pentalobes: a five-pointed reminder that Apple doesn't really want you opening up your device.

  • Still, these pentalobes are totally cute and come in a matching rose gold.

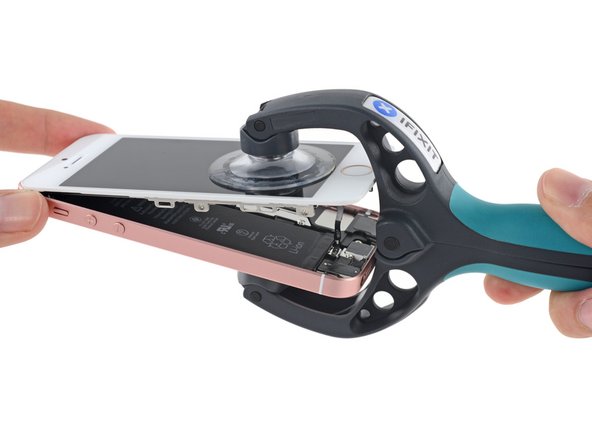
  • Setting the pretty pink screws aside, we iSclack the top off—and there's no pesky, color-matching display adhesive in sight. Compared to Apple's S-series flagships, this opening procedure is a snap.

  • We had speculated that the display gasketing in the 6s and 6s Plus was added for water resistance or structural reinforcement supporting 3D Touch. Its absence from this model and some preliminary tests suggests it's the latter.

次は私たちの嫌いな作業が待っています。ペンタロープネジです。この星型ネジは Apple がデバイスを開封しないでほしいと願っているかのように封印されています。

ですが、このペンタロープベジはローズゴールド色に塗られており、実に可愛らしく出来ています。

可愛いピンクのネジを脇に置き、上部をiSclackで開封します。作業は難しくありませんーすると、ローズゴールドに色付けされたディスプレイの接着剤が確認できます。Appleの S-series フラグシップに比べるとこの開封作業は簡単です。

6s と 6s Plusのディスプレイガスケットは耐水性機能か3D Touchを保護する構造補強、どちらかの目的のために付けられたと推測します。このモデルにはガスケットが付けられていないため、以前の予備テストからおそらく後者(=ガスケットを保護)の役割があると思われます。

Deine Beiträge sind lizenziert unter der Open-Source Creative Commons Lizenz.