Hinweis: Du bearbeitest gerade eine grundständige Anleitung, die Teil der Anleitung ist, die du eben angeschaut hast. Alle Änderungen, die du vornimmst, betreffen alle 4 Anleitungen, die diese grundständige Anleitung beinhalten.
Schritt 5 übersetzen
Schritt 5

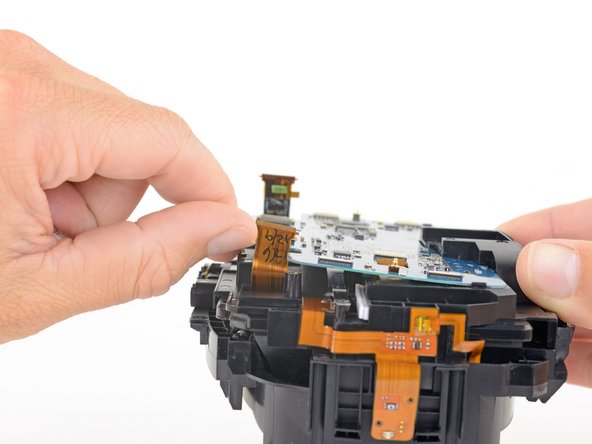


Remove the motherboard
-
Press the non-port-end of the motherboard toward the top of headset while hinging it away from the midframe to free it from the clips securing that end.
-
Slide the motherboard toward the bottom of the headset, over the clips, to remove it.
Deine Beiträge sind lizenziert unter der Open-Source Creative Commons Lizenz.