Zum Hauptinhalt wechseln

Asus G750JW-BBI7N05 Hard Drive Replacement

Englisch
Deutsch

Schritt 1 übersetzen

Schritt 1
Asus G750JW-BBI7N05 Hard Drive Replacement: Schritt 0, Bild 1 von 2 Asus G750JW-BBI7N05 Hard Drive Replacement: Schritt 0, Bild 2 von 2
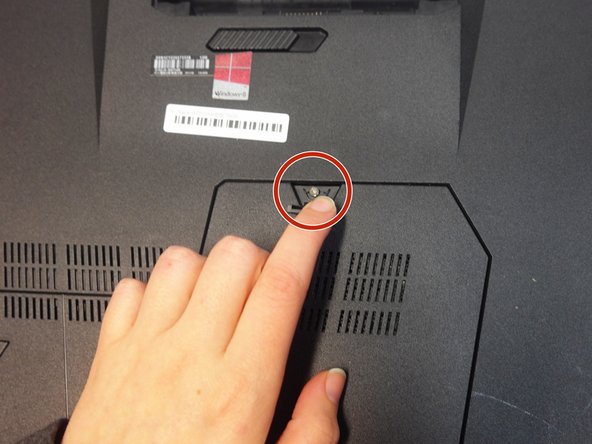
  • Lift up the rubber stopper on the backplate to expose one Phillips #00 screw. Unscrew it until it becomes loose.

  • This screw is permanently connected to the backplate and cannot be removed. Unscrewing it only allows you to remove the lower case from the laptop.

  • The backpate is the plastic plate on the underside of the laptop that covers some of its easily accessible internal components.

Hier Übersetzung einfügen

Hier Übersetzung einfügen

Hier Übersetzung einfügen

Deine Beiträge sind lizenziert unter der Open-Source Creative Commons Lizenz.