Diese Version enthält möglicherweise inkorrekte Änderungen. Wechsle zur letzten geprüften Version.
Was du brauchst
-
Dieser Schritt ist noch nicht übersetzt. Hilf mit, ihn zu übersetzen!
-
Place the laptop on a flat surface with the bottom side facing up.
-
Place the tip of a spudger or finger into the hole on the battery release slider.
-
-
Dieser Schritt ist noch nicht übersetzt. Hilf mit, ihn zu übersetzen!
-
Use the spudger to move the slider to the right and hold it there.
-
With the slider held, use your other hand to pull the battery back away from the laptop.
-
-
Dieser Schritt ist noch nicht übersetzt. Hilf mit, ihn zu übersetzen!
-
Use the screwdriver to pierce the warranty sticker.
-
Unscrew and remove the #0 6mm Phillips screw and set it aside.
-
-
Dieser Schritt ist noch nicht übersetzt. Hilf mit, ihn zu übersetzen!
-
Slide the back panel towards you. The best spots to place your fingers are on the bumpers.
-
Lift on the front edge to remove the panel.
-
-
Dieser Schritt ist noch nicht übersetzt. Hilf mit, ihn zu übersetzen!
-
Use one finger to lift up the hard drive assembly from the bottom left corner.
-
-
Dieser Schritt ist noch nicht übersetzt. Hilf mit, ihn zu übersetzen!
-
Hold the hard drive assembly keeping the end closest to you near the laptop. It's ok to tilt the far end of the drive up towards you.
-
Unscrew the two silver #0 3mm Phillips screws on the left and right sides of the hard drive.
-
-
Dieser Schritt ist noch nicht übersetzt. Hilf mit, ihn zu übersetzen!
-
Hold the base of the hard drive in your right hand.
-
Use your left hand to pull the hard drive away from its housing. Don't let the housing tug on the ribbon cable.
-
-
-
Dieser Schritt ist noch nicht übersetzt. Hilf mit, ihn zu übersetzen!
-
Pull the metal tabs sideways away from the memory stick.
-
-
Dieser Schritt ist noch nicht übersetzt. Hilf mit, ihn zu übersetzen!
-
Pull the RAM stick up and away from the laptop.
-
-
Dieser Schritt ist noch nicht übersetzt. Hilf mit, ihn zu übersetzen!
-
Use a spudger or your fingernails to lift up and unclip the two gold connectors on the top of the wireless card.
-
-
Dieser Schritt ist noch nicht übersetzt. Hilf mit, ihn zu übersetzen!
-
Unscrew the black #0 3mm Phillips screw at the top right of the wireless card.
-
-
Dieser Schritt ist noch nicht übersetzt. Hilf mit, ihn zu übersetzen!
-
The wireless card will spring up.
-
Pull the wireless card up and out to remove it.
-
-
Dieser Schritt ist noch nicht übersetzt. Hilf mit, ihn zu übersetzen!
-
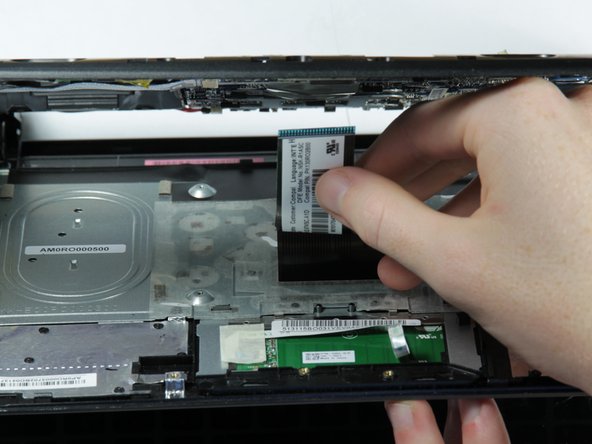
Remove the SD card or placeholder by pressing the card in until it clicks and pops out.
-
Pull the card out.
-
Remove the screws.
-
Sixteen #0 6mm Phillips screws
-
One #0 3mm screw
-
-
Dieser Schritt ist noch nicht übersetzt. Hilf mit, ihn zu übersetzen!
-
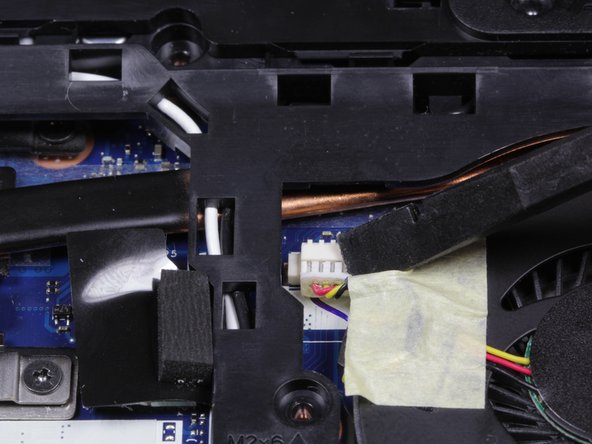
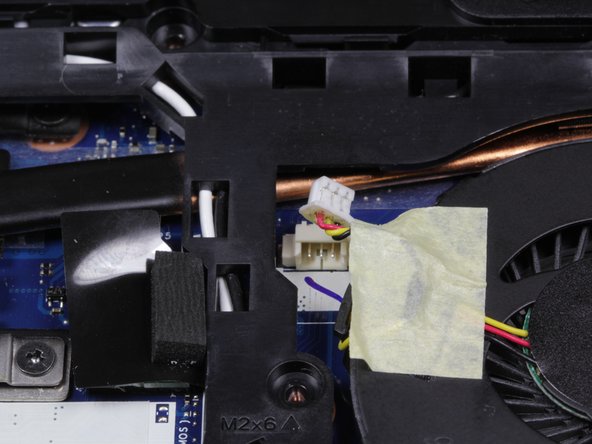
Unplug the fan power cable by pulling the cable towards you using a spudger to help pop off the connection.
-
-
Dieser Schritt ist noch nicht übersetzt. Hilf mit, ihn zu übersetzen!
-
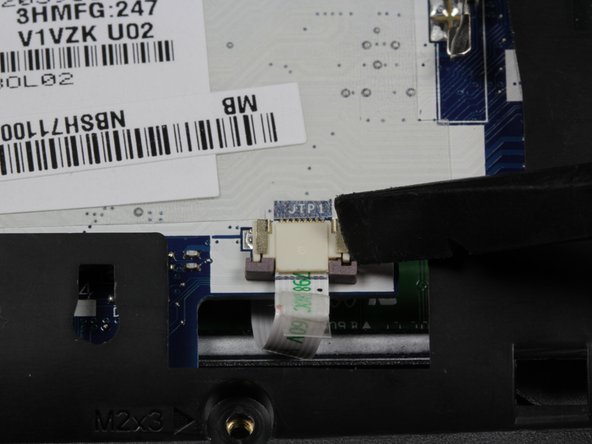
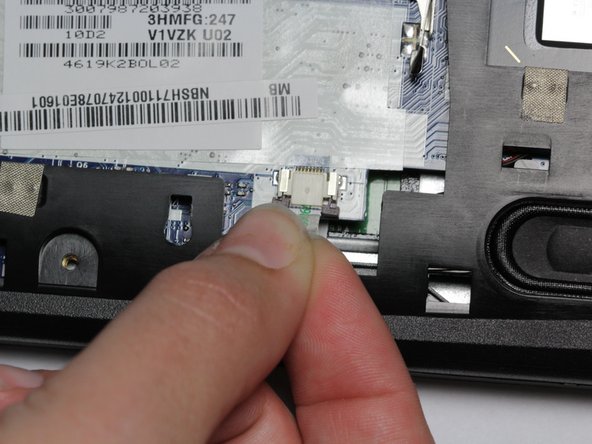
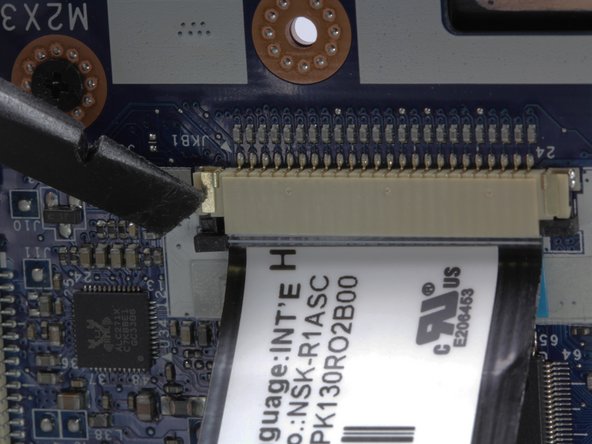
Unplug the cable below the lower RAM slot by using the spudger to slide the two brown clips towards you.
-
Gently pull the cable towards you using the clear plastic tab.
-
-
Dieser Schritt ist noch nicht übersetzt. Hilf mit, ihn zu übersetzen!
-
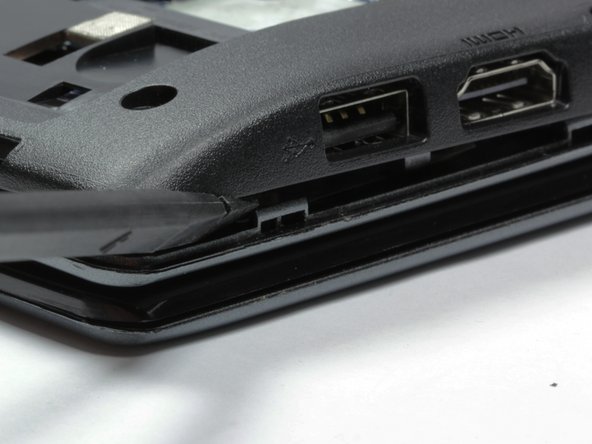
Unclip the bottom half of the case from the laptop by using a spudger and starting at the USB port on the right side of the laptop. Then work your way clockwise around the laptop.
-
-
Dieser Schritt ist noch nicht übersetzt. Hilf mit, ihn zu übersetzen!
-
Open the laptop hinge about 45 degrees.
-
Lower the keyboard assembly halfway between the case and the screen.
-
-
Dieser Schritt ist noch nicht übersetzt. Hilf mit, ihn zu übersetzen!
-
Push down on the black tabs with a spudger to free the ribbon cable from the case.
-
Gently pull the ribbon cable out of its slot.
-
-
Dieser Schritt ist noch nicht übersetzt. Hilf mit, ihn zu übersetzen!
-
Lower the keyboard assembly towards the screen until the clips near the hinges detach.
-
Set the keyboard assembly aside.
-
-
Dieser Schritt ist noch nicht übersetzt. Hilf mit, ihn zu übersetzen!
-
Open the hinge to about 90 degrees.
-
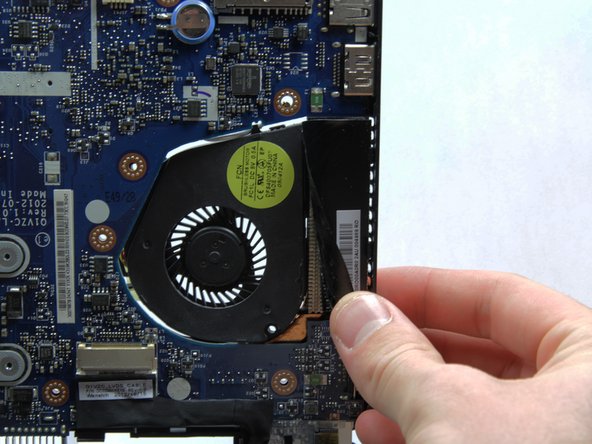
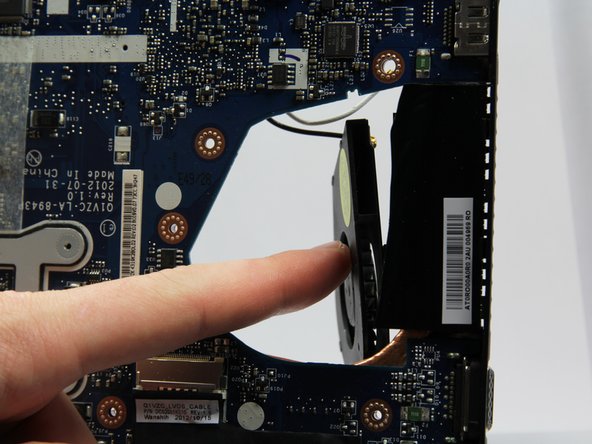
Lift up the left edge of the tape holding the fan on the right side of the motherboard.
-
Push the fan out of the back of the laptop.
-


Rückgängig: Ich habe diese Anleitung nicht absolviert.
6 weitere Nutzer:innen haben diese Anleitung absolviert.
Team

Cal Poly, Team 13-3, Forte Fall 2013 Mitglied von Cal Poly, Team 13-3, Forte Fall 2013
CPSU-FORTE-F13S13G3
5 Mitglieder
14 Anleitungen geschrieben