Einleitung
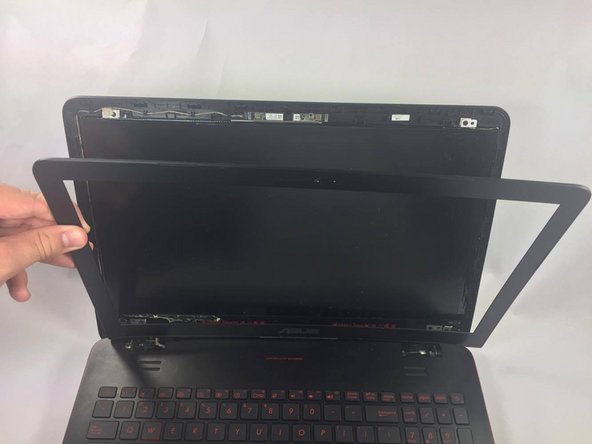
Use this guide for instructions on how to remove the screen from your ASUS ROG GL551J laptop.
The screen is the output surface for a laptop, showing text and/or images to the user. If the laptop screen becomes cracked, it fails to display anything, or the images are distorted or discolored, it may need to be replaced.
Be sure that your laptop is completely powered off and disconnected from external power before beginning this guide. It is also recommended that you wear ESD (electrostatic discharge) gloves or rubber gloves to avoid damaging laptop components.
Was du brauchst
-
-
-
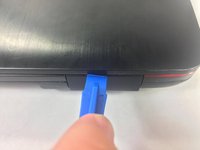
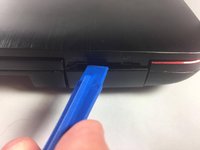
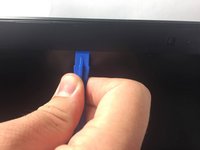
Use a plastic opening tool to remove the plastic hinge covers on either side of the laptop.
-
-
-
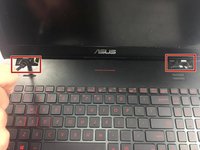
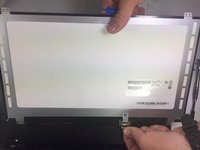
Remove the middle screws located on either side of the display.
-
-
-
Use a plastic opening tool to pop out the bezel from all four sides, then lift it out of the frame.
-
-
-
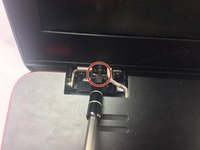
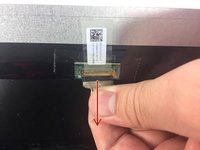
Remove the connector from the display by pulling the wire downwards.
indicate that direction of the wire is important and should be noted
instead of saying to do this in reverse order, we should recommend that when you have your new screen to reconnect the battery, connect the cable to the screen and make sure it works. ALSO rubber gloves could be very helpful with this type of procedure
-


To reassemble your device, follow these instructions in reverse order.
To reassemble your device, follow these instructions in reverse order.
Rückgängig: Ich habe diese Anleitung nicht absolviert.
Eine weitere Person hat diese Anleitung absolviert.
Team

USF Tampa, Team 5-4, Lacy Spring 2017 Mitglied von USF Tampa, Team 5-4, Lacy Spring 2017
USFT-LACY-S17S5G4
4 Mitglieder
5 Anleitungen geschrieben
Ein Kommentar
Hey, I am having issues putting the plastic hinge caps back on after I'm done. I know there is a right one and a left one but I just don't know how to pop them back into place. Starting to get a bit desperate. Could anyone give me some tips?
Thanks!
could provide a link on where to purchase screens or a link for this specific model, they are hard to find
Anika Rozeboom - Antwort