Zum Hauptinhalt wechseln

Black and Decker CM0700BZ Water Piping Replacement

Was du brauchst

  1. Black and Decker CM0700BZ Water Piping Replacement, Lid: Schritt 1, Bild 1 von 2 Black and Decker CM0700BZ Water Piping Replacement, Lid: Schritt 1, Bild 2 von 2
    • Open the lid of the coffee maker.

    • Remove the brew cup.

  2. Black and Decker CM0700BZ Water Piping Replacement: Schritt 2, Bild 1 von 3 Black and Decker CM0700BZ Water Piping Replacement: Schritt 2, Bild 2 von 3 Black and Decker CM0700BZ Water Piping Replacement: Schritt 2, Bild 3 von 3
    • Place your finger, screwdriver, or spudger behind the corner of the tab.

    • Pull up on the tab until it disconnects from the coffee maker.

  3. Black and Decker CM0700BZ Water Piping Replacement: Schritt 3, Bild 1 von 3 Black and Decker CM0700BZ Water Piping Replacement: Schritt 3, Bild 2 von 3 Black and Decker CM0700BZ Water Piping Replacement: Schritt 3, Bild 3 von 3
    • Hold the tab while pushing back on the lid.

    • The lid should open fully with the top of the lid facing down.

  4. Black and Decker CM0700BZ Water Piping Replacement: Schritt 4, Bild 1 von 2 Black and Decker CM0700BZ Water Piping Replacement: Schritt 4, Bild 2 von 2
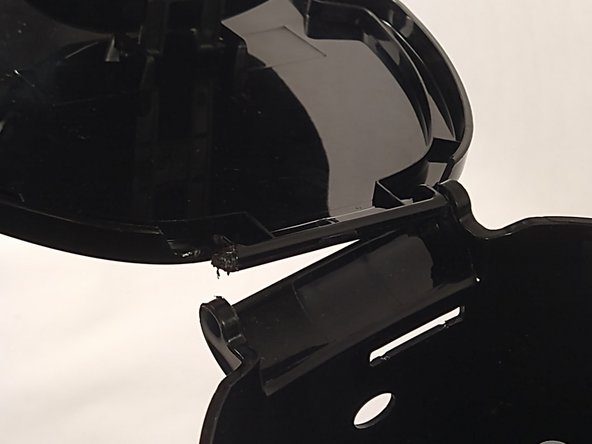
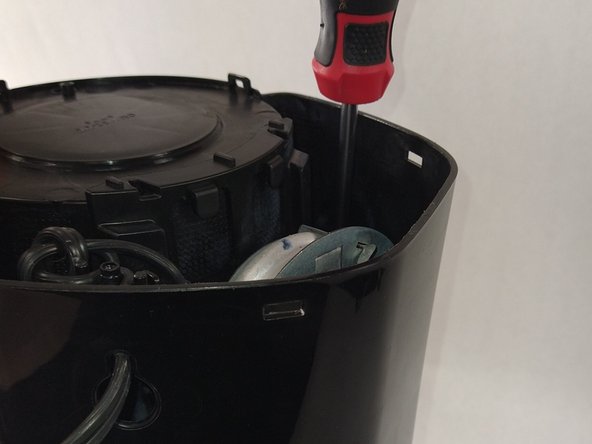
    • Insert the flathead screwdriver or spudger into one of the inserts holding the lid.

    • Pry facing away from the lid to force the peg out.

    • You should hear a pop when it disconnects.

    • Hold the lid and pull it away from the other insert.

  5. Black and Decker CM0700BZ Water Piping Replacement: Schritt 5, Bild 1 von 1
    • To also remove the shower head, use the Shower Head guide.

  6. Black and Decker CM0700BZ Water Piping Replacement, Water Pipes: Schritt 6, Bild 1 von 2 Black and Decker CM0700BZ Water Piping Replacement, Water Pipes: Schritt 6, Bild 2 von 2
    • Remove the carafe holder from the bottom of the coffee machine.

  7. Black and Decker CM0700BZ Water Piping Replacement: Schritt 7, Bild 1 von 3 Black and Decker CM0700BZ Water Piping Replacement: Schritt 7, Bild 2 von 3 Black and Decker CM0700BZ Water Piping Replacement: Schritt 7, Bild 3 von 3
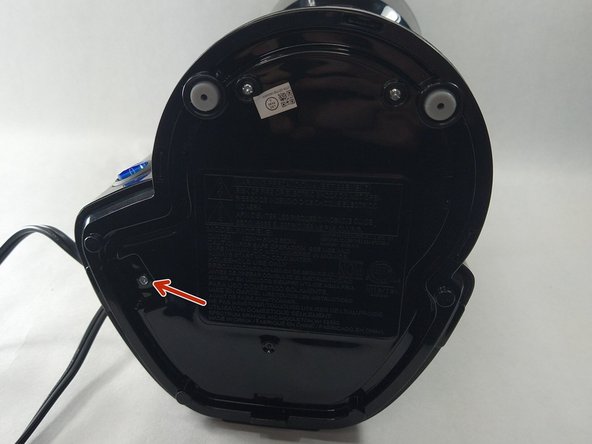
    • Place coffee maker on its side, with the bottom facing you.

    • Remove two 10mm Phillips #1 screws and one 10mm Tri-Point Y1 screws with their designated tips.

  8. Black and Decker CM0700BZ Water Piping Replacement: Schritt 8, Bild 1 von 3 Black and Decker CM0700BZ Water Piping Replacement: Schritt 8, Bild 2 von 3 Black and Decker CM0700BZ Water Piping Replacement: Schritt 8, Bild 3 von 3
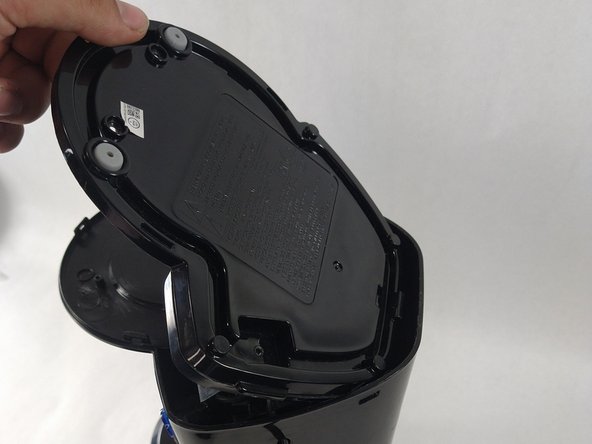
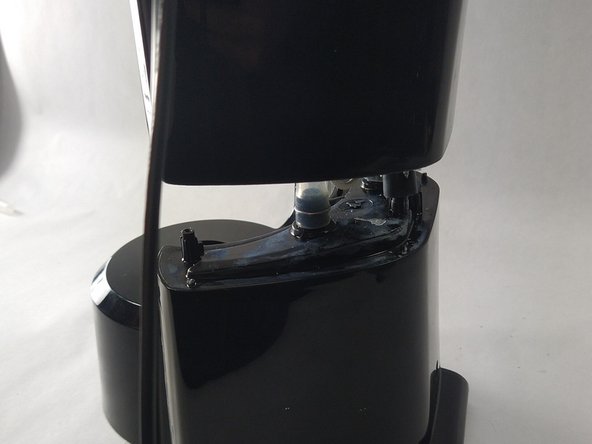
    • Slowly pry bottom lid from the front.

    • You should hear a pop.

    • Pull up and remove the bottom lid and set aside.

  9. Black and Decker CM0700BZ Water Piping Replacement: Schritt 9, Bild 1 von 1
    • Follow Step #4 of the Power Button guide, but leave the button in the machine.

  10. Black and Decker CM0700BZ Water Piping Replacement: Schritt 10, Bild 1 von 3 Black and Decker CM0700BZ Water Piping Replacement: Schritt 10, Bild 2 von 3 Black and Decker CM0700BZ Water Piping Replacement: Schritt 10, Bild 3 von 3
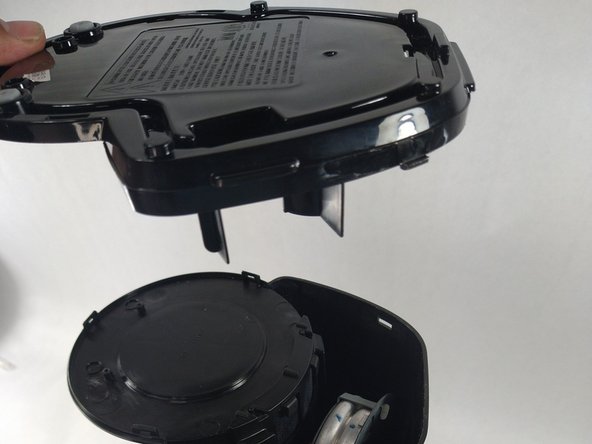
    • Remove the four 10mm Phillips #1 screws.

    • Slowly pull the water tank up to expose the water pipes.

  11. Black and Decker CM0700BZ Water Piping Replacement: Schritt 11, Bild 1 von 3 Black and Decker CM0700BZ Water Piping Replacement: Schritt 11, Bild 2 von 3 Black and Decker CM0700BZ Water Piping Replacement: Schritt 11, Bild 3 von 3
    In diesem Schritt verwendetes Werkzeug:
    Tweezers
    $4.99
    Kaufen
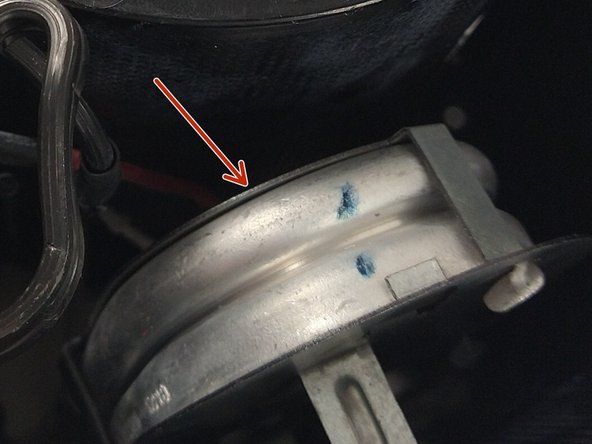
    • Squeeze on the prongs with tweezers and hold.

    • Pull the water tank while squeezing the tighteners to loosen the water pipes off of the water tank.

    • The heating element should now be loose. Remove the heating element from the machine.

  12. Black and Decker CM0700BZ Water Piping Replacement: Schritt 12, Bild 1 von 2 Black and Decker CM0700BZ Water Piping Replacement: Schritt 12, Bild 2 von 2
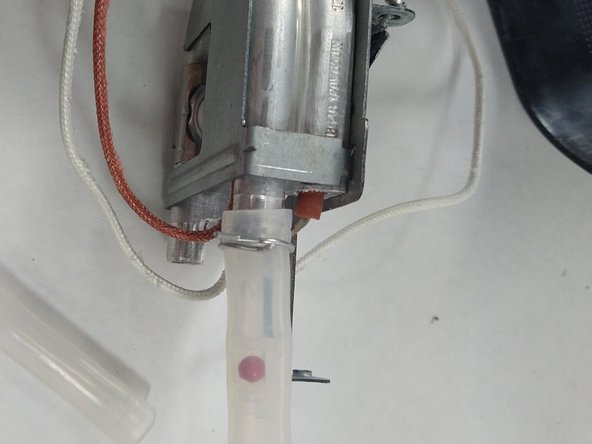
    • Squeeze and hold with tweezers again.

    • Pull the water tubes off the heating element while squeezing with tweezers.

Abschluss

To reassemble your device, follow these instructions in reverse order.

Team

UMass Dartmouth, Team 1-2, Shaddix Spring 2023 Mitglied von UMass Dartmouth, Team 1-2, Shaddix Spring 2023

UMASSD-SHADDIX-S23S1G2

4 Mitglieder

5 Anleitungen geschrieben

0 Kommentare

Kommentar hinzufügen

Seitenaufrufe:

Letzte 24 Stunden: 0

Letzte 7 Tage: 7

Letzte 30 Tage: 35

Insgesamt: 349