Einleitung
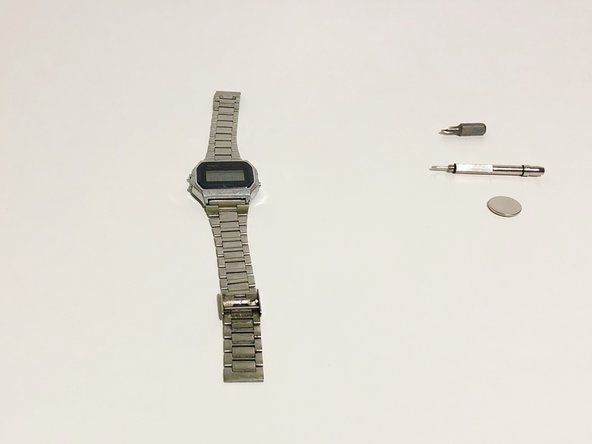
Wenn deine Casio Digitaluhr (Modell A158W-1) unerwartet nicht mehr das Datum und die Uhrzeit anzeigt und dich mit der Weckfunktion auf Trab hält, ist die höchstwahrscheinlich die Batterie die Ursache. Verwende diese Anleitung, um die Batterie deiner Uhr zu ersetzen.
Wenn Uhren den Geist aufgeben, werden sie meist weggeworfen, landen in der Schublade oder noch schlimmer, auf einer Mülldeponie, wo ihre Bestandteile möglicherweise den Boden verseuchen und die Umwelt belasten können!
Das liegt in der Regel daran, dass die meisten Uhrenbesitzer nicht wissen, wie man die Batterie wechselt, oder dass sie sich über die Komplexität des Vorgangs täuschen, obwohl er in Wirklichkeit sehr einfach ist und mit gewöhnlichen Haushaltswerkzeugen in nicht mehr als 15 Minuten erledigt werden kann!
Was du brauchst
-
-
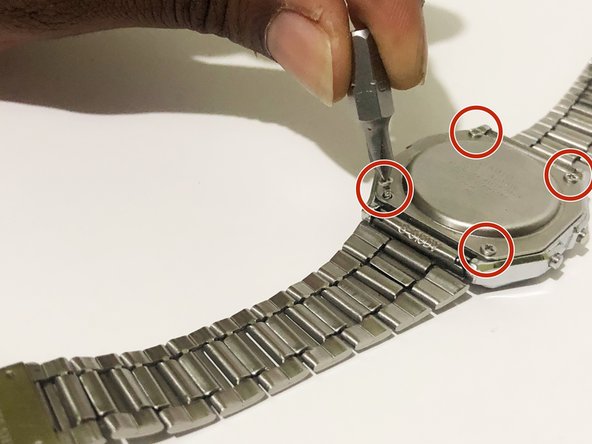
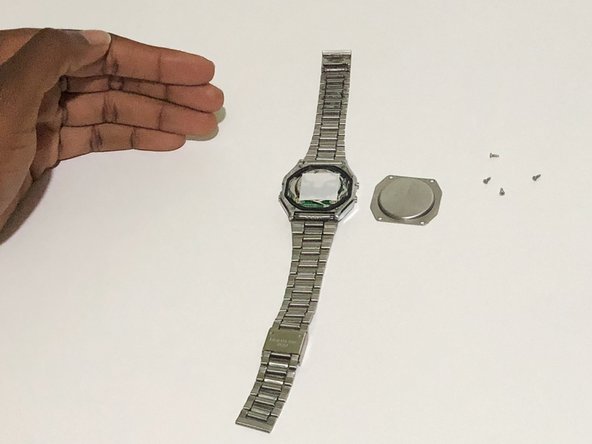
Entferne die vier Schrauben der hinteren Abdeckung mit einem Kreuzschlitzschraubendreher #00 und hebe die Abdeckung ab.
-
-
In diesem Schritt verwendetes Werkzeug:Tweezers$4.99
-
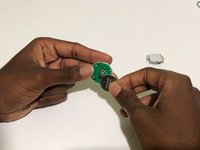
Entferne mit den Fingern oder einer Pinzette die Gummidichtung des Gehäuses.
-
-
-
-
Drücke mit dem Schlitzschraubendreher die vier Laschen um das Mittelstück nach innen, um es zu öffnen.
-
-
-
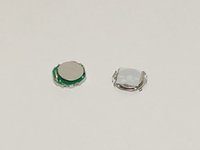
Setze eine neue CR2016 3V Lithium Batterie ein.
-
Setze das Uhrwerk wieder zusammen.
-
-
-
Setze das Uhrwerk zurück in das Gehäuse. Achte auf die richtige Orientierung des Uhrwerks.
-
Lege die Gummidichtung zurück an ihren Platz.
-
-
-
Nachdem du die Rückseite der Uhr angebracht hast, verwende den Kreuzschlitzschraubendreher #00, um die vier Schrauben einzuschrauben.
-
-
No problem with the watch, runs fine and settings easy.
But the darn bracelet gave me a hard time. To work it, make sure that the plate inside the buckle is so oriented so that two small prongs on it will fit between two links on the strap. Then you can close the buckle. If done properly, it will still need a good push to lock in place. Have a good look, the small prongs are hard to see, I used an eye loop.
I am now checking the rate of this watch, + or - seconds /day, as it will be used in astro-navigation.
I am only worried in the resin case that really looks like metal. Will it stand my rough use ? Enjoy yours as I do mine.


Um dein Gerät wieder zusammenzubauen, folge den Schritten dieser Anleitung in umgekehrter Reihenfolge.
Um dein Gerät wieder zusammenzubauen, folge den Schritten dieser Anleitung in umgekehrter Reihenfolge.
Rückgängig: Ich habe diese Anleitung nicht absolviert.
5 weitere Personen haben diese Anleitung absolviert.
Besonderer Dank geht an diese Übersetzer:innen:
100%

Diese Übersetzer:innen helfen uns, die Welt zu reparieren! Wie kann ich mithelfen?
Hier starten ›

Team

York University, Team 1-12, O'Regan Fall 2021 Mitglied von York University, Team 1-12, O'Regan Fall 2021
YORK-O'REGAN-F21S1G12
1 Mitglied
5 Anleitungen geschrieben
2 Kommentare
Thanks for the guide! I successfully managed to replace my battery. A few things I noticed during my own attempt:
1. The centerpiece cover only fits in one way when replacing it over the battery, because one side of the watch has two buttons and the other side only has one.
2. Immediately after replacing the battery and replacing the centerpiece cover, only some segments of the display were working and the watch was non-functioning. After a little googling I discovered that a CMOS clear might be required, and I followed https://rajgopalmenon.wordpress.com/2020... in order to do this. Within 5 minutes of doing the CMOS clear my watch started working again.
Casio watches on today’s market are usually shipped without instructions and in my case substantial packaging which resulted in my watch arriving with a slight dent in one of the bracelet segments. The face appeared to have some scuffs on it and it was three days before I discovered that there was a removable protection film covering the watch face. So tutorials such as this are excellent and keep the marque fully functional. As there are no moving parts in a Casio watch, battery change should be quite infrequent.