Zum Hauptinhalt wechseln
Gemeinsam reparieren - Jetzt registrieren

Conair Infiniti Pro Model 259NP Back Panel Replacement

Was du brauchst

    1. Conair Infiniti Pro Model 259NP Back Panel Replacement, Back Panel: Schritt 1, Bild 1 von 1
      • Caution: Unplug the hair dryer before attempting this guide. Leaving the device plugged in may result in electrocution and damage to the device.

      • Hold the hair dryer by the handle so that the back panel faces up.

      Frag FixBot

      Kommentar hinzufügen

    2. Conair Infiniti Pro Model 259NP Back Panel Replacement: Schritt 2, Bild 1 von 2 Conair Infiniti Pro Model 259NP Back Panel Replacement: Schritt 2, Bild 2 von 2
      • Remove the two 15.875 mm Phillips #2 screws from the back panel.

      Frag FixBot

      Kommentar hinzufügen

    3. Conair Infiniti Pro Model 259NP Back Panel Replacement: Schritt 3, Bild 1 von 3 Conair Infiniti Pro Model 259NP Back Panel Replacement: Schritt 3, Bild 2 von 3 Conair Infiniti Pro Model 259NP Back Panel Replacement: Schritt 3, Bild 3 von 3
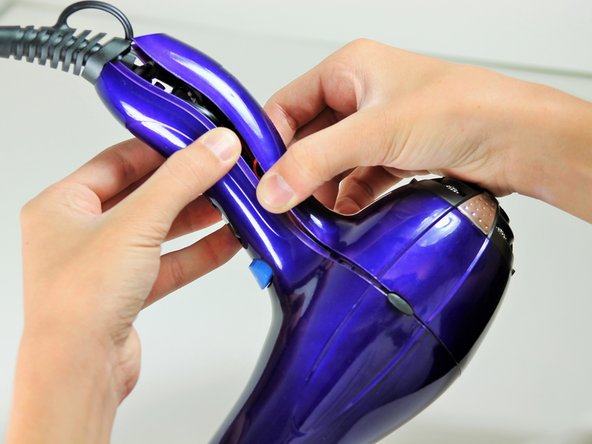
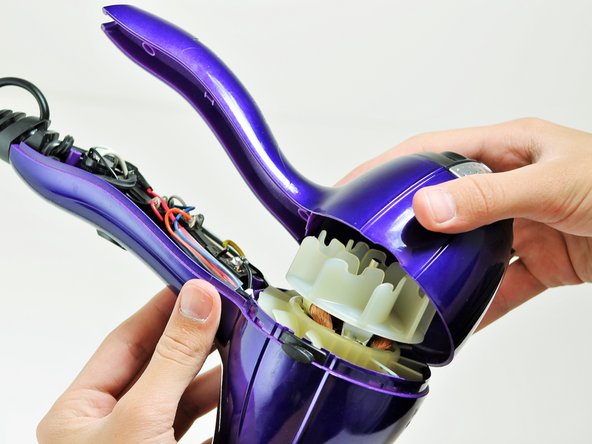
      • Starting from where the cord attaches to the handle, pull apart the two plastic panels.

      • Continue separating the back panel, working along the seam.

      • With moderate force, completely remove the back panel from the hair dryer.

      Frag FixBot

      Kommentar hinzufügen

Abschluss

To reassemble your device, follow these instructions in reverse order.

Rückgängig: Ich habe diese Anleitung nicht absolviert.

6 weitere Personen haben diese Anleitung absolviert.

Team

Cal Poly, Team 10-58, Amido Spring 2014 Mitglied von Cal Poly, Team 10-58, Amido Spring 2014

CPSU-AMIDO-S14S10G58

4 Mitglieder

14 Anleitungen geschrieben

0 Kommentare zur Anleitung

Kommentar hinzufügen

Seitenaufrufe:

Letzte 24 Stunden: 1

Letzte 7 Tage: 7

Letzte 30 Tage: 40

Insgesamt: 7,107