Diese Version enthält möglicherweise inkorrekte Änderungen. Wechsle zur letzten geprüften Version.
Was du brauchst
-
Dieser Schritt ist noch nicht übersetzt. Hilf mit, ihn zu übersetzen!
-
Locate the Hibernate option in the Start menu. Let the system fully hibernate (or shut down) before removing the battery.
-
-
Dieser Schritt ist noch nicht übersetzt. Hilf mit, ihn zu übersetzen!
-
Flip the laptop over and unlock the 2 battery tabs. The tabs will remain unlocked until the battery is removed.
-
-
Dieser Schritt ist noch nicht übersetzt. Hilf mit, ihn zu übersetzen!
-
Remove the battery. Pull the battery up from the back.
-
-
-
Dieser Schritt ist noch nicht übersetzt. Hilf mit, ihn zu übersetzen!
-
Align the battery with the tabs on the chassis. Drop the battery in place once lined up. If needed, use light pressure to seat it in the computer.
-
-
Dieser Schritt ist noch nicht übersetzt. Hilf mit, ihn zu übersetzen!
-
Turn the computer on and plug the charger in.
-
-
Dieser Schritt ist noch nicht übersetzt. Hilf mit, ihn zu übersetzen!
-
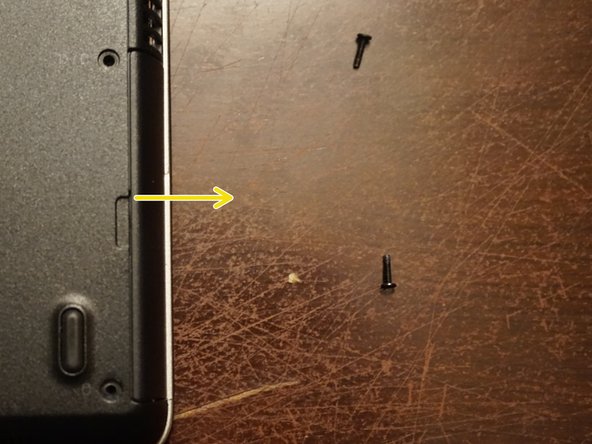
To remove the hard drive from the computer, remove the two screws. Use the Phillips #1 bit.
-
-
Dieser Schritt ist noch nicht übersetzt. Hilf mit, ihn zu übersetzen!
-
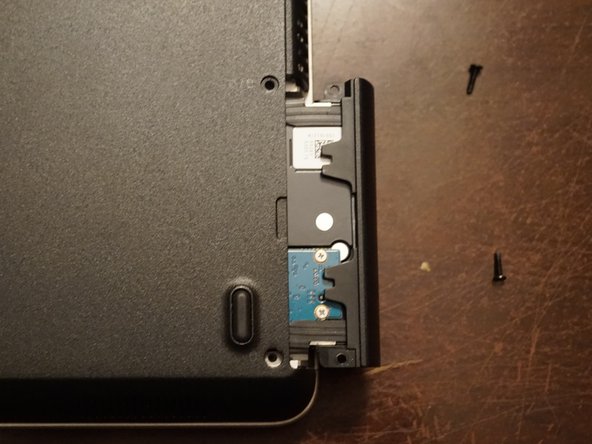
To remove the drive clip, remove the Phillips #0 screw holding the hard drive to the clip.
-
Once the screw is removed, remove the drive starting from the side with the screw.
-
Remove the drive from the right side by removing the drive from the alignment pin.
-
-
Dieser Schritt ist noch nicht übersetzt. Hilf mit, ihn zu übersetzen!
-
Once the drive is removed from the clip, remove the rubber bumpers. Transfer them to your new drive.
-


Rückgängig: Ich habe diese Anleitung nicht absolviert.
3 weitere Nutzer:innen haben diese Anleitung absolviert.

Team
