Zum Hauptinhalt wechseln

Dell Latitude E7440 Service Panel Replacement

Grundständige Anleitung
Dies ist eine grundständige Anleitung, die nur als Teil einer anderen Anleitung verwendet werden sollte.

Was du brauchst

  1. Dell Latitude E7440 Service Panel Replacement, Prepare the laptop: Schritt 1, Bild 1 von 1
    • Power off your laptop before starting.

    • Flip the device over so that the vents on the bottom are facing away from you.

  2. Dell Latitude E7440 Service Panel Replacement, Release the battery: Schritt 2, Bild 1 von 3 Dell Latitude E7440 Service Panel Replacement, Release the battery: Schritt 2, Bild 2 von 3 Dell Latitude E7440 Service Panel Replacement, Release the battery: Schritt 2, Bild 3 von 3
    • Place your finger on the latch located in the center of the laptop.

    • Slide the latch to the right, applying enough force to reveal a red indicator.

    • You will hear a soft click when the latch has been disengaged.

  3. Dell Latitude E7440 Service Panel Replacement, Remove the battery: Schritt 3, Bild 1 von 1
    • Lift the battery by the top, away from the laptop body.

  4. Dell Latitude E7440 Service Panel Replacement, Remove the bottom screws: Schritt 4, Bild 1 von 2 Dell Latitude E7440 Service Panel Replacement, Remove the bottom screws: Schritt 4, Bild 2 von 2
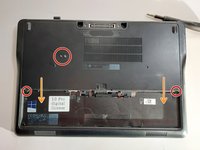
    • After removing the battery, remove the 2 screws securing the service panel.

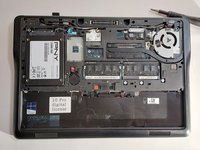
    • Slide the panel off after removing the screws.

Abschluss

To reassemble your device, follow these instructions in reverse order.

Nick

Mitglied seit: 11/10/09

89.837 Reputation

52 Anleitungen geschrieben

Team

Master Techs Mitglied von Master Techs

Community

321 Mitglieder

1.516 Anleitungen geschrieben

0 Kommentare

Kommentar hinzufügen

Seitenaufrufe:

Letzte 24 Stunden: 0

Letzte 7 Tage: 0

Letzte 30 Tage: 2

Insgesamt: 87