Einleitung
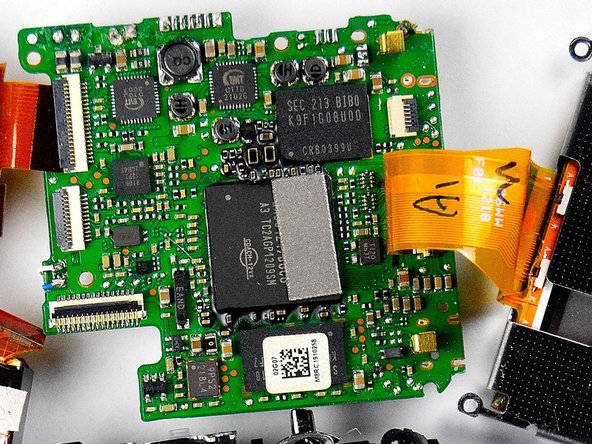
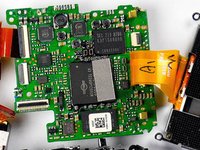
The motherboard connects everything in the camera together. A working Motherboard is essential for the camera to function properly as a complete unit.
Was du brauchst
-
-
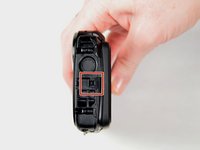
Using 1.5mm Hex Screwdriver, remove two 3.0 mm hex screws on the front of the camera.
-
Using Phillips #00 screwdriver, remove two 3.0 mm screws on the bottom of the front face.
-
-
-
Using Phillips #00 screwdriver, remove 3.0 mm screws on the bottom of the camera closer to the back.
-
Using Phillips #00 screwdriver remove two 3.0 mm screws on the back of the camera. This will remove the eyelet for the camera strap and the rear cover.
-
-
-
-
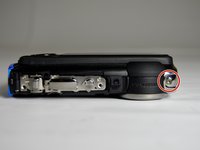
Using 1.5mm Hex screwdriver, remove 3.0 mm hex screw on top edge of silver panel.
-
Using Phillips #00 screwdriver, remove 3.0 mm screw on bottom edge.
-
Once both screws are removed the silver side casing will slide off.
-
-
-
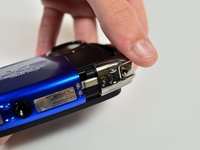
Unlatch the four clasps located on each side of the camera by hand.
-
The fourth clasp is concealed by the battery door. To reach the clasp see Fujifilm FinePix XP50 Battery Replacement for instructions.
-
-
-
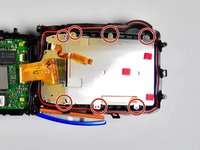
Using Phillips #00 screwdriver, remove seven 3.0 mm screws.
-
Remove the remaining five 3.0 mm screws which hold the rear case and the control panel together.
-
The rear panel is now free from the camera.
-
-
-
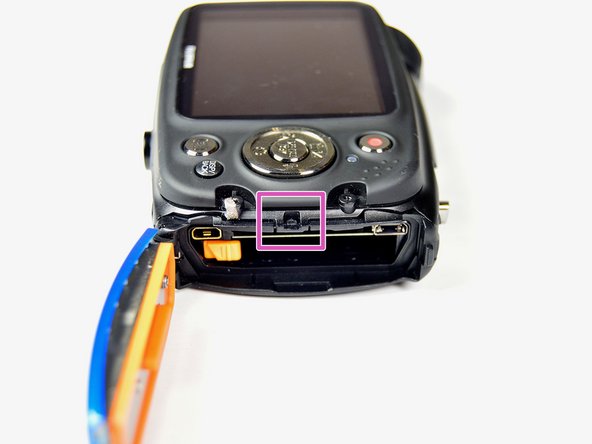
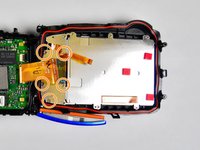
Using Phillips #00 screwdriver, remove four 3.0 mm screws holding motherboard in place.
-
-
-
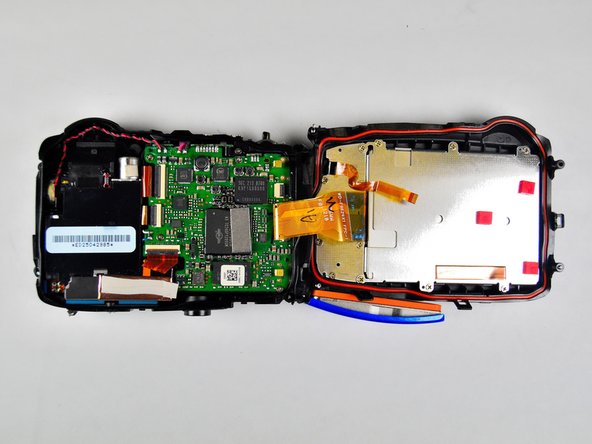
Insert the spudger in between the side case pannel and the motherboard.
-
Move the spudger in an upward motion to pry the motherboard out of the plastic housing. Work all the way around the motherboard until the motherboard is free.
-
-
-
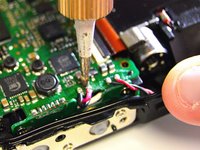
There are four wires that are soldered to the motherboard. Detach these wires from the motherboard by desoldering them.This will free the motherboard.
-
For instructions on desoldering see Wie man Lötverbindungen herstellt und entlötet
-


To reassemble your device, follow these instructions in reverse order.
To reassemble your device, follow these instructions in reverse order.
Rückgängig: Ich habe diese Anleitung nicht absolviert.
2 weitere Personen haben diese Anleitung absolviert.
Team

Baylor, Team 2-4, Grigsby Spring 2015 Mitglied von Baylor, Team 2-4, Grigsby Spring 2015
BU-GRIGSBY-S15S2G4
4 Mitglieder
8 Anleitungen geschrieben