Einleitung
Problems with charging the battery? Is the USB port damaged where it is no longer able to plug into the charging cable? It might be time to replace your USB port. After removing the second frame panel be sure to read the Cautions and steps thoroughly before proceeding.
Was du brauchst
-
-
Carefully insert the plastic prying tool into the crevice to separate the frame from the body.
-
-
-
Slide the plastic prying tool around the perimeter to completely remove the frame.
-
-
-
Remove the four 11.0 mm screws using the Torx T5 screwdriver.
-
-
-
-
Using the plastic prying tool, dislodge the frame from the body of the device.
-
Using your hands, completely disconnect the frame from the body.
-
Set the pieces of the frame aside.
-
-
-
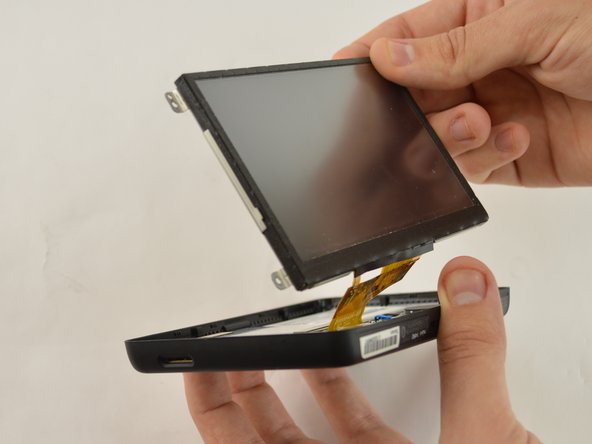
Gently lift up the display screen using your fingers to make sure the only thing connecting it to the body is the ribbon cable.
-
-
-
Remove the piece of tape that is covering the connecting point of the motherboard and display.
-
-
-
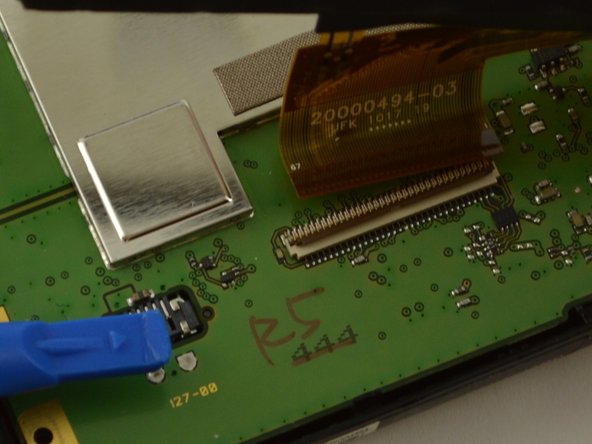
Using the plastic opening tool or your fingers, lift up the ZIF connector holding the ribbon cable in place.
-
Carefully pull the ribbon cable out of the connector with tweezers or two fingers.
-
Gently disconnect the display by pulling upward. Set display aside.
-
-
-
Use your T5 Torx screwdriver and unscrew the two 5.0 mm screws on the motherboard.
-
-
-
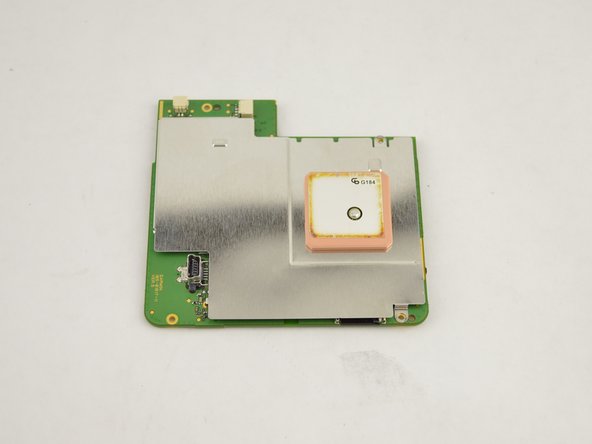
Flip the motherboard over towards the battery.
-
Use your tweezers and disconnect the two wire connectors from the motherboard.
-
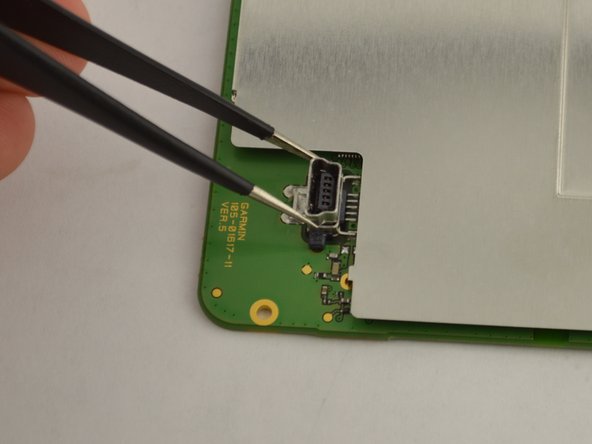
Pull the motherboard out and locate the USB port.
-
-
-
Gently and delicately heat up the solder holding the USB port to the circuit board.
-
Carefully remove the USB port with your metal tweezers and set it aside
-


To reassemble your device, follow these instructions in reverse order.
To reassemble your device, follow these instructions in reverse order.
Rückgängig: Ich habe diese Anleitung nicht absolviert.
7 weitere Nutzer:innen haben diese Anleitung absolviert.
Team

USF Tampa, Team 15-2, Remmell Spring 2016 Mitglied von USF Tampa, Team 15-2, Remmell Spring 2016
USFT-REMMELL-S16S15G2
4 Mitglieder
6 Anleitungen geschrieben
3 Kommentare
I found one on ebay, cost about 5 USD. Search for micro USB jack.
those are not micro usb, there mini usb.
Did I miss something? The title implies showing how to REPLACE the port. It ends with remove port and set aside, then reverse. On the off-chance the authors are still reading the comments, sarcastic “good job”. I also marvel that it took three of you geniuses to come up with this. I’m gonna follow Heliophile’s advice and search ebay, his or her 2 line comment was way more useful then the entire piece. Thanks Heliophile.