Einleitung
This guide will show you how to replace the speaker in the Garmin Nuvi 65LM in order to restore it's audio capabilities. It is recommended to have some soldering experience to complete this guide.
Was du brauchst
-
-
Place the device on a flat surface with the screen facing down.
-
Remove the four 4.80 mm T5 screws on the corners of the device with a T5 Torx screwdriver.
-
-
-
Use the plastic opening tool to gently pry apart the front and back casing panels. Repeat this at multiple locations around the edge of the device. You should hear the clips that hold the front and back together pop apart.
-
Once there is a large gap between the from and back casing panels, use your hands to separate the two halves.
-
-
-
-
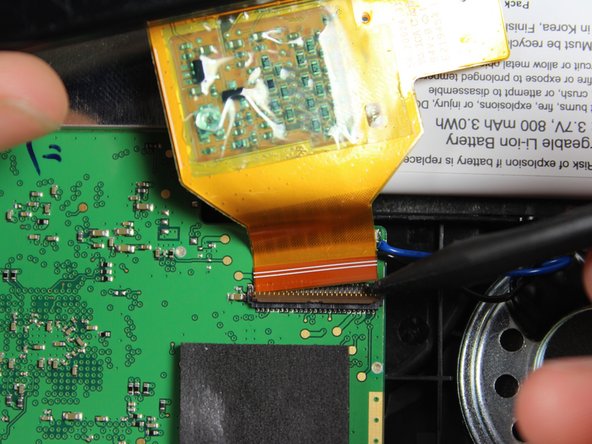
Use a spudger to pop up the ZIF connector tab that fastens the ribbon cable to the motherboard.
-
Gently pull the front panel away and set it on your flat work surface.
-
-
-
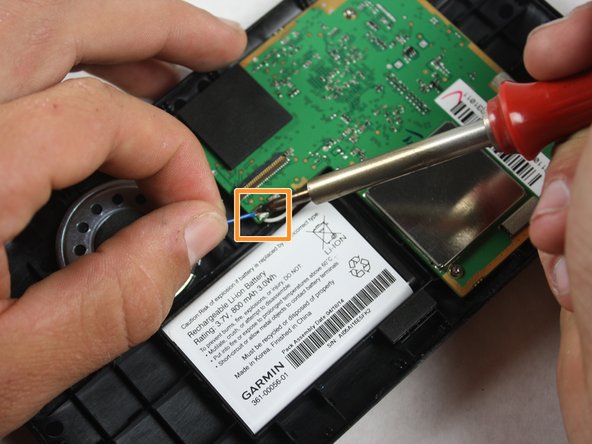
Disconnect the black and blue speaker wires by desoldering them from the terminals on the motherboard.
-
Plug in the soldering station and allow it at least 5 minutes to heat up.
-
Touch the tip of the soldering iron to each terminal until the solder begins to melt.
-
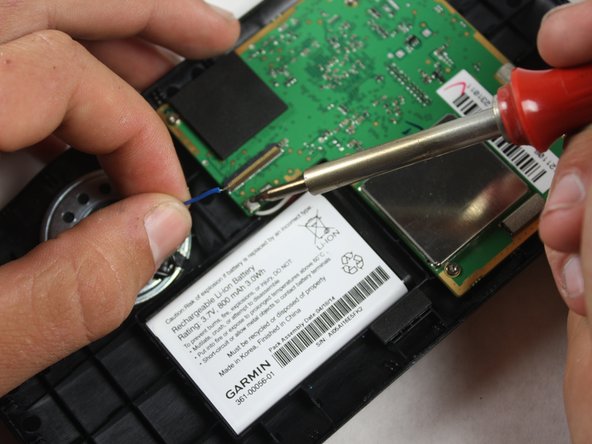
Once the solder melts gently pull the wire away from its connection to the terminal.
-
-
-
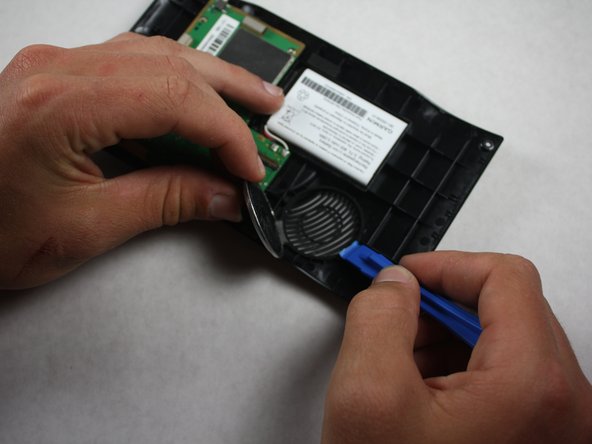
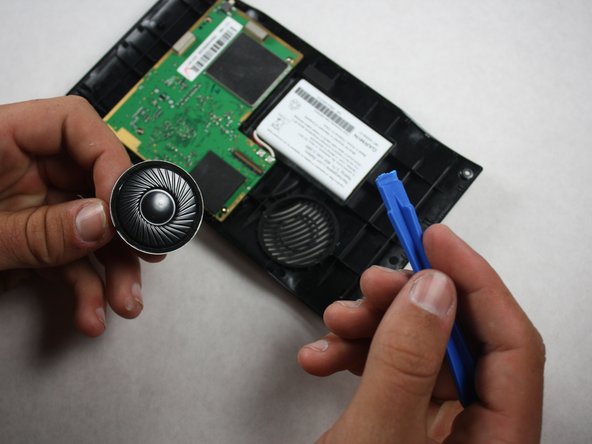
Insert the plastic opening tool between the speaker and plastic case.
-
Gently pry the speaker up until you make a gap between the speaker and plastic case.
-
Continue to do this while moving the plastic opening tool around the entire circumference of the speaker.
-
Use your fingers to gently pull the speaker completely away from the plastic case.
-


To reassemble your device, apply glue to the outer rim of the new speaker and secure it to the plastic case. Then follow these instructions in reverse order.
To reassemble your device, apply glue to the outer rim of the new speaker and secure it to the plastic case. Then follow these instructions in reverse order.
Rückgängig: Ich habe diese Anleitung nicht absolviert.
Eine weitere Person hat diese Anleitung absolviert.
Team

Cal Poly, Team 15-3, Amido Spring 2015 Mitglied von Cal Poly, Team 15-3, Amido Spring 2015
CPSU-AMIDO-S15S15G3
4 Mitglieder
6 Anleitungen geschrieben
2 Kommentare
great info…any ideas on where to get the new speaker???
I have the same question…