Einleitung
If the audio from your Goal Zero Rock Out 2 solar portable speaker (identified with model number 94007) is malfunctioning, and it’s preventing you from listening to your favorite songs, there might be a problem with the internal drivers. Luckily, you can fix this by taking the device apart and reattaching wires that may have come loose.
While following these steps, you may encounter some components of the device that are glued together, requiring a bit of force to open the speaker. This guide also involves soldering to complete the repair. Keep in mind that a soldering iron gets extremely hot and can cause burns. Additionally, it’s important to solder in a well-ventilated room, as soldering can produce harmful fumes. For more information on soldering, take a look at the How to Solder and Desolder Connections guide.
Before beginning, turn the device’s power off and disconnect it from any charging cables.
Was du brauchst
-
-
Use a 2 mm Allen Key to remove eight 13 mm screws from the faceplate.
-
Use a spudger to remove the faceplate and set it aside.
-
-
-
Use a Phillips #0 screwdriver to remove four 12 mm screws from the speaker body.
-
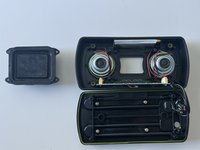
Unzip the speaker case.
-
Turn the the speaker over so the bottom is facing up.
-
-
-
-
Use a Phillips #0 screwdriver to remove the four 12 mm screws securing the center resonator.
-
Carefully remove center resonator from the enclosure.
-
-
-
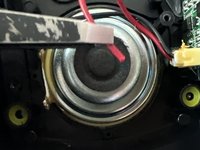
Use wire strippers to remove about 6 mm of insulation from the detached speaker wire.
-
Set the soldering iron to 350 degrees.
-
Add solder to the tip of the iron and then touch the tip to exposed wire.
-
Join the wire with the electrical contact on the speaker.
-


To reassemble your device, follow these instructions in reverse order.

Team

CSU Los Angeles, Team 8-6, Grodsky Spring 2024 Mitglied von CSU Los Angeles, Team 8-6, Grodsky Spring 2024
CSULA-GRODSKY-S24S8G6
2 Mitglieder
1 Anleitung geschrieben