Einleitung
Use this guide to replace the touchpad for your HP 14-dq0051dx laptop. This may be helpful if the touchpad is broken or not working.
Before beginning this repair, turn off the laptop and disconnect from the AC adapter.
Was du brauchst
-
-
Turn the laptop upside down so the backside is facing up.
-
Use a Phillips #1 screwdriver to remove eight screws from the back case.
-
-
-
Turn the laptop over and open the screen.
-
Insert the opening tool into the seam between the bottom panel and the keyboard.
-
Run the opening tool along the entire seam to separate the bottom panel.
-
-
-
Once the bottom panel is separated from the laptop, carefully close the laptop and turn it upside down.
-
Place both your hands on opposite ends of the bottom panel, and lift up and remove the panel.
-
-
-
-
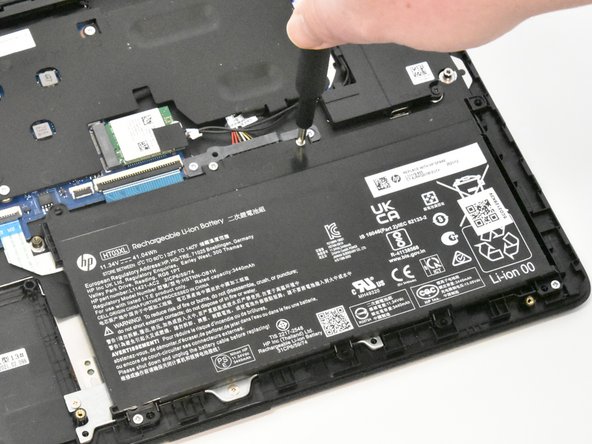
Use a Phillips #1 screwdriver to remove the four 2.5 mm screws that secure the battery.
-
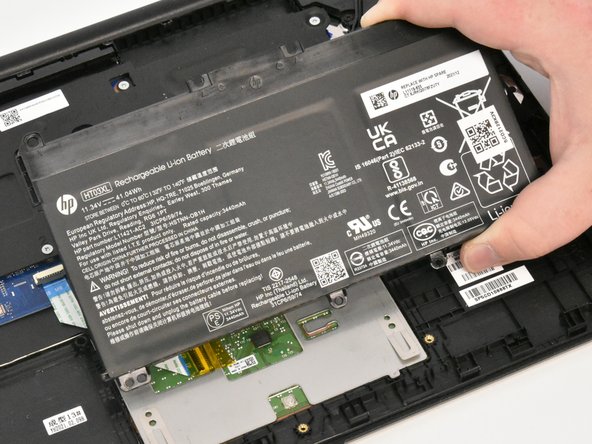
Remove the battery from the laptop.
-
-
-
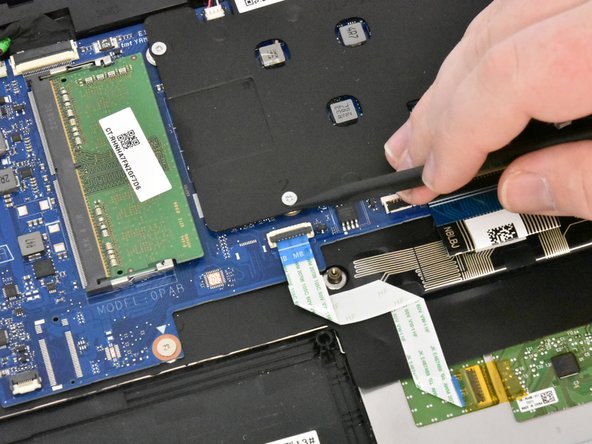
Use the tip of a spudger or your fingernail to flip up the small locking flap from ZIF connector that attaches the touchpad cable to the motherboard.
-
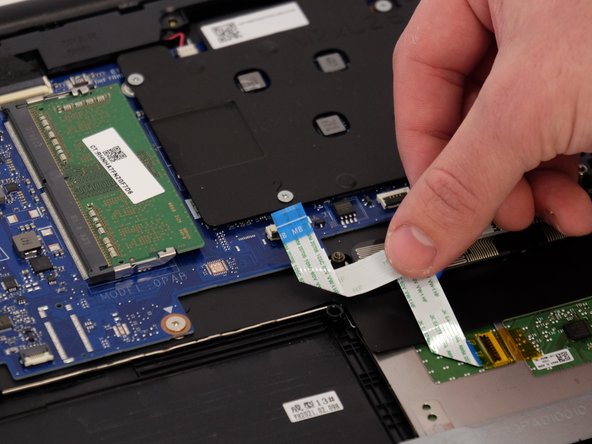
Pull the ribbon cable out from the connector.
-
-
-
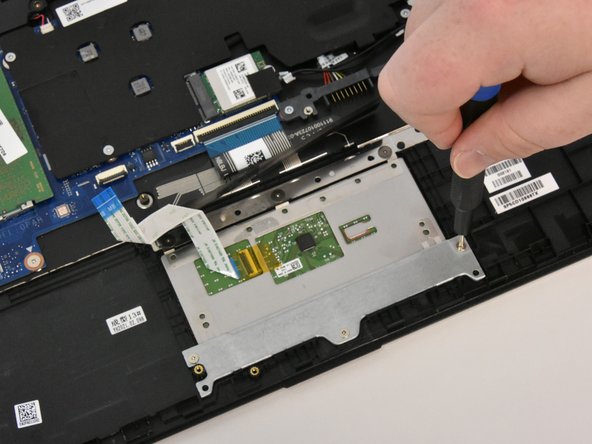
Use a Phillips #0 screwdriver to remove the three 2.0 mm screws from the metal plate covering the bottom of the touch pad.
-
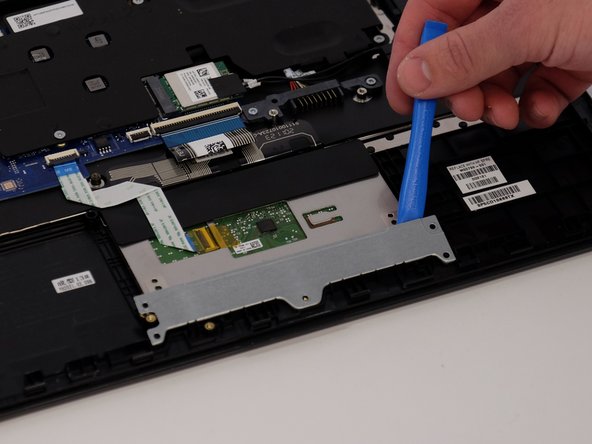
Use an opening tool to remove the bottom plate.
-
-
-
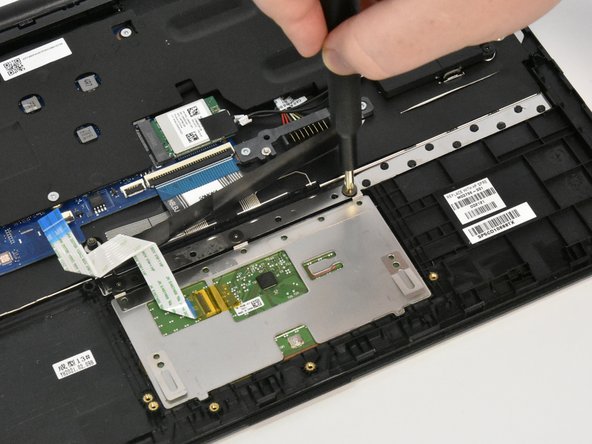
Lift up the flap covering to the top of the touchpad.
-
Use a Phillips #1 screwdriver to remove the three 1.5 mm screws from the top of the touchpad.
-
Use the opening tool to carefully lift up and remove the touchpad.
-


To reassemble your device, follow these instructions in reverse order.
To reassemble your device, follow these instructions in reverse order.
Team

Linn Benton Community College, Team 1-5, Karnes Winter 2023 Mitglied von Linn Benton Community College, Team 1-5, Karnes Winter 2023
LBCC-KARNES-W23S1G5
4 Mitglieder
5 Anleitungen geschrieben