Einleitung
This leads the reader through removing the hard drive for replacement. The hard drive may need replacing if it is too slow or makes odd noises while running. If you are not encountering these specific issues with your computer, check the HP 15-ay052nr troubleshooting page to direct yourself towards the guide most beneficial towards your issue.
Was du brauchst
-
-
Turn the device and lay it upside-down on a flat surface so the base of the computer is facing upwards.
-
-
-
Identify the two (2) sliding lock mechanisms on either side of the battery and slide them towards the center.
-
-
-
Remove the rubber feet on the bottom of the device to access all the screws.
-
-
-
-
Unscrew the twelve 9 mm JIS #0 screws on the back of the device.
-
Gently remove the optical drive (CD reader) to more easily separate the base.
-
-
-
Unclip the keyboard surface from the base using an iFixit opening tool around the entire border.
-
-
-
Remove the three 3 mm screws that mount the hard drive to the computer.
-
-
-
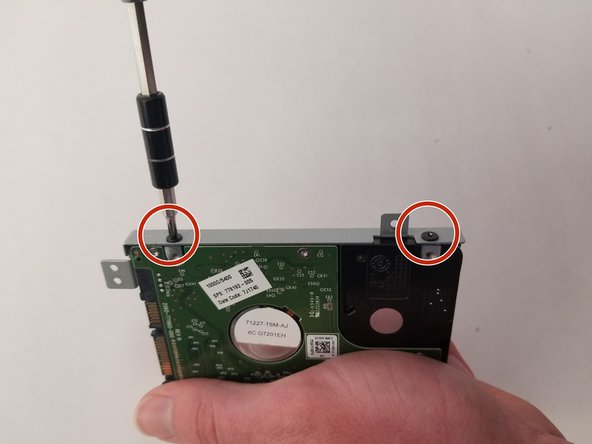
Lift the hard drive from the computer and remove the two 3-mm screws that connect each mounting bracket to the hard drive.
-


To reassemble your device, follow these instructions in reverse order.
To reassemble your device, follow these instructions in reverse order.
Rückgängig: Ich habe diese Anleitung nicht absolviert.
Eine weitere Person hat diese Anleitung absolviert.
Team

Oregon Institute of Technology, Team S1-G5, Lancaster Winter 2019 Mitglied von Oregon Institute of Technology, Team S1-G5, Lancaster Winter 2019
OIT-LANCASTER-W19S1G5
4 Mitglieder
8 Anleitungen geschrieben