Einleitung
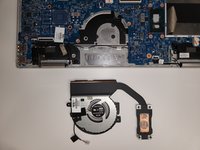
This guide will be utilized to locate, remove, and replace the cooling fan of your HP Envy x360 15m-bp111dx. If your laptop has a clicking fan, or you suspect that there is a problem with the CPU fan/heat sink, use this guide to replace the CPU fan and heat sink. The fan and heat sink work together to draw heat away from the CPU, keeping it cool and allowing your device to run as efficiently as possible. If your fan is broken, it can cause a clicking sound or could lead to your device overheating.
Before using this guide, ensure that the venting holes on the back of the laptop are clear of dust and debris. Typically, you can remove dust and buildup with a small dust blower. Restart the machine to ensure the fan is still clicking.
The final step requires you to re-apply thermal paste onto the CPU. If you skip this step, you will almost certainly damage your machine.
Be sure that your laptop is powered off, disconnected from the power adapter, and that the components have cooled before beginning this replacement guide.
Was du brauchst
-
-
Remove the rubber feet to access the screws.
-
Using a Phillips #0 screwdriver, remove the four 7 mm screws.
-
Using a T5 Torx screwdriver, remove the three 5 mm screws.
-
-
-
Insert opening picks or an opening tool inside the edge of the chassis to separate the back panel from the rest of the computer.
-
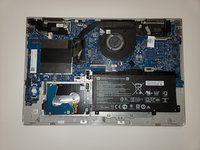
Remove the back case.
-
-
-
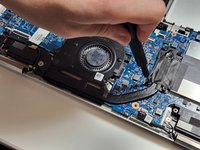
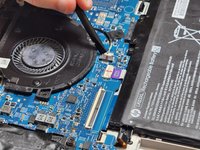
In diesem Schritt verwendetes Werkzeug:Halberd Spudger$2.99
-
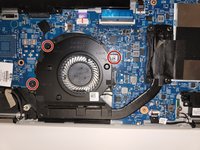
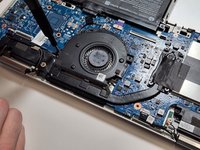
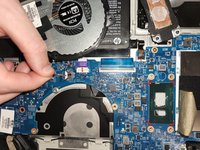
Using the halberd spudger, remove the sliding connector directly beside the fan.
-


To reassemble your device, follow these instructions in reverse order.
To reassemble your device, follow these instructions in reverse order.
Rückgängig: Ich habe diese Anleitung nicht absolviert.
Eine weitere Person hat diese Anleitung absolviert.

Team

Clemson, Team 2-2, Hunter Spring 2022 Mitglied von Clemson, Team 2-2, Hunter Spring 2022
CLEM-HUNTER-S22S2G2
5 Mitglieder
6 Anleitungen geschrieben