Einleitung
This is a fan replacement guide for the HP Envy x360 m6-w105dx. The fan is an important part in order to regulate the temperatures of components inside the laptop. If you are having problems with your device overheating, excessive noise being produced during intensive computing, or crashing with excessive heat, a fan replacement may help the issue.
In replacing the fan assembly, the heatsink will need to come up from the CPU, and the thermal paste will need to be reapplied. Refer to this thermal paste application guide for best practices on how to get your thermal paste properly installed.
Was du brauchst
-
-
Use the opening pick to lift up the eight rubber grips on the underside of the device.
-
With the #1 Phillips screwdriver, remove the twelve 6mm screws from the back case.
-
-
-
Open the laptop and turn to the keyboard.
-
Gently insert an opening pick into the edge of the keyboard panel, and slide around the keyboard lining until the clips have all been disengaged.
-
Lift the keyboard panel from the bottom and carefully start to lift up.
-
-
-
Gently lift the keyboard up from the bottom.
-
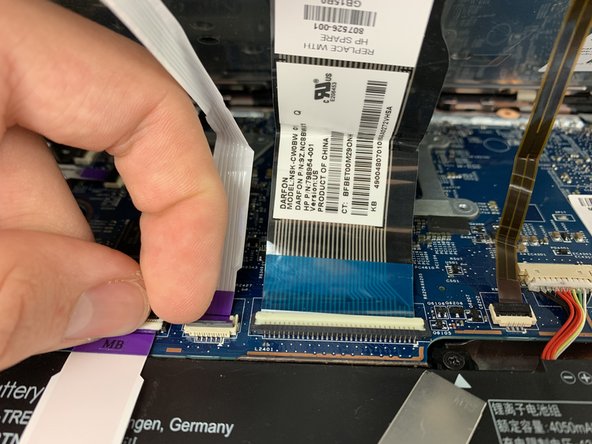
Carefully open the locking flap of the three ZIF connectors and detach the three ribbon cables from the motherboard using your fingers.
-
Fully remove the keyboard from the laptop and install your new keyboard.
-
-
-
-
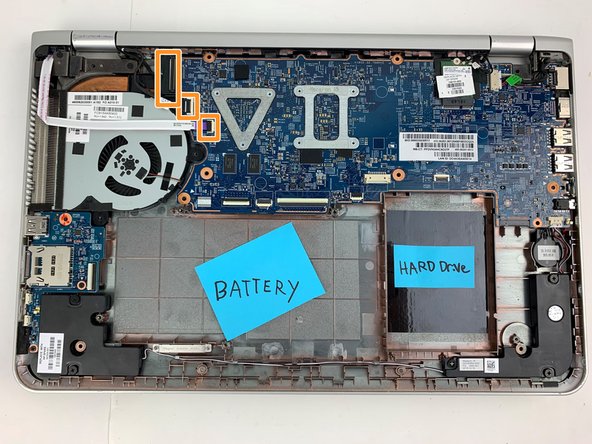
Unscrew the five 4mm screws with the #01 phillips head screw driver.
-
Gently flip open the ZIF connectors and remove the ribbon cables.
-
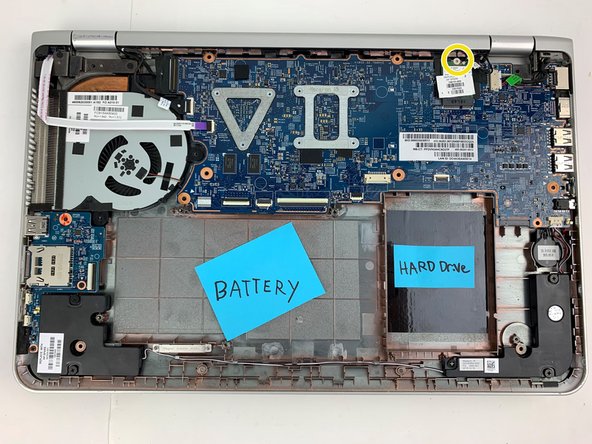
Unscrew the WLAN chip and push the chip up and out of the port.
-
-
-
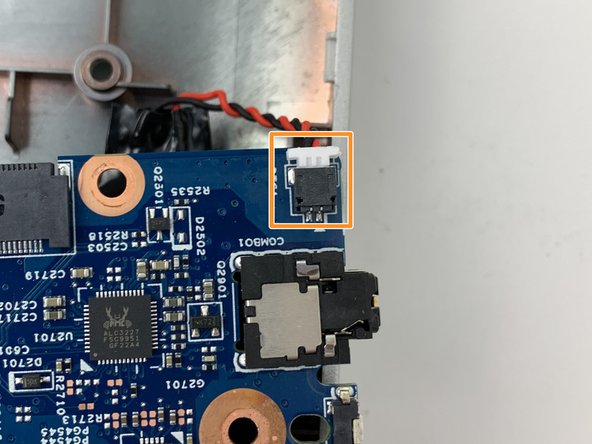
Disconnect the cable connectors for each of the speakers.
-
Lift the motherboard up and flip towards you to disconnect an additional cable connector on the rear side.
-
Remove motherboard and fan assembly from the laptop.
-
-
-
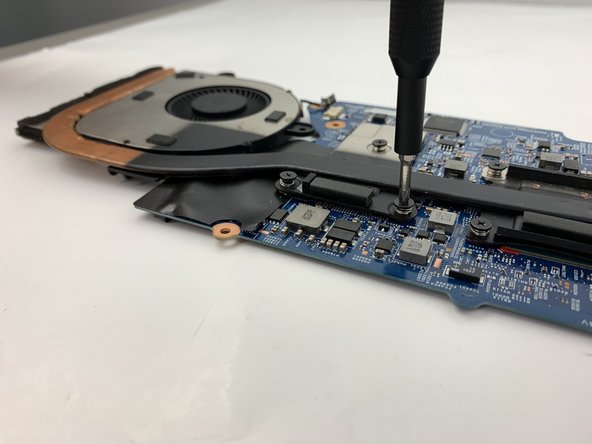
Unscrew the seven spring locked screws with the #1 Phillips screwdriver.
-
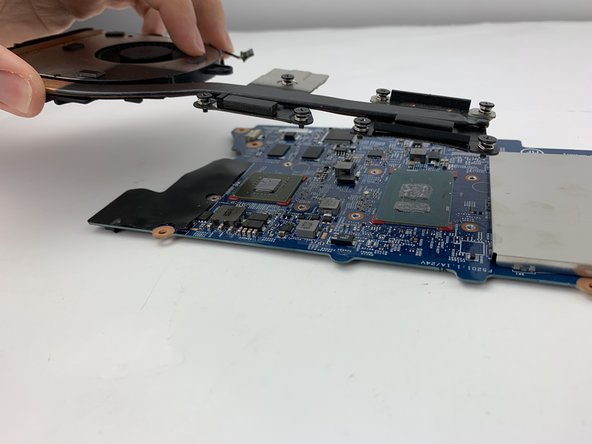
Once all screws are out, remove the fan by lifting it up from the motherboard.
-
-
-
Replace the old fan with a new fan.
-
To replace the thermal paste, follow this thermal paste application guide.
-


To reassemble your device, follow these instructions in reverse order.
To reassemble your device, follow these instructions in reverse order.
Rückgängig: Ich habe diese Anleitung nicht absolviert.
2 weitere Personen haben diese Anleitung absolviert.
Team

Embry-Riddle Aeronautical University, Team S5-G3, Watkins Spring 2020 Mitglied von Embry-Riddle Aeronautical University, Team S5-G3, Watkins Spring 2020
ERAU-WATKINS-S20S5G3
4 Mitglieder
5 Anleitungen geschrieben