Zum Hauptinhalt wechseln

HP LaserJet P1102w Left Side Panel Replacement

Was du brauchst

  1. HP LaserJet P1102w Left Side Panel Replacement, Left Side Panel: Schritt 1, Bild 1 von 3 HP LaserJet P1102w Left Side Panel Replacement, Left Side Panel: Schritt 1, Bild 2 von 3 HP LaserJet P1102w Left Side Panel Replacement, Left Side Panel: Schritt 1, Bild 3 von 3
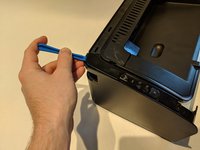
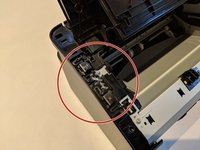
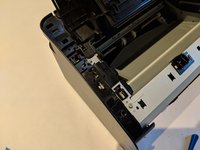
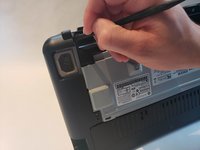
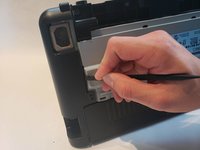
    • Flip printer on it's back. Using the plastic spudger, pry off front panel. There will be two main points to focus as shown.

    • Pry carefully to not break any plastic.

    my two main points were precisely under the rubber feet, they were surprisingly difficulty to dislodge.

    Peter Taffs - Antwort

  2. HP LaserJet P1102w Left Side Panel Replacement: Schritt 2, Bild 1 von 2 HP LaserJet P1102w Left Side Panel Replacement: Schritt 2, Bild 2 von 2
    • Now that the pry points are free lift up the front panel.

  3. HP LaserJet P1102w Left Side Panel Replacement: Schritt 3, Bild 1 von 2 HP LaserJet P1102w Left Side Panel Replacement: Schritt 3, Bild 2 von 2
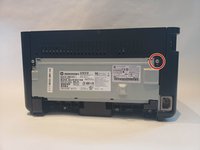
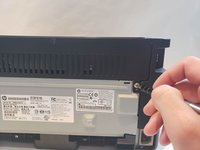
    • Unscrew the #1 Phillips screw 6mm on the back of the printer.

  4. HP LaserJet P1102w Left Side Panel Replacement: Schritt 4, Bild 1 von 3 HP LaserJet P1102w Left Side Panel Replacement: Schritt 4, Bild 2 von 3 HP LaserJet P1102w Left Side Panel Replacement: Schritt 4, Bild 3 von 3
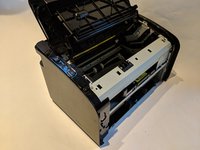
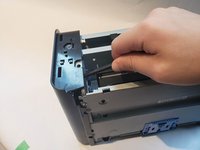
    • Using the plastic spudger, remove the button housing from the top left of printer.

    • Pry carefully to not break any plastic.

  5. HP LaserJet P1102w Left Side Panel Replacement: Schritt 5, Bild 1 von 2 HP LaserJet P1102w Left Side Panel Replacement: Schritt 5, Bild 2 von 2
    • Once the housing is removed, remove the three buttons.

  6. HP LaserJet P1102w Left Side Panel Replacement: Schritt 6, Bild 1 von 3 HP LaserJet P1102w Left Side Panel Replacement: Schritt 6, Bild 2 von 3 HP LaserJet P1102w Left Side Panel Replacement: Schritt 6, Bild 3 von 3
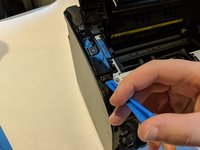
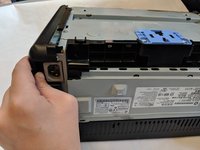
    • Use the plastic spudger to remove the side panel. There are three main prying points as shown.

    • Pry carefully to not break any plastic.

    mine had a PH2 screw on the printer back thru the side panel into the aluminum serial plate/back, placed in the 2nd and third picture in the tab with a round screw hole and square locator hole. Critical clips were center back, center top and center bottom, and two points on the front.

    Peter Taffs - Antwort

    edit, i see the screws talked about in step 3. sorry.

    Peter Taffs - Antwort

  7. HP LaserJet P1102w Left Side Panel Replacement: Schritt 7, Bild 1 von 2 HP LaserJet P1102w Left Side Panel Replacement: Schritt 7, Bild 2 von 2
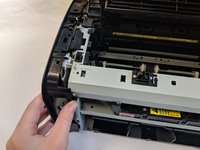
    • With all pry points free, remove the side panel.

Abschluss

To reassemble your device, follow these instructions in reverse order.

Eine weitere Person hat diese Anleitung absolviert.

Jerome Etten

Mitglied seit: 10/04/18

730 Reputation

4 Anleitungen geschrieben

Team

UW Stout, Team S6-G4, Ogden Fall 2018 Mitglied von UW Stout, Team S6-G4, Ogden Fall 2018

UWSTOUT-OGDEN-F18S6G4

4 Mitglieder

10 Anleitungen geschrieben

Ein Kommentar

How to replace the HP 2055 motherboard

Wale - Antwort

Kommentar hinzufügen

Seitenaufrufe:

Letzte 24 Stunden: 3

Letzte 7 Tage: 9

Letzte 30 Tage: 63

Insgesamt: 1,862