Einleitung
If your device is unable to hold onto a charge or power on, there may be a problem with its battery. This guide will show you how to replace the battery for the Hannspree Hannspad SN1AT71.
The battery replacement will require soldering. Soldering increases the difficulty of replacing the battery. For soldering assistance, there is a tutorial on the iFixit website.
If your battery is swollen, take appropriate precautions.
The battery can be refurbished, so don’t forget to recycle your battery.
Was du brauchst
-
-
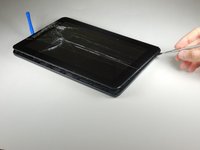
Use the metal spudger to press an opening between the screen and back cover.
-
The plastic tabs are located on each corner of the back cover.
-
-
-
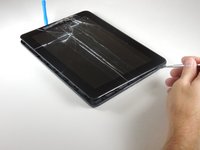
Wedge the plastic opening tool between the screen and the back panel to prevent re-engagement
-
-
-
-
Slide the metal spudger around the casing to separate it from the inside of the tablet.
-
-
-
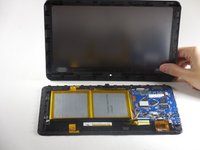
Flip the tablet over so the screen side is down after all the tabs are separated.
-
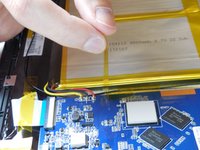
Remove the back panel by delicately lifting it straight up.
-
-
In diesem Schritt verwendetes Werkzeug:Tweezers$4.99
-
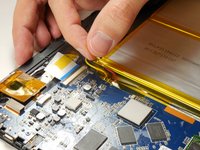
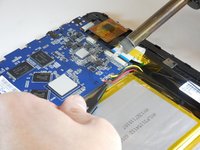
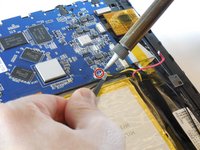
Grab hold of the red wire using the tweezers.
-
Desolder the red wire connection from the motherboard using the tip of the soldering iron.
-
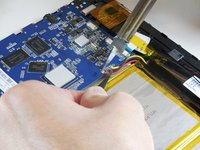
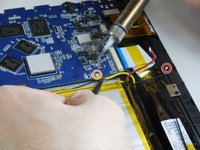
Move the wire connection away from the motherboard.
-
-
-
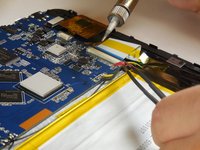
Desolder the black and yellow wire connection from the motherboard by following the previous step.
-
-
-
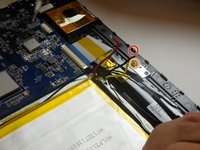
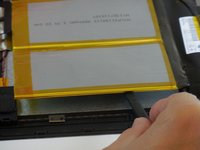
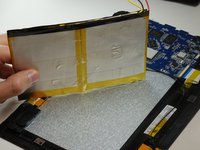
Insert the flat end of the nylon spudger between the battery and the case.
-
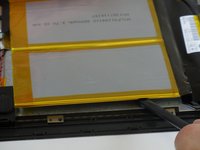
The battery is connected to the tablet with an adhesive tape and will come free slowly.
-


To reassemble your device, follow these instructions in reverse order.
To reassemble your device, follow these instructions in reverse order.
Rückgängig: Ich habe diese Anleitung nicht absolviert.
9 weitere Personen haben diese Anleitung absolviert.
Team

Colorado Springs, Team 9-4, Panko Spring 2015 Mitglied von Colorado Springs, Team 9-4, Panko Spring 2015
UCCS-PANKO-S15S9G4
3 Mitglieder
10 Anleitungen geschrieben
3 Kommentare
Easy to follow,but, can't find a battery anywhere, so really No use
Matthew,
Great job!!
I followed your instructions and no problem
Thanks
Me Eisenhut