Zum Hauptinhalt wechseln

Insignia Flex 11.6 Speakers Replacement

Was du brauchst

  1. Insignia Flex 11.6 Speakers Replacement, Power Removal: Schritt 1, Bild 1 von 3 Insignia Flex 11.6 Speakers Replacement, Power Removal: Schritt 1, Bild 2 von 3 Insignia Flex 11.6 Speakers Replacement, Power Removal: Schritt 1, Bild 3 von 3
    • Before working on the device, make sure the device is off and not plugged into any power source for safety reasons. Failure to comply could result in injury.

    • Place the device on a firm surface with the device screen facing down.

  2. Insignia Flex 11.6 Speakers Replacement: Schritt 2, Bild 1 von 2 Insignia Flex 11.6 Speakers Replacement: Schritt 2, Bild 2 von 2
  3. Insignia Flex 11.6 Speakers Replacement: Schritt 3, Bild 1 von 3 Insignia Flex 11.6 Speakers Replacement: Schritt 3, Bild 2 von 3 Insignia Flex 11.6 Speakers Replacement: Schritt 3, Bild 3 von 3
    In diesem Schritt verwendetes Werkzeug:
    Plastic Cards
    $2.99
    Kaufen
    • Using a plastic tool and the plastic card, gently pry off the back cover.

  4. Insignia Flex 11.6 Speakers Replacement: Schritt 4, Bild 1 von 3 Insignia Flex 11.6 Speakers Replacement: Schritt 4, Bild 2 von 3 Insignia Flex 11.6 Speakers Replacement: Schritt 4, Bild 3 von 3
    • Using tweezers, remove the electrical connector that connects to the battery to remove the power to the battery.

  5. Insignia Flex 11.6 Speakers Replacement, Speakers: Schritt 5, Bild 1 von 1
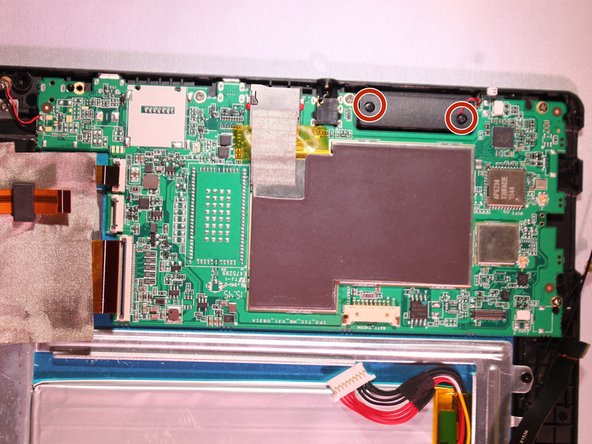
    • Remove 2 electrical connectors that connects to the speaker using flat tweezers.

  6. Insignia Flex 11.6 Speakers Replacement: Schritt 6, Bild 1 von 2 Insignia Flex 11.6 Speakers Replacement: Schritt 6, Bild 2 von 2
    • Remove 2 - 6 mm J000 Phillips screws from each of the speakers.

    • Speakers will pop out at this point.

Abschluss

To reassemble your device, follow these instructions in reverse order.

0 Kommentare

Kommentar hinzufügen

Seitenaufrufe:

Letzte 24 Stunden: 0

Letzte 7 Tage: 1

Letzte 30 Tage: 2

Insgesamt: 512