Einleitung
Diese Anleitung gibt dir all die Informationen, die du benötigst, um den Intel NUC5i7RYH oder Ähnliches auseinanderzunehmen.
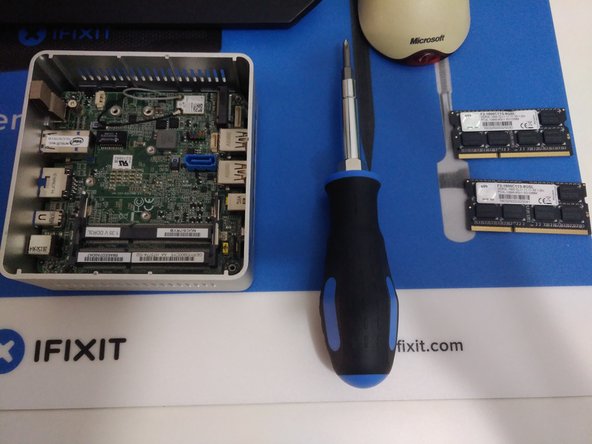
Was du brauchst
-
-
Platziere den NUC kopfüber und beginne, mit einem Kreuzschlitzschraubendreher die unteren Schrauben an der unteren Gehäusetür zu entfernen.
-
Diese Schrauben sitzen in einer Halterung, also werden sie nicht herausfallen, wenn du den Deckel öffnest.
-
-
-
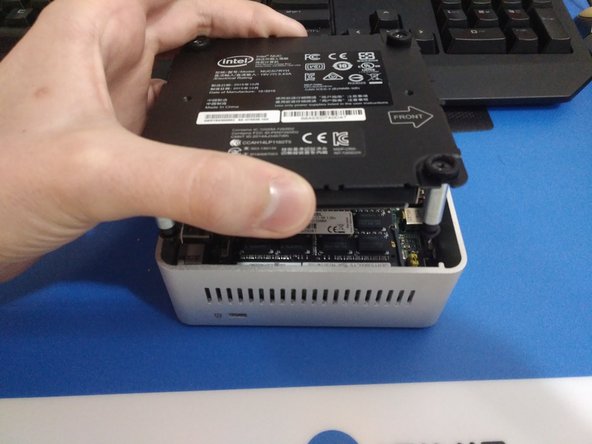
Hebe die Gehäusetür an, beachte die Kabel, welche mit dem Motherboard verbunden sind. Das ist das Stromkabel sowie das Datenkabel der 2,5" Festplatte, welche auf der Gehäusetür verbaut ist.
-
Ziehe vorsichtig die Kabel vom Motherboard ab und lege die Gehäusetür beiseite.
-
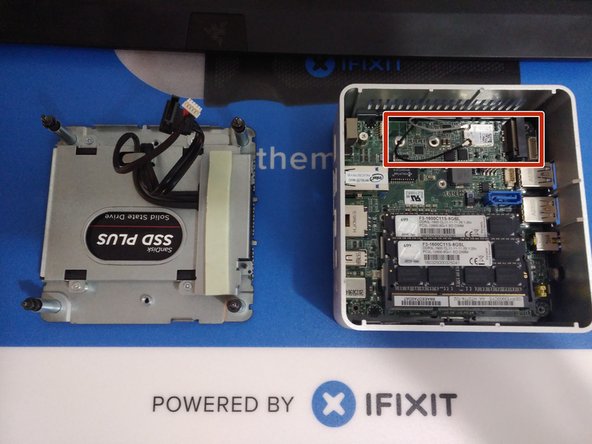
Im letzten Foto ist der Slot für eine Blade SSD markiert. Hier würdest du eine Blade SSD installieren (Verschraubt mit einer einzelnen Schraube).
-
-
-
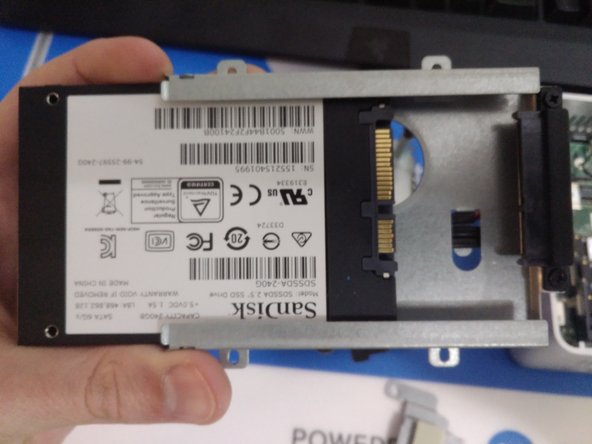
Entferne die vier silbernen Schrauben, welche die HDD in der Halterung fixieren. Die Metallabschirmung mit dem Wärmeleitstreifen wird sich lösen (Dieser wird bei der Installation einer Blade-SSD benötigt, da er die SSD schützt).
-
Schiebe vorsichtig die 2,5" Festplatte aus der Halterung.
-
-
-
-
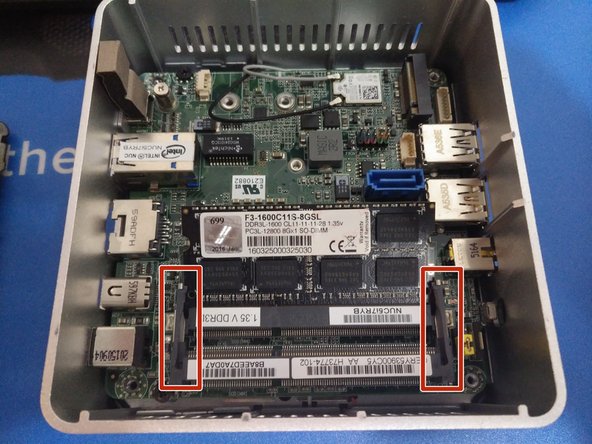
Der Ausbau des RAM erfolgt wie an einem Standard-Laptop: Biege vorsichtig die beiden Halterungs-Arme nach außen bis der RAM hochspringt und ziehe ihn anschließend vorsichtig aus dem Sockel.
-
Wenn zwei RAM-Riegel verwendet werden, wiederhole einfach obigen Schritt für den darunter liegenden Riegel.
-
-
-
Das Motherboard ist links mit zwei schwarzen Kreuzschlitzschrauben befestigt.
-
Stelle sicher, dass du die Antennenkabel der W-Lan-Karte absteckst, bevor du das Mainboard entfernst.
-
Greife das Motherboard am Ethernet-Port und hebe es aus dem Gehäuse.
I’m trying to disassemble an NUC 54250WYKH (released 2013), due to a now hopelessly broken fan. Removing the mother board has been proven to be very hard.I’m suspecting that it is just “stuck” to the top or that the headphone jack/IR receiver part is stuck.
After removing the two screws above: is it just a matter of applying a bit of force?
Hi Linus,
The motherboard in my NUC lifts out without much force at all, so try and make sure none of the connectors are catching on the case.
Does it budge at all? There’s a chance the I/O ports are catching on the case of the NUC when lifting the motherboard up.
After trying to brute force the Motherboard out, i tried to remove the black plastic cover for the jackstick. You have to press the plastic from inside and out. There is a “holder" you need to press from its metalframe. After i got the cover out, I could see the jackstick that was behind the cover, was sticking further out the metal case, therefore holding the motherboard., As it got stuck on the metal frame.
Then getting it out from the opposite side (LAN and power side) was easy.
This was in the D54250wykh.
Sadly I cannot add pictures of it in this comment.
-
-
-
Die Hauptplatine sollte sich direkt aus dem Gehäuse heben lassen.
-
Um den Lüfter zu entfernen, schraube die beiden Kreuzschlitzschrauben ab, mit denen er befestigt ist. Er kann dann von der Hauptplatine abgezogen werden.
Thank you for this tutorial - it was lifesaver for us.
Our NUC was overheating and after we disassembled motherboard and cleaned tons of dust in fan NUC is working propery again.
Thans a lot :)
BR, Alan
-
-
-
Der NUC ist recht einfach zum Auseinandernehmen und wieder Zusammenzubauen. Viel Glück!
The case is a tight fit. It's easiest if you put the front side all the way down and in place and push down on the top of the ethernet port to reseat the motherboard.
-


Um dein Gerät wieder zusammenzubauen, folge der Anleitung in umgekehrter Reihenfolge.
Um dein Gerät wieder zusammenzubauen, folge der Anleitung in umgekehrter Reihenfolge.
Rückgängig: Ich habe diese Anleitung nicht absolviert.
20 weitere Nutzer:innen haben diese Anleitung absolviert.
Besonderer Dank geht an diese Übersetzer:innen:
100%


Diese Übersetzer:innen helfen uns, die Welt zu reparieren! Wie kann ich mithelfen?
Hier starten ›

15 Kommentare
Congrats! Thanks for letting me know, and I’m glad to hear your machine is running cooler!
hello. I need a replacement audio jack (port) for this nuc, model 5i5ryh, can’t find it anywhere, any suggestions?
You can try looking on eBay for replacement audio jacks. From what I’m seeing, you could potentially use a universal one and solder a few jumper wires to their corresponding pins and make something work.
Generally, no. The CPUs in these are BGA soldered to the board. If you were very crafty with a reflow station and had a replacement CPU that you knew was compatible with the motherboard, you could attempt it. But generally, it’s recommended that you just get a new machine.
Oh ok thanks for kind answer! Then, can I place Radeon 550 on NUC, or any graphic card? If yes can you please tell me the steps? I’m planning to buy NUC8i5BEK and I want to make it as gaming PC. So I would like to place the Radeon Graphic car…
Addition, I found that there is way to connect VGA with 16x-1x connector, but is there any way to connect 1x in intel nuc?
Great description, I have used it on NUC5i5RYH.
I have cleaned fan and after dust is gone NUC is working perfectly again.
Thanks
I have a 5i7 that’s 4 years old now. Bought it in 2016 as a barebones from an Ebay buyer who didn’t like it because it ran too hot. He said he had it for 3 months- they were a fairly new model at the time. The 5i7’s do run warm when heavily tasked- the thing is that you CAN push these things. I’m not quite sure where he used this thing- I suspect it was in an area with lots of pets and lots of cigarette smoke. I went ahead and cleaned it out and it runs fine.
This is a pretty heavy duty processor stuffed into a small case with small heat sink cooling passages.. not really any worse than any i7 notebook out there. However it’s really easy to disassemble, so I make it a point to take it apart and clean the fan and the heat sink passages about every 4 months. I also changed the fan about a years ago as it was starting to get noisy.
Along with a Mac Mini, I still use it daily, running Windows 7 Ultimate, 2.5 Intel SSD and 16Gb of ram. Still a great little machine. I’ll be moving to Ubuntu on it soon.
Used this guide to disassemble and clean my 5 year old NUC6i5SYH. As a result the CPU temperature dropped by 30 degrees, excellent!
Glad to hear it helped you out!
Hey! Any recommendations on where to find a replacement for the thermal pad on the hard drive enclosure? I'm having a hard time finding the correct thickness.
Thanks!