Einleitung
Wenn das Drainageventil nicht mehr richtig funktioniert kann Wasser in die Tropfschale statt die Brühkammer gelangen, der Kaffe wird dünn. Du musst es reinigen und die Dichtungen austauschen, dies wird hier gezeigt.
-
-
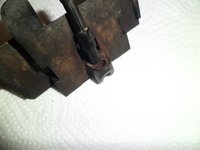
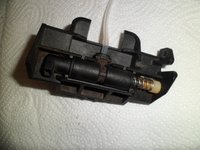
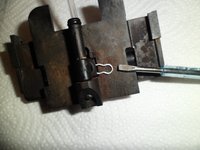
Wenn viel Wasser in die Abtropfschale ist entweder ist einer der Kolbendichtringe defekt oder Dichtungen am Drainageventil. Eine davon ist im ersten Foto weiß markiert. Sie befindet sich am Andockstutzen des Ventils zum Brühkolben ist deswegen stark beansprucht. Entferne zuerst die Klammer auf die der Schraubendreher zeigt.
-
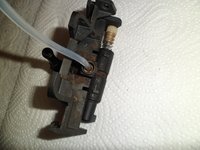
In der Anleitung zeige ich ein gereinigtes Drainageventil. Meistens findest du es stark mit Kaffeemehl verschmutzt und verfettet. Reinige es gut mit Hilfe von Küchenpapier, Zahnstochern und Spülmittel.
-
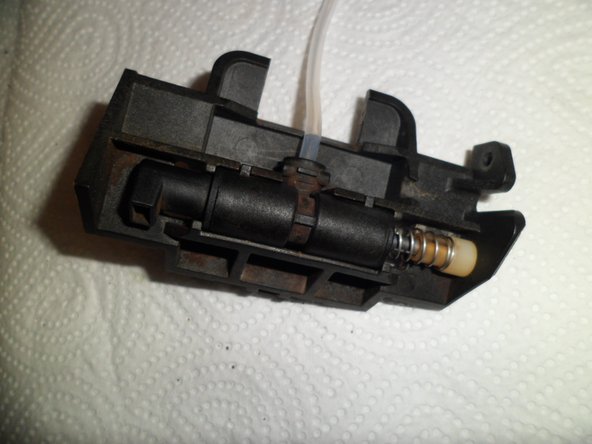
An der schwarzen Ventilkammer befindet sich ein Metallstempel mit einer Feder und einer weißen Abdeckkappe. Drücke diese nach innen und hebele die ganze Kammer mit dem Schraubendreher heraus. Dies geht oft schwer, weil viel Schmutz daran klebt.
-
Die Feder kann beim Ausbau herausspringen, halte sie deswegen gut fest. Dann lässt sich alles gut zerlegen.
-
-
-
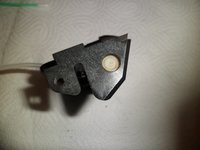
Hier kannst du schön sehen, wie der Andockstutzen in den Kolben eingreift. Da dies bei jedem Brühvorgang passiert ist der Dichtring stark beansprucht.
-
-
-
-
Hier sind alle Teile des Ventils zu sehen. Zwei elastische Dichtungen sind im Innern der T-förmigen Ventilkammer zum Abdichten des Ventilstößels.
-
Es handelt sich um Lippendichtungen. Sie sind auch stark beansprucht, verhärten und werden undicht. Tausche sie gegen neue! Achte darauf dass die Lippen jeweils in das Ventilinnere zeigen, die flache Seite ist außen. Alle Plastikteile selbst sind mit Nuten versehen, so dass sie nur in einer Position zusammengebaut werden können, achte darauf!
-
Auch der Wasserzulauf ist mit einer Klammer gesichert, du kannst sie abziehen, reinigen und die Dichtung erneuern.
-
Beim Zusammenbau solltest du die Dichtungen mit lebensmittelechtem Silikonfett schmieren.
-
-
-
Reinige die Dichtungen, besser noch tausche sie aus. Schmiere sie mit lebensmittelechtem Silikonfett.
-
Beginne den Wiederzusammenbau mit dem Andockstutzen. Vergiss nicht die Dichtringe an beiden Enden.
-
Im zweiten und dritten Bild siehst du die montierte Ventilkammer. Drücke auf die weiße Kappe und presse so die Feder zusammen, schiebe die Ventilkammer in die Aufnahme hinein, wobei die Nuten genau passen müssen. (meine Bilder sind leider nicht so gut)
-
-
-
Im ersten Bild siehts du die ganze montierte Einheit von rechts. Die weiße Kappe muss genau in das Loch passen, sonst schließt das Ventil nicht richtig.
-
Prüfe ob sich der Stempel eindrücken lässt und leicht bewegt.
-
Schiebe die Sicherungsfedern wieder ein.
-
Und jetzt kannst du die Brühgruppe fertig montieren.
-
-
-
Es gibt auch noch eine zweite Anleitung für das Drainageventil, dort sind die Fotos besser.
-


Um dein Gerät wieder zusammen zu setzen folge den Schritten in umgekehrter Reihenfolge.
Um dein Gerät wieder zusammen zu setzen folge den Schritten in umgekehrter Reihenfolge.
Rückgängig: Ich habe diese Anleitung nicht absolviert.
6 weitere Personen haben diese Anleitung absolviert.
Besonderer Dank geht an diese Übersetzer:innen:
100%
VauWeh hilft uns, die Welt in Ordnung zu bringen! Wie kann ich mithelfen?
Hier starten ›

9 Kommentare
Jura ENA 5 Drain valve is similar but I have a problem where water and steam leaks from the nipple after the rinse has been completed. It seems like there is pressure build up and the valve cannot hold. I have 2x ENA 5 machines. I have tried 2 different drain valve assemblies and both leak on one faulty machine. Could this be related to the PCB? If I don’t turn off the power quickly when the steam leak starts, the overheat fuse will break on the water block and cause Error 1.
It seems the water heater block can not control the heat and causes the drain valve to leak steam. I have error 1 (from water block overheat). I replaced the fuse and again steam comes out the drain valve. How to test the PCB to confirm?
See Jura ENA micro 9 Drainageventil revidieren (in german) , the long pin with the plastic cap in the drainage valve is opened by a motor. Maybe it's broken?
VauWeh -
Upon reassembly, I go and turn on the unit and it goes through the initialization without issue moving up an down the unit. It then asks rotary button to pushed to rinse machine. Upon doing so, it goes through the process but everything is going to the drain tray. If I then choose an espresso, it goes through but brews to the drain tray.
I have checked the drain stepper motor and is functioning properly. I have tried manually pushing the drain valve during the process and still goes directly to the drain. I have disassembled the brew group again to ensure I put back together properly and in the right way. I have done similarly to the drain valve assembly. I blow through all hoses without issue when valve is open. It makes hot water without an issue out the steam valve. The water is moving and I don't believe there are any blockages or hose or o-ring issues.
Please help if you have an idea. Thanks...
@melon18057 My answer could not help?
VauWeh -
I am going to try and change back to my old gaskets and orings... Maybe not good seal?... I blow through the valve while it is open and closed position... Although it has some resistance. I wish Jura didn't charge so much in Toronto to look at the machine.
melon -