Einleitung
If your second-generation Kindle screen is cracked, not responding to touch, or has a malfunctioning display, it may be time to replace it. Replace the screen on your Kindle 2 with this installation guide.
Kindle (2nd Gen) LCD displays can be purchased on eBay, AliExpress, Amazon, etc.
Was du brauchst
-
-
Lay the Kindle face down on a soft cloth to protect its screen.
-
Wedge the plastic opening tool in the small opening between the grey plastic and the metal casing.
-
Move the plastic opening tool across the opening while pressing down to separate the grey plastic from the metal casing.
-
Slide the gray plastic top piece away from the Kindle's metal casing.
-
Once the gray plastic top piece is detached from the metal back cover, remove it.
-
-
-
Use a Phillips #00 screwdriver to remove the two 4 mm screws from the metal casing.
-
-
-
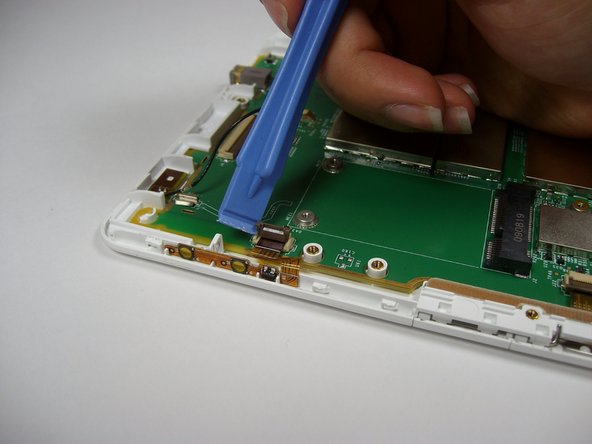
Use the plastic opening tool to push down and pry towards the metal casing to release each of the three clips that hold the metal case in place.
-
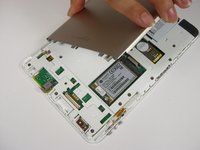
Remove the metal casing.
-
-
-
Use a Phillips #00 screwdriver to remove the two 3 mm screws that hold the battery in place.
-
-
-
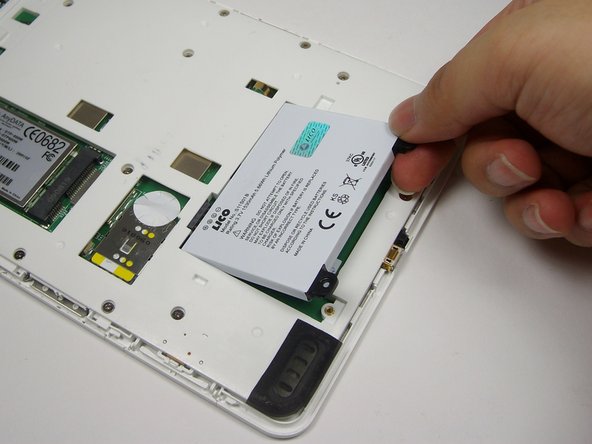
Pry upward under the black tab with the spudger to dislodge the battery.
-
Use your fingers to lift the battery out of the device.
-
-
-
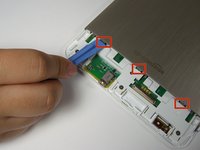
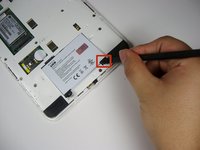
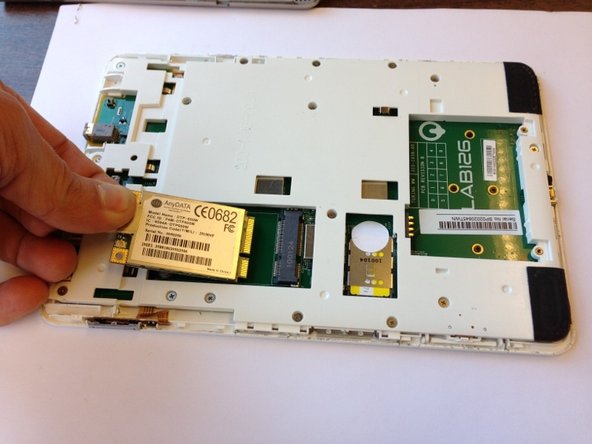
Use a Phillips #00 screwdriver to remove the two 2mm screws from the wireless card.
-
-
-
-
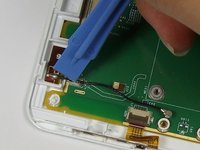
Use the plastic opening tool to wedge underneath the connection and gently pop off the wire cap.
STEP 7.5 Remove Plastic Protector. There are 16 2.5mm screws keeping it in place. Remove them and the protector will come off easily. I used this guide a few months ago and it had a step here explaining this that now seems to be missing.
-
-
-
Use your fingers to lift the left end of the wireless card.
-
Pull the card out of the slot.
-
-
-
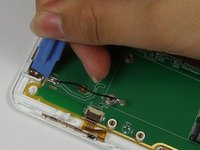
Use the plastic opening tool to push each side of the crimp away from each other. This will open the crimp holding the wire.
-
Use your fingers to lift the wire out of the crimp when there is enough separation between the sides of the crimp.
-
-
In diesem Schritt verwendetes Werkzeug:Tweezers$4.99
-
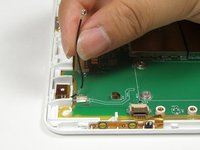
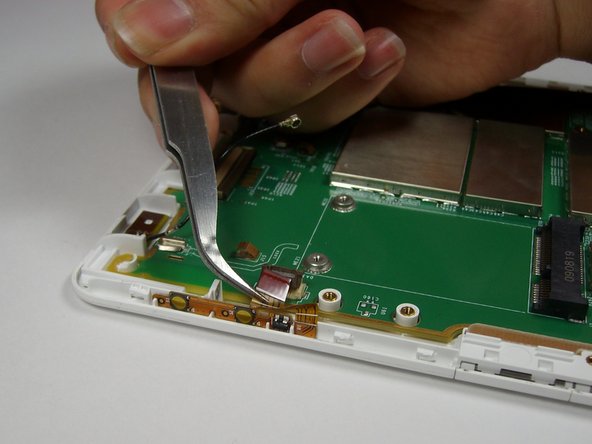
Wedge the opening tool underneath the plastic ribbon and gently pull up to lift the brown connector flap.
-
Squeeze the plastic ribbon gently with the tweezers and pull away from the connector to remove it.
-
-
-
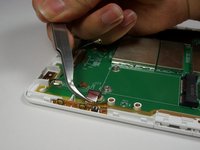
Locate the next brown connector three inches to the right of the previous connector and repeat Step 10 to remove the plastic ribbon.
-
-
-
Rotate the device 180 degrees and locate a smaller brown connector on the left side of the device.
-
Repeat Step 10.
-
-
-
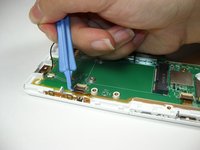
Push your finger down on the last plastic ribbon.
-
Slide your finger away from the connector to remove the last ribbon.
This cable's connector also has a hinge that must be opened to put the cable back in properly.
You don't have to remove this connector to look at the keyboard. Remove it only if you are looking to replace screen.
Also the black connector can be popped open like the other brown ones, before you pull out the connector cable.
-
-
-
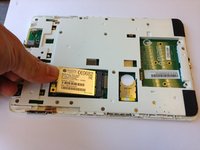
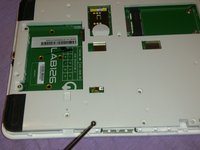
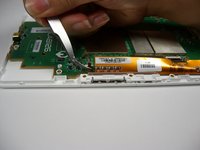
Use a Phillips #00 screwdriver to remove the four 4 mm screws from the motherboard located around the LAB126 logo.
-
-
-
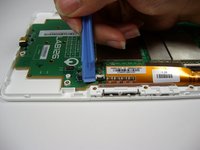
Grab the bottom corner of the motherboard and safely remove it from the Kindle.
-
-
-
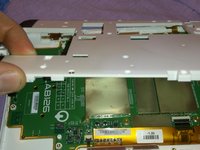
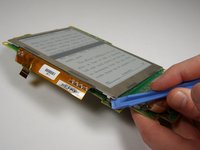
Flip the motherboard over so the screen is facing up.
-
Using your fingers, gently pull off the plastic header bar located at the top of the screen attached to the motherboard.
-
-
-
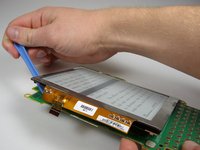
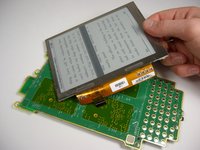
Pry underneath all four sides of the device with the plastic opening tool to remove the screen from the motherboard.
Note that around the 2 top corners of the e-ink screen, there are 2x metal tabs along both edges along the e-ink frame that penetrate the motherboard. The bottom 2 corners each only have 1 metal tab along the vertical edge. Beyond that, a spudger can be used along the perimeter to pry the e-ink screen from the motherboard. (If you purchased a replacement e-ink screen, take a look at the backside to see where the tabs are located. OR if you look at the backside of the motherboard, you can see the small slots where the metal tabs poke thru.)
-


To reassemble your device, follow these instructions in reverse order.
To reassemble your device, follow these instructions in reverse order.
Rückgängig: Ich habe diese Anleitung nicht absolviert.
25 weitere Personen haben diese Anleitung absolviert.
Team

Cal Poly, Team 12-32, Amido Spring 2013 Mitglied von Cal Poly, Team 12-32, Amido Spring 2013
CPSU-AMIDO-S13S12G32
4 Mitglieder
14 Anleitungen geschrieben
7 Kommentare
Great guide!
My replacement screen came with a spudger like the one shown, but it was pretty mangled by the time I got the back off. I had much better luck with another spudger shaped like a guitar pick.
Yeah, the step to remove the inner plastic protector is missing. It is pretty obvious that it needs to happen, but it would be good to include in the guide.
The ribbon for the screen needs to be pushed in further than the other ribbons, and took a bit of wiggling. FYI for others attempting this!
I followed this guide, but the screen is still on the "Amazon Kindle" screen that was on the replacement when it came in the mail. I opened it to ensure the ribbons are all in place. It's fully charged (green light) and the computer can see it as a hard drive. Calibre can also see all the books are still in place. Any ideas what connection I need to recheck to get the replacement screen working? I'd love to get my old Kindle 2 back in business!
Answering my own question in case it helps anyone. It turns out the ribbon for the screen (the last one removed in Step 14) wasn't far enough in the connector. I was trying it with the line about even with the "39" on the board, which wasn't far enough. After the eBay seller kindly gave me some tips, I was able to manhandle the ribbon closer to the connector, and now the screen works great!
In order to be pre-prepared, (I'm pretty sure the double-sided tape holding the screen to the motherboard will need replacement after years of service) is the tape of the fairly thick foam variety or the much thinner plastic ribbon style?
Are replacement screens still available for purchase?
Great guide. Look at the comments at step 14. If anyone is interested, If anyione is still interesed, in March 2017 I bought a replacement screen for US$15 here: https://www.aliexpress.com/item/Free-too...
I had a heck of time using the spudger. I have found that grabbing the corners and using my thumbs to push the plastic away worked like a champ.
teamhudson - Antwort
Thanks for this tip, was successful using the thumb method :)
Rosie A. -
to help get enough grip with my thumbs, I used a piece of old yoga mat to increase friction between thumbs and the top plastic piece
Rosie A. -
For anyone still looking for this in 2020, see my comment here for how to properly remove the back.
Kindle 2 Teardown
Dave76 - Antwort