Einleitung
Overtime, dust and other dirt particles may accumulate in your phone, especially the charging port. If the charging port in your device accumulates too much dust or dirt, your phone may fail to charge.
This guide shows how to replace the charge port of the LG Phoenix 2, model LG-K371. A charge port replacement may be necessary if the phone is not able to charge, if it stops charging when the charge cable is moved, or if the charge port is otherwise damaged.
Was du brauchst
-
-
Place a fingernail in the notch at the bottom edge of the phone.
-
Pull on the back cover with one hand while keeping the rest of the phone steady, and run your fingernail along the edge.
-
-
-
Place a fingernail in the notch at the bottom edge of the battery.
-
Pull the battery out.
-
-
-
Remove all nine of the 3.0mm screws on the back of the phone using a Phillips #0 screwdriver, including the one attaching the camera lens.
-
-
-
-
With the plastic opening tool, pry between the screen and the outer chrome edge to remove the bottom shield from the rest of the phone.
-
-
-
With a plastic opening tool, disconnect all three ribbon connectors from the motherboard: one for the front camera, one for the rear camera, and one for the screen.
-
-
-
Using a plastic opening tool, separate the motherboard from the back frame and remove it from the device.
-
-
-
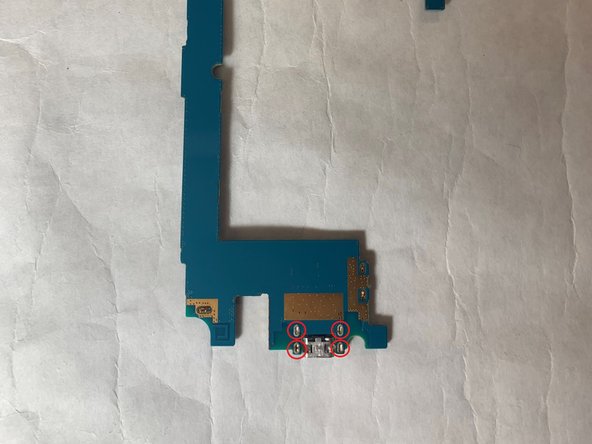
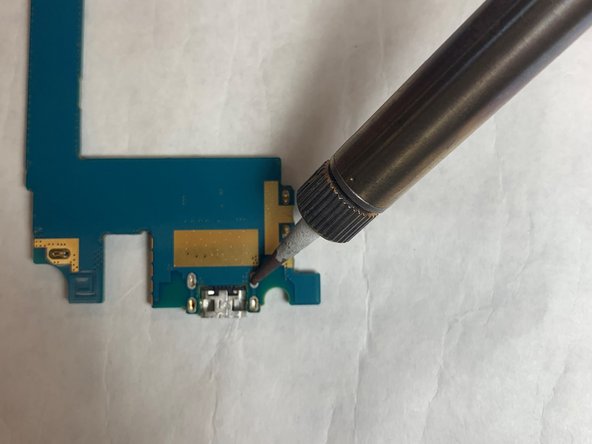
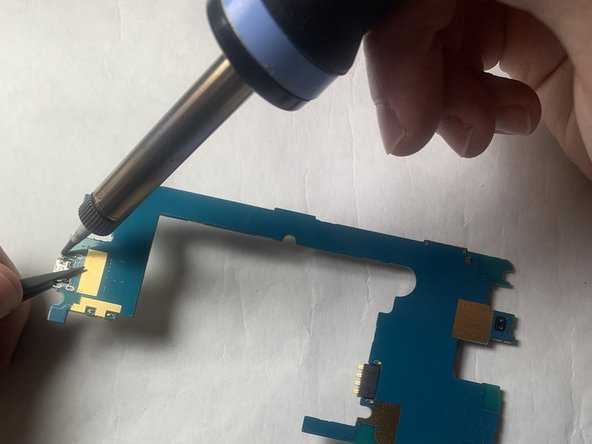
Desolder the USB port from the motherboard.
-
For more instructions on soldering an desoldering connections, please read the How to Solder and Desolder Connections guide.
-


To reassemble your device, follow these instructions in reverse order.
To reassemble your device, follow these instructions in reverse order.
Rückgängig: Ich habe diese Anleitung nicht absolviert.
3 weitere Nutzer:innen haben diese Anleitung absolviert.
Team

IUPUI, Team S1-G1, Harley Fall 2019 Mitglied von IUPUI, Team S1-G1, Harley Fall 2019
IUPUI-HARLEY-F19S1G1
3 Mitglieder
4 Anleitungen geschrieben