Einleitung
This guide provides steps for replacing the home button in the LeapFrog LeapPad Ultra XDi (model number 33300).
The home button allows you to return to the home screen from apps and other pages on the device. When this part is not working properly you will not be able to return to the home screen using this button or may experience delays. You should first try the home button troubleshooting guide before replacing the entire home button. A new home button is also required for this guide.
Before beginning, make sure to power down the device completely and disconnect it from any power source.
Was du brauchst
-
-
Orient the tablet so it’s laying screen down and the barcode sticker is facing up.
-
Remove the barcode sticker to expose the two screws.
-
-
-
Using the iFixit opening tool, pry off the purple and white child-proof casing to expose the twelve screws.
-
-
-
-
Remove all twelve 7mm Phillips #1 screws located along the edges of the device.
-
-
-
Using your fingers, grab the battery wires and carefully unplug them from the motherboard.
-
Use the Spudger to remove the glued down battery.
-
-
-
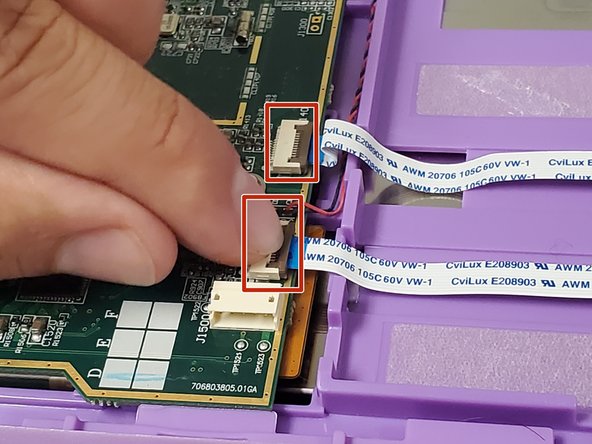
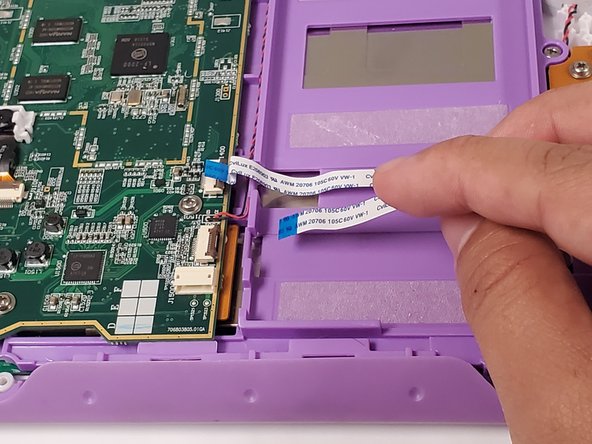
Locate the three ribbon cables on top of the motherboard.
-
Flip up the locking clip on the ribbon cable connector to release the cable.
-
Disconnect the cables from their connectors.
-
-
-
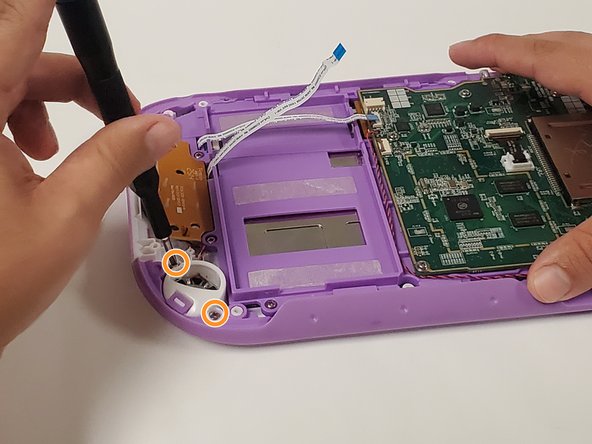
Unscrew the four 5mm Phillips #1 screws.
-
Unscrew the two 5mm Phillips #1 screws.
-
Lift the home button circuit board up. Replace the home button circuit board.
-


To reassemble your device, follow these instructions in reverse order.
To reassemble your device, follow these instructions in reverse order.

Team

University of North Texas, Team S1-G4, Friess Fall 2019 Mitglied von University of North Texas, Team S1-G4, Friess Fall 2019
UNT-FRIESS-F19S1G4
3 Mitglieder
5 Anleitungen geschrieben