Einleitung
This repair guide is to remove, clean, and replace the cooling fan system on the Lenovo ThinkPad X1 Yoga (Model Number: 20FQ005YUS). The cooling system is very important to keep the computer functioning smoothly. If your computer is running slowly, overheating, or the fan is loud, it is time to clean or change the cooling fan system.
After Step 4, you will need to reapply thermal paste. Please refer to this guide on how to do that.
Was du brauchst
-
-
Flip the computer over so the bottom is facing up.
-
Remove nine 4mm Phillips #1 screws from the bottom of the computer.
-
Use an iFixit opening tool to pry the back cover off of the laptop.
-
-
-
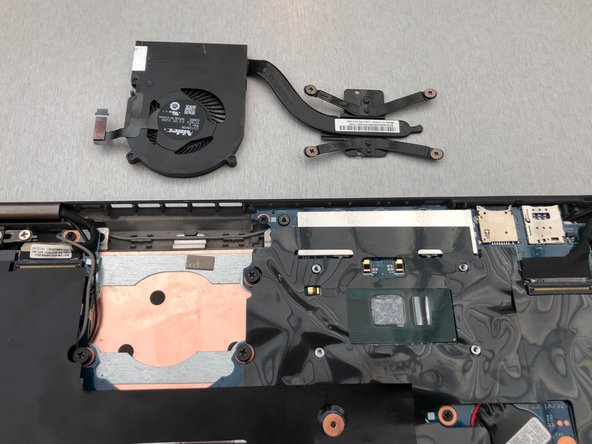
Remove four 4.5mm Phillips #1 screws from the corners of the heat sink.
-
-
-
-
Gently peel back the black plastic covering around the fan.
-
Using an iFixit opening tool, flip up the small black cover of the fan plug.
-
-
-
Using tweezers, pull the plastic strip out.
-


To reassemble your device, follow these instructions in reverse order.
To reassemble your device, follow these instructions in reverse order.
Rückgängig: Ich habe diese Anleitung nicht absolviert.
2 weitere Personen haben diese Anleitung absolviert.
Team

Embry-Riddle Aeronautical University, Team S22-G6, Branham Fall 2019 Mitglied von Embry-Riddle Aeronautical University, Team S22-G6, Branham Fall 2019
ERAU-BRANHAM-F19S22G6
3 Mitglieder
23 Anleitungen geschrieben