Was du brauchst
-
-
Docking via 3 pcs. connectors sliding sideways into the laptop.
-
Power connector used is the square type.
-
Keep track of where the screws are located, because there are many.
-
Be careful on disassembly. The dock is partly mechanical, and it relies on springs and flexing of mechanical parts to function.
-
-
-
Check if the firmware is updated. In this case, the repair may not be needed. The dock needs to be powered and laptop docked when running the update tool.
-
-
-
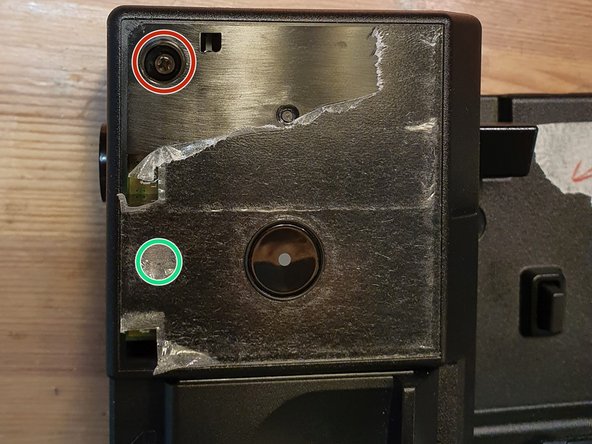
Remove the 5 screws circled in red from the side of the dock.
The two hex heads by the VGA connector do not have to be removed at this point. It's much easier to get a nutdriver on them after the plastic cover is removed, you just have to lift that section of the plastic cover over the hex heads when removing the plastic cover.
-
-
-
-
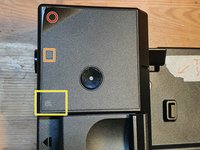
Use plastic picks or a metal spudger to pry off the top left corner of the shown cover. Remove the hidden screw.
-
Lock engaged (LED on). The switch is located inside the button assembly.(when the slider is moved right).
-
Laptop connected/detected: LED on.
-
Screw for removing the key-lock. No need for removal if the whole button assembly is to be removed together.
-
-
-
Pry off the bezel around the key-lock. Remove the screw that connects the button assembly and the bottom assembly.
Removing the bezel is quite the challenge, the 3 tabs holding the bezel to the plastic button cover are strong. I got it off without breaking any of the tabs, but I put several mars on the button cover in the process.
-
-
-
Use plastic picks or a metal spudger to pry off the top covers of the two screws on the top side.
-
-
-
Button assembly separated. The docking connectors are visible.
-
-
-
PCB top side
-
Red boxes : Dual Synchronous, Step-Down Controller with 5-V and 3.3-V LDOs. Texas instruments: TPS51225
-
Left step down produce 5V
-
Right step down: produce 3V3 and 5V
-
There are three Eeprom on board : winbond: 25x10CLNIG , 8 pin, U4 and U10 (1M-bit SPI)
-
VLI marked IC: Via labs Usb port controllers VL820. https://www.via-labs.com/product_show.ph...
-
Synaptics VMM5322.Have features for HDMI and 2xDisplay port out.
-
-
-
PCB bottom side
-
Red boxes : usb-c controller ICs. Via Labs inc, : VP225 - USB Type-C DFP CC Controller
-
Blue box: 2 pcs. cypress CYP3123 USB type C port controller. https://www.cypress.com/part/cypd3123-40...
-
Red arows: 20V path to the laptop usb-c charge power.
-


To reassemble your device, follow these instructions in reverse order.
To reassemble your device, follow these instructions in reverse order.
Rückgängig: Ich habe diese Anleitung nicht absolviert.
5 weitere Personen haben diese Anleitung absolviert.

3 Kommentare
Não estou conseguindo atualizar o firmware pois nao reconhece o audio USB
ThinkPad Ultra Docking Station FW Utility v3.3.4
Package including (Audio:0012,USB Hub:5033/5034,DP Hub:5.06.001,PD Control:D5.0.10.16)
========================================================================================
Date:08/26/2024
Time:18:17:2.349
Checking current Dock FW version.
USB Audio: N/A
USB Audio can't be detected.
Return Code:-10
Hello all, I am desperately looking for the firmware version 3.3.1 and after hours and hours of research I cannot find it.
I found the version 3.0 and the version 3.3.4 but not the version 3.3.1.
If please someone has this version and could send me a link of it....
EDIT of PREVIOUS POST :
Hello all,
I am desperately looking for the firmware versions 3.3.1 and 3.3.3 and after hours and hours of research I cannot find them. I found the versions 3.0 and the version 3.3.4 but not the versions 3.3.1 and 3.3.3.
I am researching them in order to perform successive updates until the 3.3.4 (the update always fails) and also being able to test each version on my external screen.
If someone has one of these version could you please send me a link of it ?