Einleitung
This replacement guide is an intermediate guide that does not require a solder or soldering skills. This does require you to replace the motherboard and the battery, however.
Was du brauchst
-
-
With the device screen face down, use the metal spudger to remove the small rubber circles on all four corners of the device. The screws should now be revealed.
-
Using the metal spudger, pry open the small, long rubber rectangle on the back of the device to reveal more screws.
-
-
-
Using a Phillips #00 screwdriver, remove the four 6.8mm screws from the four corners of the device.
-
Using the same screwdriver, remove the three screws that were behind the rubber rectangle. These screws do not come out of the device.
-
Use the plastic opening tool to gently pry open the back panel of the tablet.
-
-
-
-
Using the plastic opening tool, gently push the two small, black and white switches out in the direction of the ribbon wires.
-
Slowly pull the ribbon wire out of the switch to free it.
-
-
-
Push the larger black and white strip leading to a ribbon wire upward using the plastic opening tool.
-
Carefully pull the ribbon wire out of the switch
-
-
-
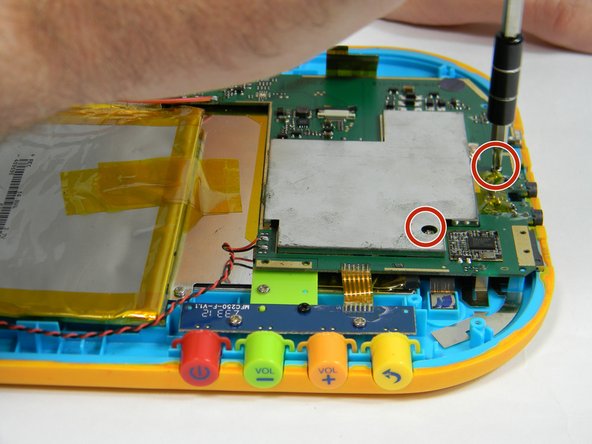
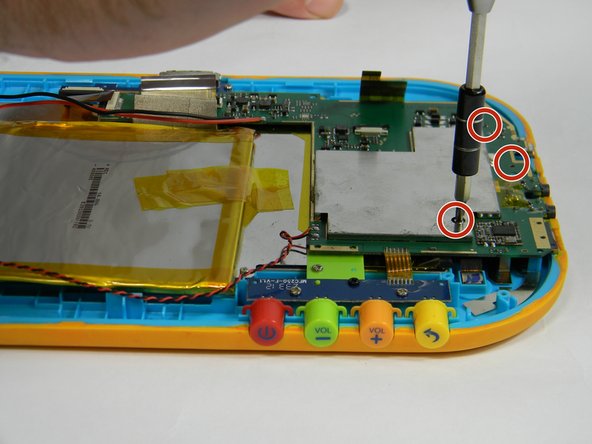
Unscrew the five 4 mm screws around the perimeter of the motherboard using the ph00 size phillips head screwdriver.
-
-
-
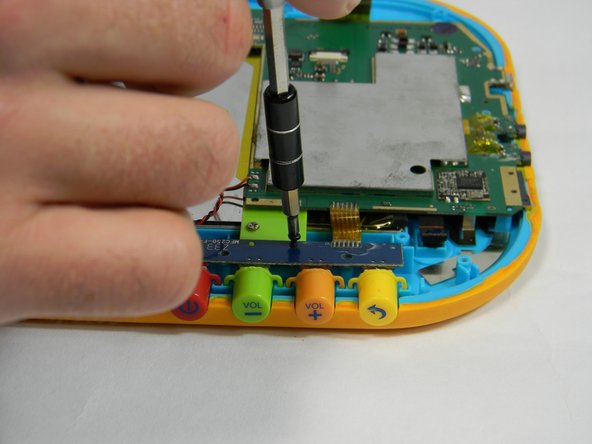
Remove the button board by unscrewing two more 4 mm screws and one 6.5 mm screw
-
-
-
Solder off connections from the wire connecting the motherboard to the speaker.
-
-
-
Using the plastic opening tool, pop up the black and white clip holding the ribbon wire in place for the camera.
-


To reassemble your device, follow these instructions in reverse order.
To reassemble your device, follow these instructions in reverse order.
Rückgängig: Ich habe diese Anleitung nicht absolviert.
Eine weitere Person hat diese Anleitung absolviert.
Team

USF Tampa, Team 17-3, Blackwell Fall 2016 Mitglied von USF Tampa, Team 17-3, Blackwell Fall 2016
USFT-BLACKWELL-F16S17G3
4 Mitglieder
12 Anleitungen geschrieben