Zum Hauptinhalt wechseln

Logitech Harmony Smart Control Charging Port Replacement

Was du brauchst

  1. Logitech Harmony Smart Control Charging Port Replacement, Charging Port: Schritt 1, Bild 1 von 2 Logitech Harmony Smart Control Charging Port Replacement, Charging Port: Schritt 1, Bild 2 von 2
    • Use the plastic opening tool to lift up the rubber pad.

    • With your fingers, pull back the rubber pad. This will expose the screw holes on the bottom of the device.

    • Repeat the step above for the second rubber pad on the bottom of the hub.

  2. Logitech Harmony Smart Control Charging Port Replacement: Schritt 2, Bild 1 von 2 Logitech Harmony Smart Control Charging Port Replacement: Schritt 2, Bild 2 von 2
    • Using the PH00 bit, remove the four 6mm Phillips screws

  3. Logitech Harmony Smart Control Charging Port Replacement: Schritt 3, Bild 1 von 2 Logitech Harmony Smart Control Charging Port Replacement: Schritt 3, Bild 2 von 2
    • Use the plastic opening tool to pry open and separate the pieces of plastic from each other.

  4. Logitech Harmony Smart Control Charging Port Replacement: Schritt 4, Bild 1 von 2 Logitech Harmony Smart Control Charging Port Replacement: Schritt 4, Bild 2 von 2
    • Using the PH00 bit, remove the three 4mm Phillips screws.

  5. Logitech Harmony Smart Control Charging Port Replacement: Schritt 5, Bild 1 von 3 Logitech Harmony Smart Control Charging Port Replacement: Schritt 5, Bild 2 von 3 Logitech Harmony Smart Control Charging Port Replacement: Schritt 5, Bild 3 von 3
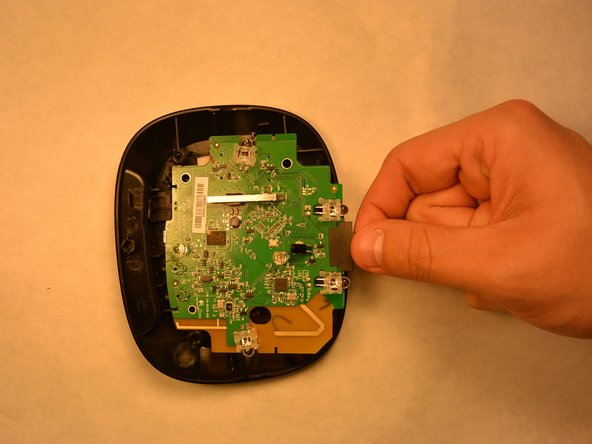
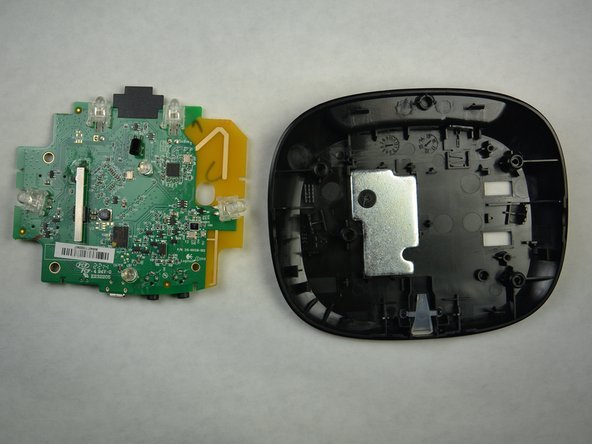
    • Starting at the yellow corner, use a plastic opening tool to pry the circuit board from the housing.

  6. Logitech Harmony Smart Control Charging Port Replacement: Schritt 6, Bild 1 von 3 Logitech Harmony Smart Control Charging Port Replacement: Schritt 6, Bild 2 von 3 Logitech Harmony Smart Control Charging Port Replacement: Schritt 6, Bild 3 von 3
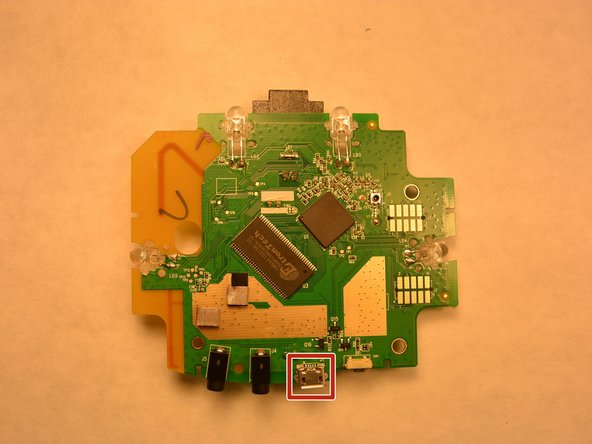
    • Locate the defective charging port.

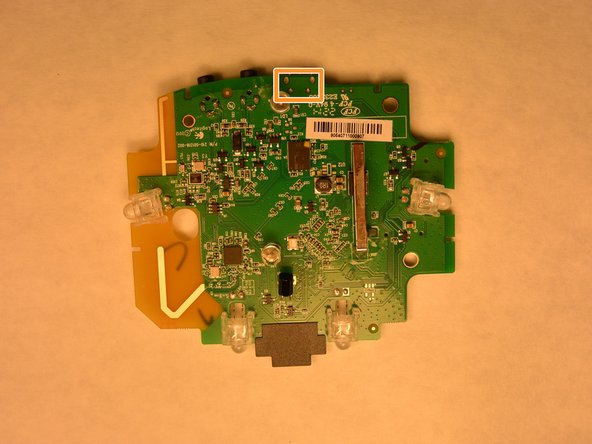
    • Turn the circuit board over to expose the charging solder.

    • Using a soldering iron, remove the solder and the charging port. Install a new charging port and solder.

Abschluss

To reassemble your device, follow these instructions in reverse order.

Ein:e weitere:r Nutzer:in hat diese Anleitung absolviert.

Josh Hendricks

Mitglied seit: 09/17/15

464 Reputation

4 Anleitungen geschrieben

Team

IUPUI, Team 3-2, Harley Fall 2015 Mitglied von IUPUI, Team 3-2, Harley Fall 2015

IUPUI-HARLEY-F15S3G2

4 Mitglieder

5 Anleitungen geschrieben

0 Kommentare

Kommentar hinzufügen

Seitenaufrufe:

Letzte 24 Stunden: 0

Letzte 7 Tage: 5

Letzte 30 Tage: 9

Insgesamt: 710