Einleitung
If your Meizu MX3 is not turning on no matter what you do, draining faster than it used to, or is overheating too much then you may need to replace the battery. This guide will show you how to replace your old Meizu MX3 battery with a new battery with only 3 steps. Remember to power off your device.
Phone batteries store energy by converting chemical reactions to electrical energy. Batteries can start to slow down and not store energy as well due to several reasons with the most common being dropping and damaging your phone and keeping your phone in extreme temperatures. To combat this you can replace the battery when you notice it's not storing energy as well as it used to or is overheating your device to a dangerous degree.
When removing the actual battery on step 3, exercise caution as a punctured battery can explode and cause fires.
Was du brauchst
-
-
Insert the plastic opening tool in between the charging port and the back case of the device. Slowly move the tool to the left of the device until you come the top by the power button.
-
Using a paper clip or pointed-edge spudger push in the pin located in the bottom right-hand corner on the back of the phone.
-
-
-
-
Using one of the small Phillips screwdriver bits provided unscrew the 11 screws present on the protective plastic plate under the device case.
-
-
-
After the 11 screws are loosened use the plastic opening tool and gently pry the protective plate from the back of the device.
-
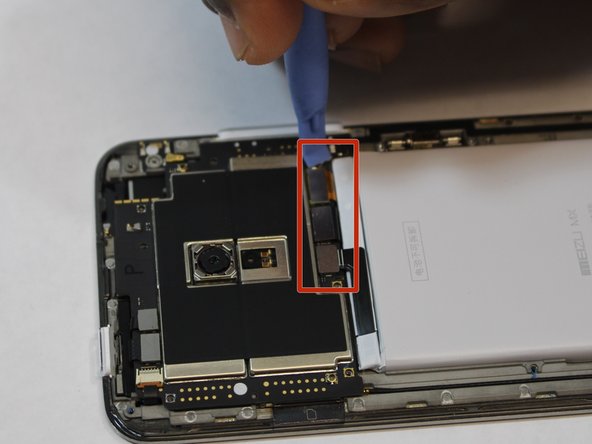
Once the plate is off, use the same tool to gently remove the 3 ribbon cables located directly above the battery.
-
On the left side of the battery on the phone case, there is a groove where the plastic opening tool can be inserted to pry the battery up and out.
-


To reassemble your device, follow these instructions in reverse order.
To reassemble your device, follow these instructions in reverse order.
Rückgängig: Ich habe diese Anleitung nicht absolviert.
6 weitere Personen haben diese Anleitung absolviert.
Team

USF Tampa, Team 15-2, Remmell Fall 2014 Mitglied von USF Tampa, Team 15-2, Remmell Fall 2014
USFT-REMMELL-F14S15G2
4 Mitglieder
15 Anleitungen geschrieben
Ein Kommentar
The battery cover of my mx3 had 9 screws visibles. The last 2, the top and bottom middle screws, were hidden under a layer of paint and didn't look like screws. Just push the screw driver in and break the paint layer. I would guess that this is the equivalent of a warranty seal, so if your phone is still under warranty think carefully before you do them.