Einleitung
This guide provides the procedure for replacing the front buttons on the device. To access the front buttons, the device case needs to be opened. The process of opening the device might be intimidating at first, but the proper precautions are outlined in the guide. No device damage is expected if the guide steps are followed. For more information, refer to our troubleshooting page.
Was du brauchst
-
-
Before starting the disassembly, remove
-
The stylus
-
Any game cartridge
-
The SD card
-
-
-
Unscrew the four 6mm tri-point screws located at the four corners of the bottom panel.
-
-
-
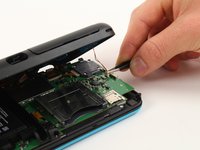
Using a spudger, separate the back panel from the front casing by gently prying around the panel.
-
There are many clips along the hinge of the case, so it is recommended to work your way along one short side and the two long sides before finishing the last short side.
-
-
In diesem Schritt verwendetes Werkzeug:Tweezers$4.99
-
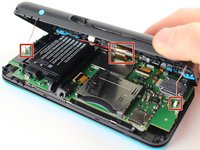
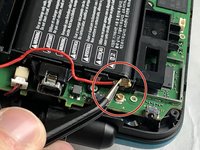
Using tweezers, disconnect the two cables that connect the rear buttons on either side to the motherboard by gently pulling them upwards.
-
-
-
-
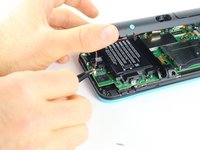
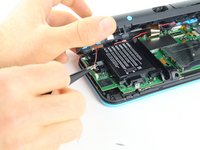
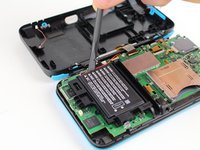
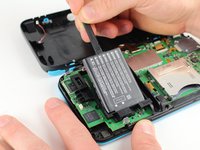
Using a spudger, lift out the battery.
-
Be aware that there is a sticky pad holding the battery into its tray. It may be necessary to use multiple tools to gently pry the battery away from the tray and motherboard.
-
-
In diesem Schritt verwendetes Werkzeug:Tweezers$4.99
-
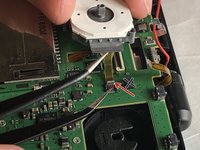
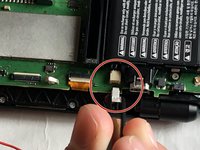
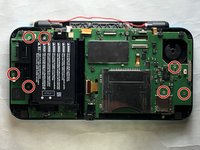
There are 8 ribbon cables that need to be removed as shown in the picture.
-
For the remaining 6 (in red), use a pair of tweezers to flip the latches up and pull the ribbon cable out.
-
Note that the second picture shows a broken ribbon connector next to the joystick ribbon connector (to the right of the red arrow). Do not attempt to unlatch this connector as shown in the picture!
-
-
-
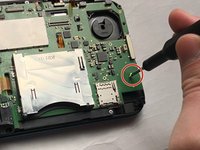
Remove the seven 4.4 mm screws using a J00 (or iFixit's Phillips #00) screwdriver bit.
-
Remove the motherboard from the device.
-
-
In diesem Schritt verwendetes Werkzeug:Tweezers$4.99
-
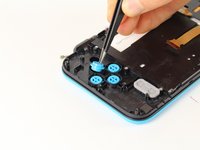
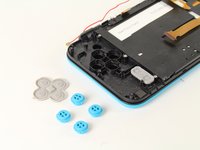
Lift off the rubber cover on the A, B, X, and Y buttons.
-
Using tweezers, lift out the buttons.
-
-
-
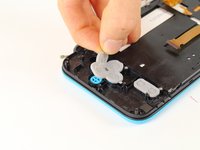
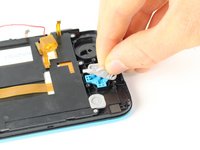
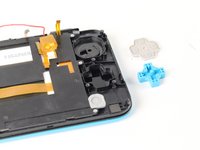
Lift off the grey rubber cover on the start and select buttons.
-
Using tweezers, lift out the buttons.
-
-
-
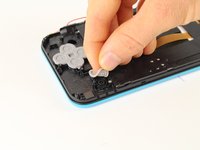
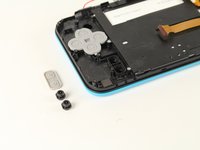
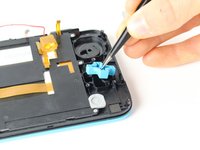
Lift off the grey rubber membrane on the D-pad.
-
Using tweezers, lift the D-pad out.
-
-
-
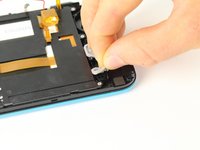
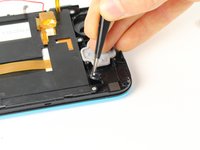
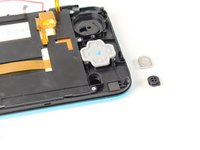
Lift off the grey rubber membrane covering the home button.
-
Using tweezers, lift out the button.
-


To reassemble your device, follow these instructions in reverse order.
To reassemble your device, follow these instructions in reverse order.
Rückgängig: Ich habe diese Anleitung nicht absolviert.
5 weitere Personen haben diese Anleitung absolviert.

Team

Cal Poly, Team S18-G6, Forte Fall 2017 Mitglied von Cal Poly, Team S18-G6, Forte Fall 2017
CPSU-FORTE-F17S18G6
5 Mitglieder
20 Anleitungen geschrieben
4 Kommentare
after assembly, pressing ZL causes some kind of an electric short, and the console turns off immediately, help !
This usually occurs when you break the lower screen's power ribbon cable connector. It is not a ZIF connector and "unlatching" it will break it causing a loose fit. The shoulder button presses against the ribbon cable causing it to shift in the connector resulting in the speakers popping and the device turning off.
Mike -