Einleitung
This guide will show how to replace the circuit board in your Ninja Professional Blender, in the event that it stops working. The removal process requires the removal of four screws and the desolder of five components.
Was du brauchst
-
-
Remove the five screws (13mm long, 6mm head diameter) using a Phillips #2 screwdriver.
-
-
-
Without removing any screws, you can pull the 2nd layer free from the base. Do this now and set it down gently next to the base.
-
The power cord runs through a hole in the side of this layer. Squeeze the cord and pull it through the hole to separate the layer from the cord.
-
-
-
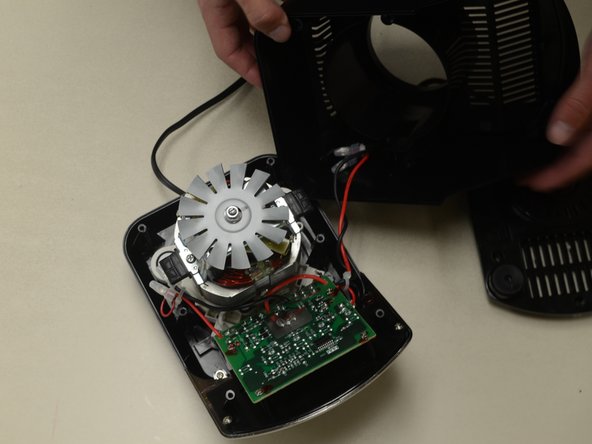
Using the Phillips #2 screwdriver, remove these six screws (13mm long, 6mm head diameter). Then carefully remove this layer, and rest it next to the blender base.
-
-
-
-
Remove these four screws (10mm long, 5mm head diameter) using a Phillips #2 screwdriver.
-
-
-
Using a pair of scissors or wire cutters, cut the zip tie holding these wires.
-
This will give the circuit board more range of motion.
-
-
-
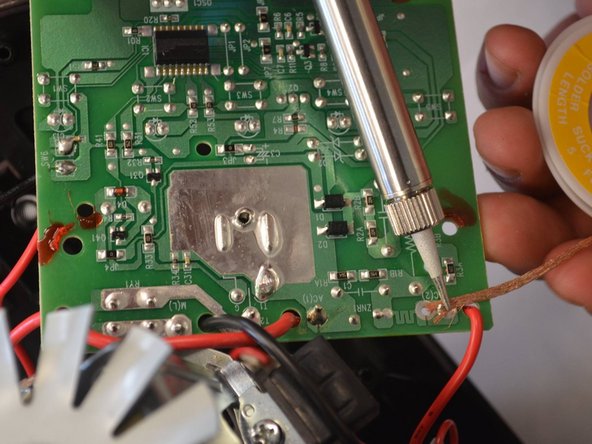
Desolder the five wires from the solder pads shown.
-
If you do not know how to do this, iFixit has a guide describing the process.
-
-
-
After the wires have cooled enough to touch, carefully slide the circuit board free of the wires.
-
NOTE: keep track of which pad each wire was soldered to. This is important for your blender to function.
-
To reassemble your device, follow these instructions in reverse order, but solder the wires back to the board.
To reassemble your device, follow these instructions in reverse order, but solder the wires back to the board.
Rückgängig: Ich habe diese Anleitung nicht absolviert.
2 weitere Nutzer:innen haben diese Anleitung absolviert.
4 Kommentare
Where can I buy de circuito board?
Where can i buy the circuit board ?


