Einleitung
If your power button panel doesn't light up, your LED lights may be malfunctioning. This guide will help show the replacement of faulty LED lights under the button panel.
Was du brauchst
-
-
Using the Phillips #1 screwdriver, remove the 5 screws (13mm long, 6mm wide) holding the outer base.
-
Lift the base up to remove it.
-
-
-
Remove the midsection by pulling it up. If the section is stuck, use the iFixit plastic opening tool to pry it off.
-
Pull the power cord through the mid-section opening.
-
-
-
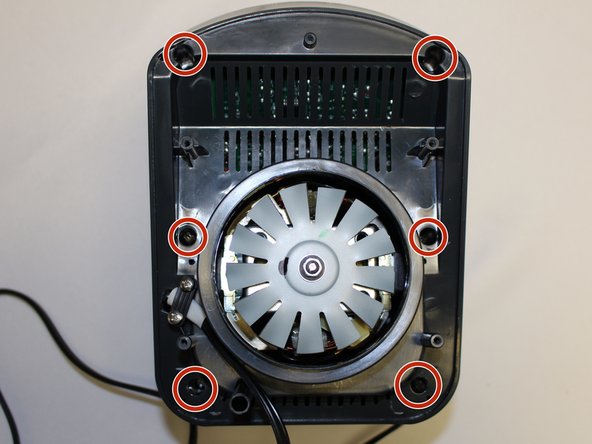
Using the Phillips #1 screwdriver, remove the 6 screws (13 mm long, 6 mm wide).
-
-
-
-
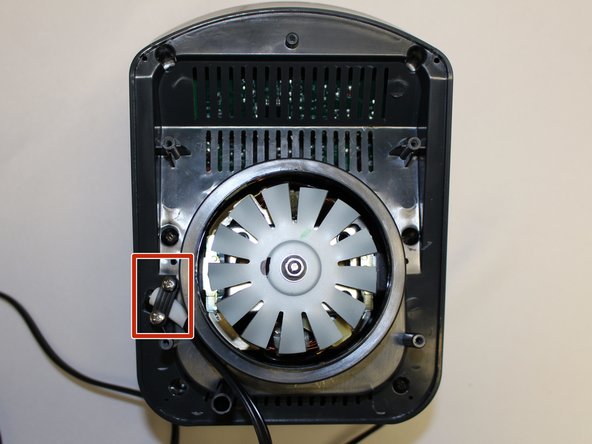
Using the Phillips #1 screwdriver, remove the two screws (5 mm long, 3 mm wide) holding the power cord onto the motor cover.
-
-
-
Using the iFixit plastic opening tool, pry the motor cover off the general housing. Once it is loose, lift it up to remove it off the base.
-
Slide the cover all the way to the end of the power cord.
-
-
-
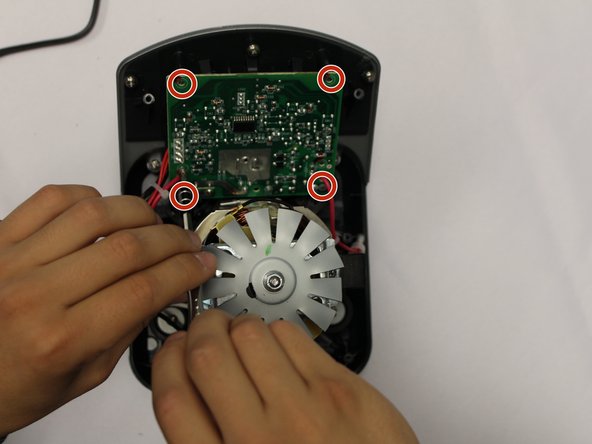
Using the Phillips #2 screwdriver, remove the four screws (10mm long, 5mm wide) on the circuit board.
-
-
-
To give the circuit board further range of motion, remove the pictured zip ties holding the cables.
-
-
-
Flip the circuit board to view the soldering connections of the LED lights and replace as needed.
-
For instructions on sodering and desoldering reference iFixit's guide.
-


To reassemble your device, follow these instructions in reverse order.
To reassemble your device, follow these instructions in reverse order.
Team

Central Washington University, Team S1-G1, Pengilly Fall 2017 Mitglied von Central Washington University, Team S1-G1, Pengilly Fall 2017
CWU-PENGILLY-F17S1G1
4 Mitglieder
9 Anleitungen geschrieben