Einleitung
In this guide, some soldering is required when disconnecting the battery from the motherboard. If you are unfamiliar with soldering, watch Soldering Tutorial for Beginners, Five Easy Steps to familiarize yourself and to be able to correctly replace the battery.
Was du brauchst
-
-
Use the plastic opening tool to remove the rubber caps from each end of the speaker.
-
-
-
Remove four (4) 11.7 mm Phillips #0 screws from each side at the bottom of the speaker.
-
-
-
-
Use the plastic opening tool on one of the corners to separate the bottom piece from the speaker, and then remove the piece.
-
-
-
Begin by removing the bottom piece, revealing the inner compartment with the speaker cables and battery.
-
Remove two (2) 11.7mm Phillips #0 screws from each side of the speaker plate.
-
Remove speaker plate from the front of the battery.
-
-
-
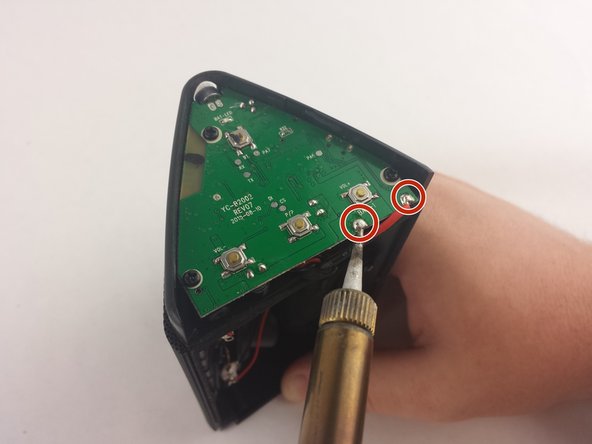
Locate the soldering points for the battery on the motherboard face of the speaker.
-
Use a soldering iron to carefully disconnect the battery from the motherboard.
-
Learn more about soldering here.
-
Remove the battery from the inside compartment for replacement.
-


To reassemble your device, follow these instructions in reverse order.
To reassemble your device, follow these instructions in reverse order.
Rückgängig: Ich habe diese Anleitung nicht absolviert.
14 weitere Personen haben diese Anleitung absolviert.
Team

USF Tampa, Team 15-6, Remmell Spring 2016 Mitglied von USF Tampa, Team 15-6, Remmell Spring 2016
USFT-REMMELL-S16S15G6
4 Mitglieder
4 Anleitungen geschrieben
25 Kommentare
What is the kind of battery used? Thanks!
Hi Rodrigo, the Oontz Angle 3 uses a rechargeable 2200mAh lithium-ion battery. Happy Fixing!
can i upgrade it to 4300mah?
the one that I have has a "circuit board" attached to the battery. Is this what controls the recharging? If so, where do you get the battery with these?
Hi Rob,use soldering iron disconnect the circuit board which come with old battery you going to replace, and soldering iron the disconnected circuit board back onto your new battery. The so called circuit board is to protect the battery from over discharge or over charge. Hope this help.