Was du brauchst
-
-
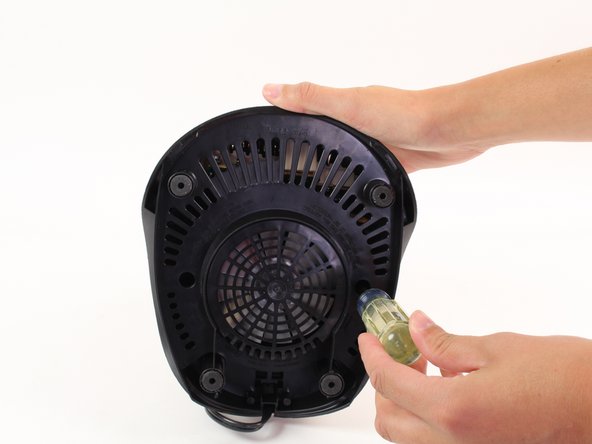
Unscrew the 16mm screws located on the plastic bottom from the blender base using a Phillips #2 screwdriver.
Is it possible to get a replacement base. Just the plastic cover? I can't seem to find mine and it is cracked and broken yet still works.
-
-
-
-
Holding the center of the fan, grip the knob in the center of the top of the blender with a wrench and twist the wrench counterclockwise.
-
-
-
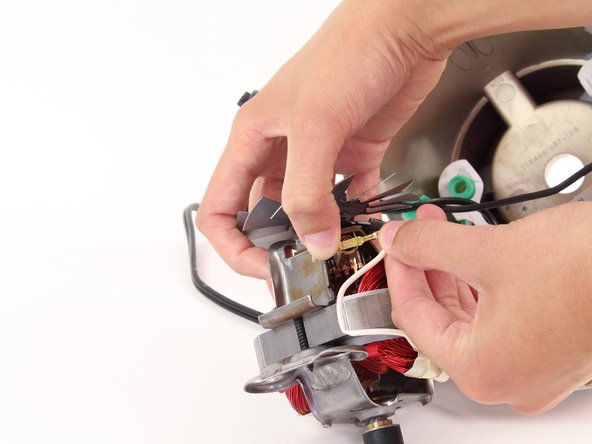
Now de-solder the yellow wire from circuit board. De-solder the wire following these instructions.
-
-
-
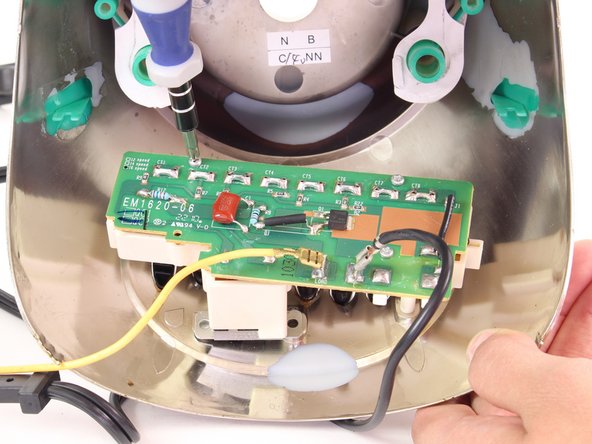
Locate the four 11mm screws in the circuit board.
-
Unscrew the four screws using the Phillips #1 screwdriver.
-
-
-
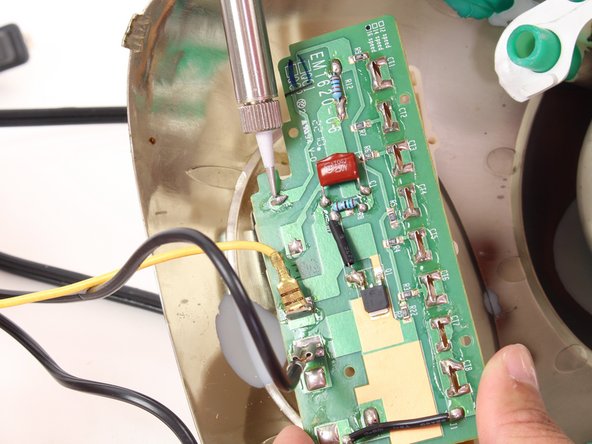
Desolder the circuit board from the base at the indicated point, following the directions by clicking here.
-
Now separate the circuit board from the base.
I need to but this board but can’t find it anywhere. Sigh. Only one button works when i turn on the blender but i’ve opened it several times and have found nothing wrong with it. I’m so confused.
-
-
-
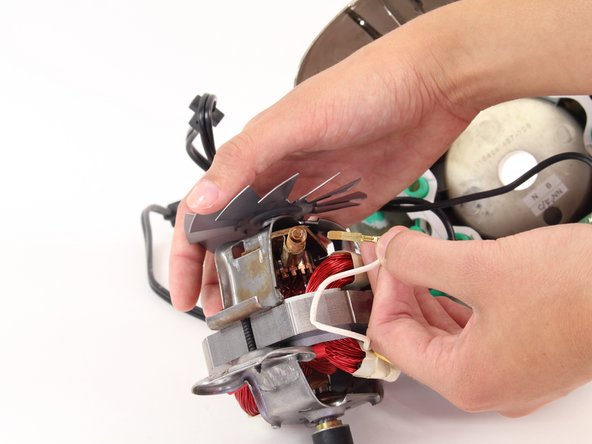
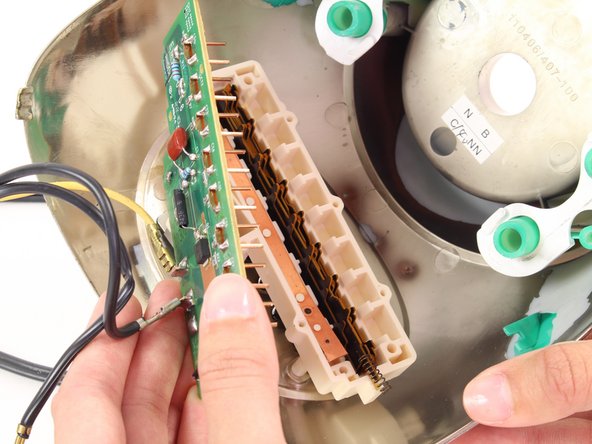
You will see that the circuit board is still attached by a red wire and a black wire.
-
Flip the circuit board back over and desolder at the indicated points following the directions given here.
buenas tardes, tengo una pregunta, para soldar, involuntariamente, dejé los platos y ahora no los escucho para acomodarlos, podría ayudar en la secuencia, ¡muchas gracias!
Hola. Me ayuda? Mi circuit board le faltan dos de esos circulitos blancos que se ven adentro. Eso affecta en algo. El problema es que solamente un boton sirve..
good afternoon, I have a question, to be welding, unintentionally, the cards went out and now I do not know the order to accommodate them, they could help me in the sequence, thank you very much !!!
Only one button works on mine and i just don’t see anything wrong with it. What could be the issue? What about if i want to buy a new circuit board, do you guys sell it?
-


Now your circuit board is ready to be replaced. To reassemble your device, follow these instructions in reverse order.
Now your circuit board is ready to be replaced. To reassemble your device, follow these instructions in reverse order.
Rückgängig: Ich habe diese Anleitung nicht absolviert.
6 weitere Nutzer:innen haben diese Anleitung absolviert.
Team

Cal Poly, Team 12-37, Maness Spring 2014 Mitglied von Cal Poly, Team 12-37, Maness Spring 2014
CPSU-MANESS-S14S12G37
4 Mitglieder
5 Anleitungen geschrieben
10 Kommentare
So, a question. Where does the spring go? I was fixing one of these and the spring fell out and I never saw where it came from.
inside 2 tubes that stick out opposite of each other just below the fan.
Spring goes on the one of the strips that slides back and forth....it has small end which goes in a small notched cavity of the plastic housing. Spring goes on that longer end of the stripe. See the picture in step 12...its popped out from the plastic housing.
conoces el orden de las laminas del circuito de velocidades…? agradecere cualquier sugerencia…
Awesome, this guide was really helpful in repairing my blender. Thumbs up for the author.
Thanks for this very helpful guide with the great photos! I repaired my blender (same model; some of the speed buttons weren’t working) WITHOUT needing to search the world for replacement parts. (I never did find a new motor or circuit board; only refurbs on ebay). Maybe I was lucky, but this is what worked for me:
STEP 11: Look at ALL the solder points on the circuit board. If any look dull or cracked, re-solder them all carefully. This might be all that’s gone wrong. But go on to Step 12 before assembling & testing the blender:
STEP 12: Clean all the copper contacts on the bottom side of circuit board and where it fits onto the base. I used CRC electronic spray cleaner and a Q-tip (rub gently). Also check the glass fuse near those contacts!
Now re-assemble and test. I hope your blender now works without needing a new circuit board. Good luck!
Agree with the last comment from KATWYN. I didn't want to buy refurbished board, in addition to the steps s/he mentioned, I applied die-electric grease on each copper "fingers" which arc when making / breaking the contact deteriorating over time. My problem was the low / high speed switch which i cleaned with connector cleaner. Don't use harsh solvent as plastic parts can get dissolved, affecting free movements of the switch.
Conoce el orden de las laminas del circuito de velocidades…? agradeceré cualquier sugerencia. Gracias
Conoces el orden de las laminas del circuito de velocidades…? agradeceré cualquier sugerencia. Gracias