Einleitung
If you find that your scanner is making strange noises or still fails to function properly, the motor might be jammed or need replacing. This guide will help you remove the motor from the inner casing.
Was du brauchst
-
-
To start, open the device by removing the 5, 5mm x 9mm screws, with a Phillips J1 screwdriver.
-
-
-
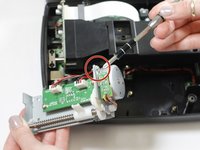
Next, remove the 5 9mm x 5mm screws from the circled spots with a Phillips J1 screwdriver.
-
-
-
-
Once the screws are removed, carefully lift the motor casing out of the device.
-
The plastic piece circled acts as a clamp, lift the casing up and towards you to detach the casing.
-
-
-
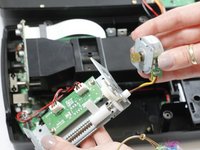
Now, with the motor casing in hand, remove the two 9mm x 5mm screw and washer at the top of the motor casing using a J1 screwdriver.
-
Gently pull the motor away from the casing to expose the wires.
-
-
-
Carefully desolder the wires from their contact point on the circuit board.
-
You have now successfully removed the motor!
-


To reassemble your device, follow these instructions in reverse order.

Team

Texas Tech, Team S46-G2, Bennett Spring 2017 Mitglied von Texas Tech, Team S46-G2, Bennett Spring 2017
TTU-BENNETT-S17S46G2
3 Mitglieder
10 Anleitungen geschrieben