Einleitung
Use this guide to correctly replace the earpiece in one of the handsets in your Panasonic phone. Replacing the earpiece can result in better quality sound being transmitted through the handset as well as reduced static. This repair will require soldering.
This procedure applies to all handsets that are given with the device.
If you need help with soldering, review how to solder and desolder connections.
Was du brauchst
-
-
-
In order to remove the back of the phone, unscrew the two screws at the bottom corners on the back of the phone.
-
-
-
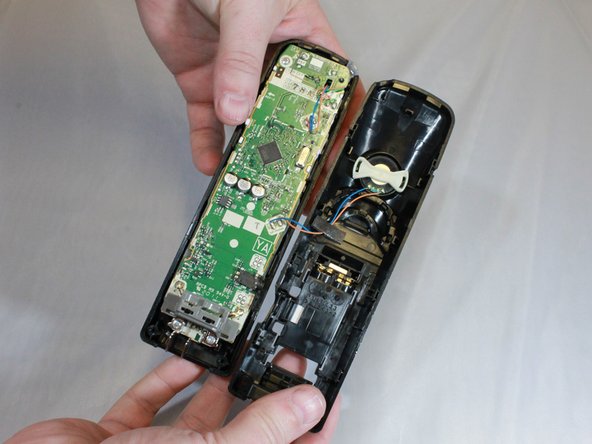
In order to remove the back of the phone, pry the back open by inserting the iFixit Opening tool in the space between the front and back of the phone.
-
-
-
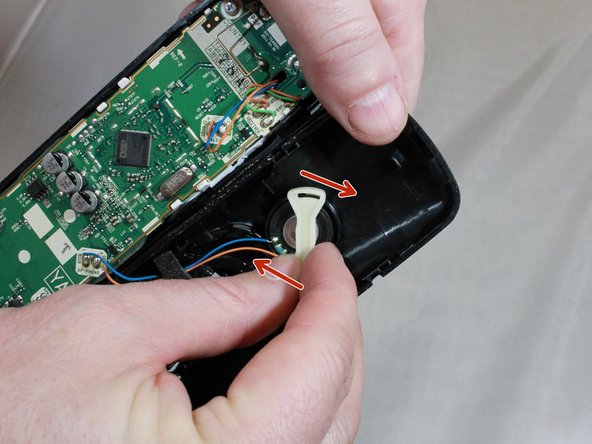
Remove the earpiece cover by twisting the plastic earpiece clockwise to unlock.
-
-
-
Replace earpiece by heating wires with soldering iron.
-
Solder wires back to earpiece after installing the replacement earpiece.
-


To reassemble your device, follow these instructions in reverse order.
To reassemble your device, follow these instructions in reverse order.
Rückgängig: Ich habe diese Anleitung nicht absolviert.
Ein:e weitere:r Nutzer:in hat diese Anleitung absolviert.
Team

Eastern Washington University, Team S1-G2, Rowley Spring 2019 Mitglied von Eastern Washington University, Team S1-G2, Rowley Spring 2019
EWU-ROWLEY-S19S1G2
4 Mitglieder
5 Anleitungen geschrieben