Zum Hauptinhalt wechseln

Philips Sonicare DiamondClean Circuit Board Replacement

Was du brauchst

  1. Philips Sonicare DiamondClean Circuit Board Replacement, Circuit Board: Schritt 1, Bild 1 von 2 Philips Sonicare DiamondClean Circuit Board Replacement, Circuit Board: Schritt 1, Bild 2 von 2
    • Pull the brush head from the toothbrush.

  2. Philips Sonicare DiamondClean Circuit Board Replacement: Schritt 2, Bild 1 von 1
    • Use a spudger to pry the chrome cap from the base of the toothbrush.

  3. Philips Sonicare DiamondClean Circuit Board Replacement: Schritt 3, Bild 1 von 3 Philips Sonicare DiamondClean Circuit Board Replacement: Schritt 3, Bild 2 von 3 Philips Sonicare DiamondClean Circuit Board Replacement: Schritt 3, Bild 3 von 3
    • Invert the toothbrush and apply pressure against the metal tip until the internals and casing separate.

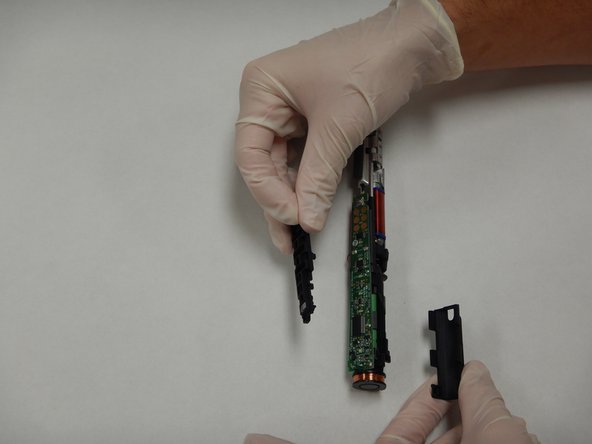
    • Remove the internals from the casing.

  4. Philips Sonicare DiamondClean Circuit Board Replacement: Schritt 4, Bild 1 von 1
    • Remove the rubber covers from the circuit board and battery.

  5. Philips Sonicare DiamondClean Circuit Board Replacement: Schritt 5, Bild 1 von 1
    • Carefully free the top end of the circuit board from the plastic clips holding it in place.

  6. Philips Sonicare DiamondClean Circuit Board Replacement: Schritt 6, Bild 1 von 1
    • Use the soldering iron to desolder the terminals marked F1, C5, R7, R6, and JP1.

    • Check out our How to Solder and Desolder Connections guide for help with soldering best practices!

    • Remove the circuit board.

Abschluss

To reassemble your device, follow these instructions in reverse order.

0 Kommentare

Kommentar hinzufügen

Seitenaufrufe:

Letzte 24 Stunden: 2

Letzte 7 Tage: 17

Letzte 30 Tage: 74

Insgesamt: 2,670