Einleitung
The TerraCopter Evo controller joysticks are used to guide and steer the drone in flight and on the ground. The joysticks can break off from the controller or separate from their assemblies. This guide will assist in opening the controller to the joysticks and completely replacing them. If your joysticks are just cosmetically damaged, you can just follow up to Step 2 and then reassemble with your new joysticks. However, if your joysticks are not processing input correctly or at all, you will need to solder to replace the electrical component. Check out our How to Solder and Desolder Connections guide if you are unfamiliar with soldering best practices.
Was du brauchst
-
-
Using a Phillips #0 screwdriver, remove the screw connecting the battery cover to the controller.
-
Remove the battery cover from the controller.
-
-
Schritt 3 Protocol TerraCopter EVO Controller Opening
Achtung: Die Schritte 3-4 stammen von einer Anleitung, die derzeit bearbeitet wird.
-
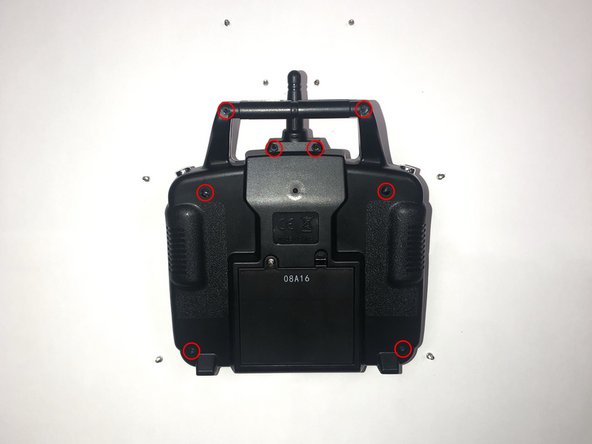
Orientate the controller to where the battery compartment is facing upwards.
-
Remove the four 5mm and four 4mm Phillips #1 screws from the case.
-
-
-
-
Since the battery wires are still attached, carefully move the rear panel down to expose the motherboard.
-
-
-
Remove the eight 5mm Phillips #1 screws from the motherboard.
-
-
-
After removing the screws, orientate the motherboard to where the side with the black joysticks face upwards.
-
Pull the black plastic joysticks from the motherboard, out of their their assembly.
-
-
-
Once the joysticks are removed, orientate the motherboard to where the green side is facing upwards.
-
On the green side of the motherboard, locate the two sets of ten pin arrays that hold the joystick assembly to the motherboard.
-
-
-
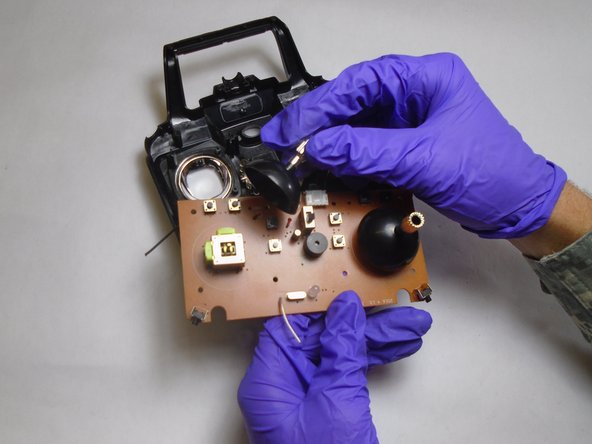
Melt the existing solder points on the pin arrays with a soldering iron and lift the joystick assemblies from their location on the motherboard.
-


To reassemble your device, follow these instructions in reverse order.
To reassemble your device, follow these instructions in reverse order.
Team

The Citadel Military College of South Carolina, Team S1-G22, Eggleston Fall 2019 Mitglied von The Citadel Military College of South Carolina, Team S1-G22, Eggleston Fall 2019
CMCSC-EGGLESTON-F19S1G22
3 Mitglieder
3 Anleitungen geschrieben