Einleitung
Par définition, un wader ne doit pas laisser entrer l’eau ! Si le vôtre a un trou, vous pouvez non seulement le réparer facilement, mais aussi vous vanter (légitimement !) de vos talents de réparateur. Suivez simplement nos instructions pour faire une réparation quasi invisible.
Was du brauchst
-
-
Installez l’échelle à un endroit où vous pourrez faire couler de l’eau sans problème. Veillez à ce qu’elle soit bien stable.
-
Retournez le wader sur l’envers.
-
Accrochez-le sur l’échelle.
-
-
-
Introduisez le tuyau dans le wader.
-
Faites descendre le tuyau dans une des jambes.
-
-
-
Cherchez la ou les zones percées, et entourez-les au marqueur permanent.
-
Faites la même chose pour l’autre jambe.
-
Videz toute l’eau et laissez complètement sécher votre wader avant de continuer.
-
-
-
-
Passez un peu d’alcool sur chaque cercle que vous avez fait au marqueur, afin de bien nettoyer la zone.
-
Attendez que l’alcool se soit complètement évaporé.
-
-
-
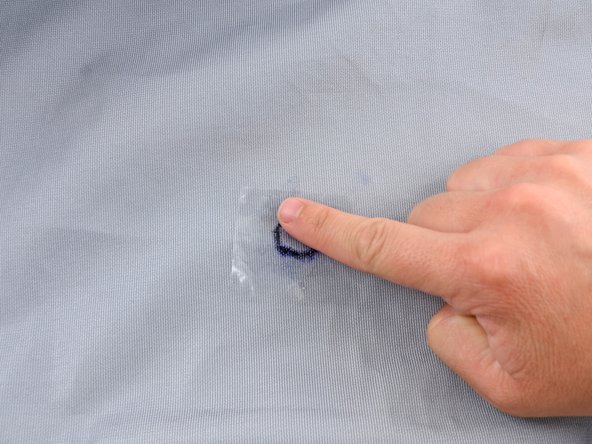
Appliquez le film sur la surface que vous venez d’encoller.
-
Lissez le film du doigt, en chassant les bulles d’air.
-
Ne touchez plus à votre wader pendant 12 heures.
-


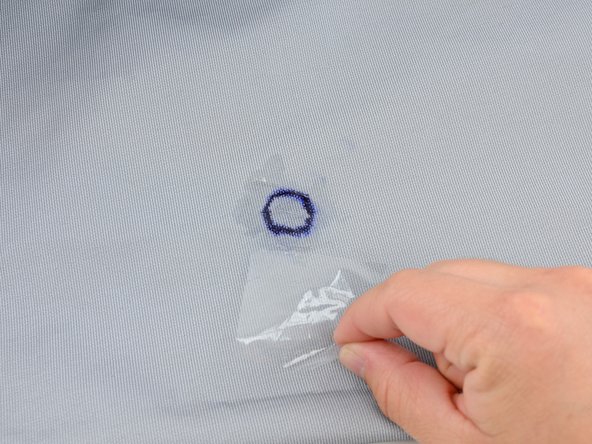
À la place du trou, vous avez maintenant une zone intacte, invisible et étanche. Procédez de la même façon pour réparer les autres trous que vous avez marqués.
À la place du trou, vous avez maintenant une zone intacte, invisible et étanche. Procédez de la même façon pour réparer les autres trous que vous avez marqués.
Rückgängig: Ich habe diese Anleitung nicht absolviert.
8 weitere Nutzer:innen haben diese Anleitung absolviert.
Besonderer Dank geht an diese Übersetzer:innen:
100%

Diese Übersetzer:innen helfen uns, die Welt zu reparieren! Wie kann ich mithelfen?
Hier starten ›


6 Kommentare
Ho riparato i wader seguendo le indicazioni, ed e stato un trionfo, lavoro perfettamente riuscito. Ora devo provare la tenuta andando a pescare.
Unico problema e il pennarello, che bagnandosi con l’acqua sbava e tende a cancellarsi pur essendo indelebile…. Quando si i Wader si asciugano si rischia di non vedere bene i buchi da riparare se sono di piccola entità.
Ciao Loris, puoi utilizzare un Markal B Paint Stick per contrassegnare le perdite. Puoi acquistarli su Amazon.
My waders have a nice, round hole about 1/4" in diameter, an inch above the top of the gravel guard. Since Seam Grip can't be applied where there isn't any fabric, a patch is evidently needed, but what to use? LDPE? Tenacious Tape? Other? This is a recent pair of Swiftcurrent waders.
Hi AMG, you can actually fix a hole using Seam Grip by either using LDPE on one side or a TPU patch before applying Seam Grip. Because of the location it would be easier to use a TPU patch, the adhesive would keep it in place while applying Seam Grip. Next apply seam grip to the other side liberally, extending past the hole by a 1/2" in all directions. Cover that with either another TPU patch or LDPE film with a flat weighted object to flatten out the repair while it cures. I hope that helps with future DIY endeavors.
How about the seam in the crotch of the waders?